1. Employee work schedule – brief overview
Each user can specify at what times they are available (per user configuration).
For example, they can arrange the work schedule according to the rules: on weekdays, from 08:00 am to 04:00 pm. Based on the schedule and calendar events, links with free slots will be generated.
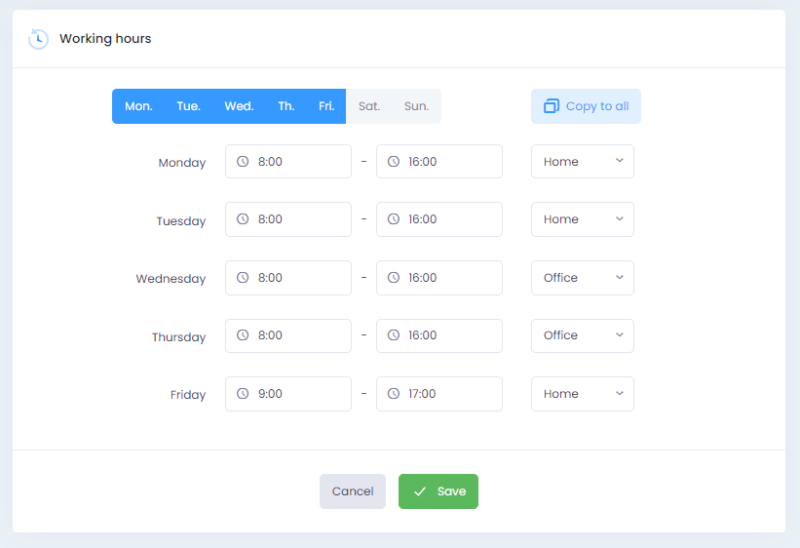
They can specify when they are available in: configuration / personal / days and working hours. The user marks on which days they work. By default, the days from Monday to Friday are marked. Then, they specify working hours for these days, and whether they work remotely or on-site (home/office).
To make it easier, if all days look the same, the user can complete the settings only for the first day and use the Copy to all button, which will copy the data to the other days. If the user completes the information about a work model, it can be displayed in the popover with the preview of the user’s data (e.g., John Smith works remotely on Mondays, and in the popover, we can see that he is available remotely).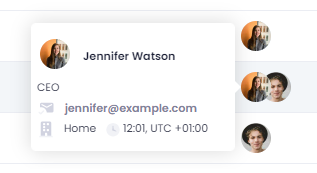
2. Scheduling a meeting
Meeting details
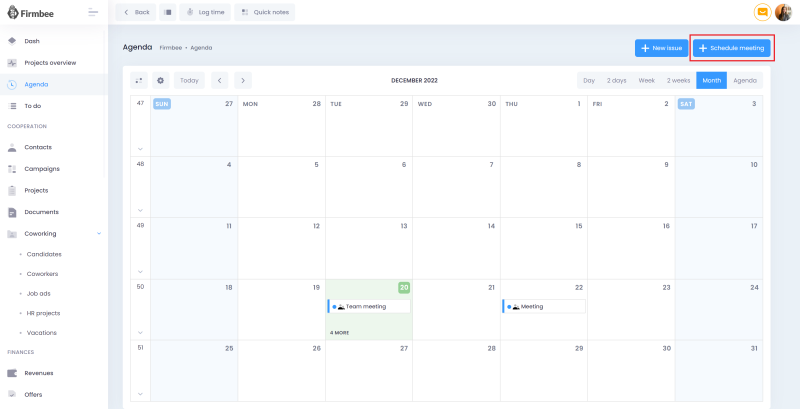
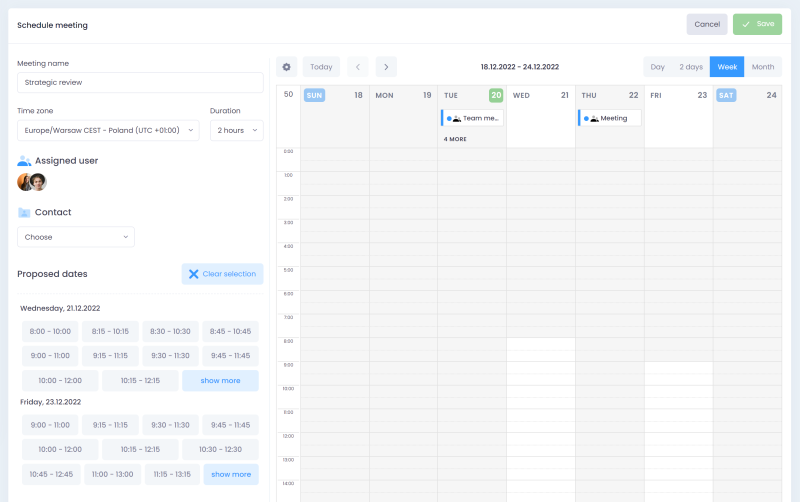
After choosing the action Schedule meeting in the agenda, a page with the following fields will be displayed on the left:- Time zone → the user can choose which time zone they want to use when selecting hours. By default, it will be the time zone of the logged-in user. Other Firmbee users will have the hours displayed in their time zones.
- Meeting name → a mandatory text field.
- Duration → the user can choose the duration from the predefined list or specify their own. The values of the list are:
- 15 minutes,
- 30 minutes,
- 1 hour,
- 2 hours
- custom → after selecting this option, a field to complete the range is displayed. The time is given in hh:mm format. The duration should be confirmed with the Save button. Cancellation restores the last entry in the field.
- Attendees are divided into:
- users (the logged-in user is the host of the meeting, their avatar on the list and calendars are already selected),
- contacts (further divided by: a company, contact person, candidate and coworker – if they have related issues at the given time, then they will be displayed in the grid with a preview of dates, too)
- On the right, attendees’ calendars are displayed. There are the following view modes available: week, two days, day. Hours outside the attendees’ work schedule are marked in gray.
Generating proposed dates
After completing the details, a list of suggested dates will be displayed (when all Firmbee users participating in the meeting are available). The suggested dates refer to pagination (e.g. current week, next week, today, today and tomorrow). By default, two lines of suggested hours are displayed on the page for each day. To load more (if available), click the Show more button.
Available dates are generated based on:- schedules of Firmbee users attending the meeting,
- the dates of issues in the attendees’ calendars (including vacations, for which the event will be created in the user’s calendar).
Important points:
- Past dates cannot be chosen.
- If the duration of the meeting is longer than the time slots set in the schedule, the schedule will not apply to this type of event. For example, if your schedule says you are free from 4:30 pm to 5 pm, but the duration of the meeting is one hour, then the date cannot be proposed.
- The dates sent as proposals can be reserved in the users’ calendars→ draft issues will be created (so that users have information that the date can be taken). They will disappear after the date is approved.
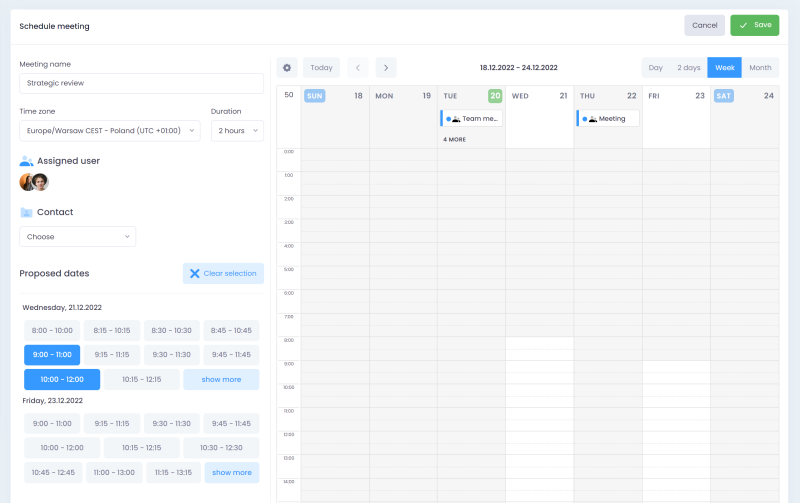
Date suggestions
Once the dates are selected, an email is sent. The recipients of the message are all attendees (except the host). The sender of the message is the author of the meeting. The content includes information about the invitation to the meeting and a request to choose a date from among the proposed ones. A page with suggested dates is linked in the message.
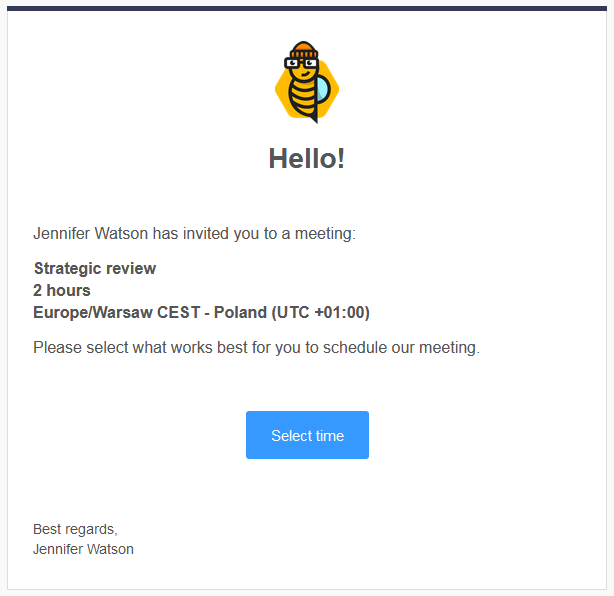
A button in the message redirects to a page with proposed dates, where the following elements are displayed:
- on the left, information about the meeting:
- a header Meeting and meeting name,
- invitees,
- duration,
- time zone.
- on the right, proposed dates
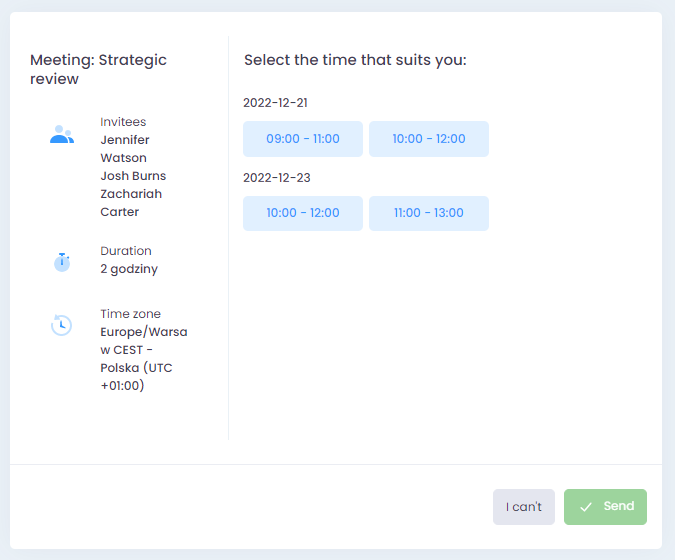
The user can choose several dates. After choosing a date or dates, the user should click Send. A message with the selected dates will be sent to the author of the meeting.
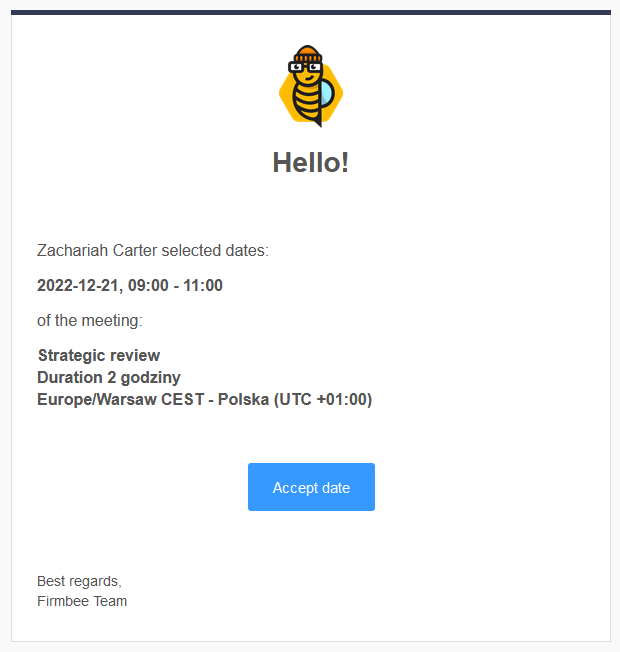
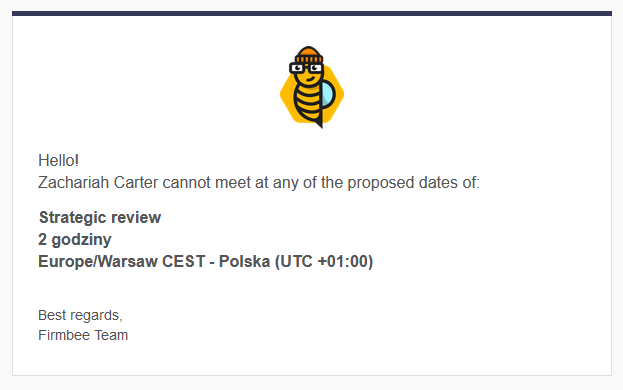
Next to the attendee’s name, the “x” icon will appear. After hovering over the icon, the tooltip with the text “Cannot” will show. Attendees who have already answered the email will be marked with the “check” icon.
Draft meetings
In the users’ calendars, the selected dates have been pre-booked (a draft meeting is created). Draft meetings will disappear after the meeting is approved.
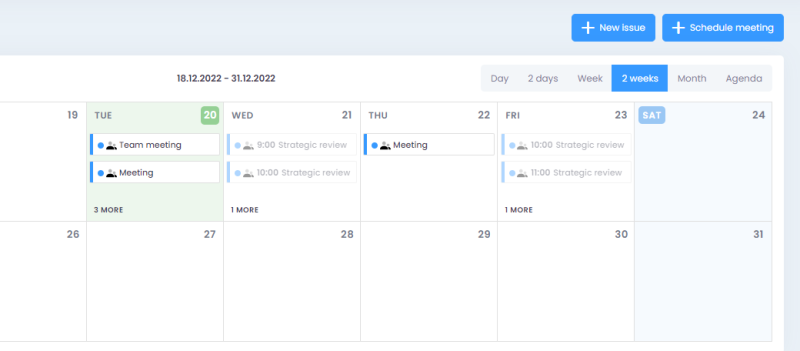
A draft meeting is a window with details of the meeting reservation → just like the view with suggested dates sent to attendees, but with dates already selected by them. Next to the selected dates, tags are displayed as to how many invitees have chosen the date. To see who has selected the date, hover over the tag. The date selected by the highest number of attendees is highlighted (border).
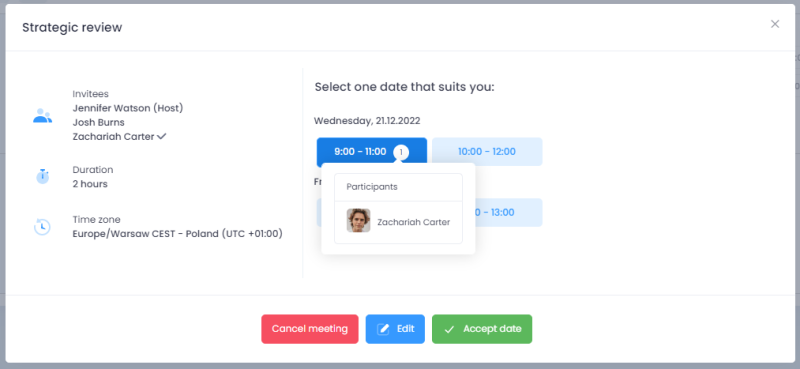
Confirming a date
The author of the meeting, after collecting responses from all attendees, approves the final date. They can only choose one date. Until the date is selected, the confirmation button is disabled. When you hover over the button, a tooltip is displayed with the message: You must select a date to confirm.
Editing an existing reservation
The author of the meeting can edit an existing reservation using the Edit button. The author can select other dates and change the reservation. Once the changes are approved, emails with proposed dates will be resent. In the edit view, past dates are no longer available.
Canceling an existing reservation
The author of the meeting can also cancel the reservation at this stage. After clicking Cancel meeting, a window will appear asking you to confirm the decision.
The user will see the following message:
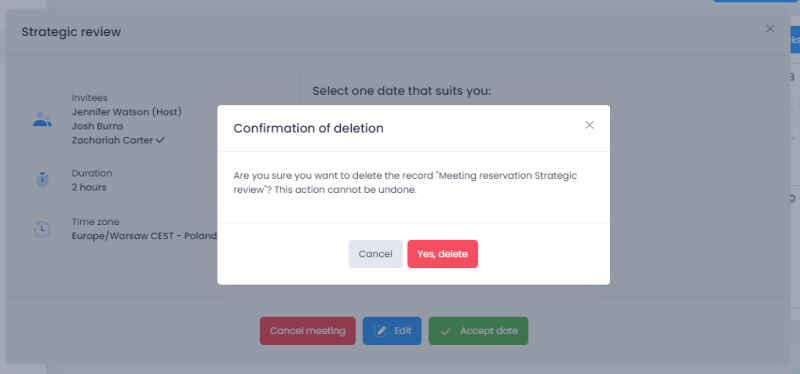
The following email will be sent to the attendees:
Subject: Cancellation of a scheduled meeting {meeting name}
Content:
Hello,
{user’s name} canceled the meeting {meeting name}.
Subject: Cancellation of a scheduled meeting {meeting name}
Content:
Hello,
{user’s name} canceled the meeting {meeting name}.
Meeting notifications
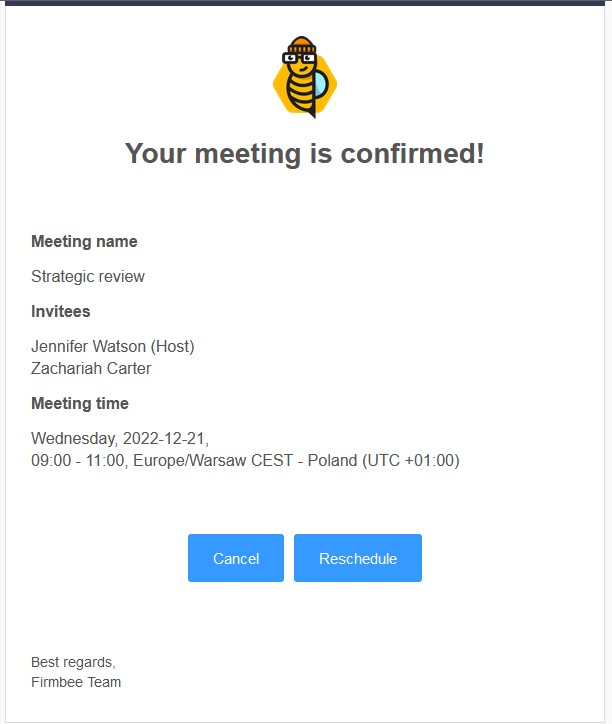
After approval, an email notification is sent to attendees about the details of the meeting. The email contains the following information:
- meeting name,
- date of the meeting → date, times, time zone,
- list of attendees,
- links to reschedule and cancel the meeting (details in the next section).
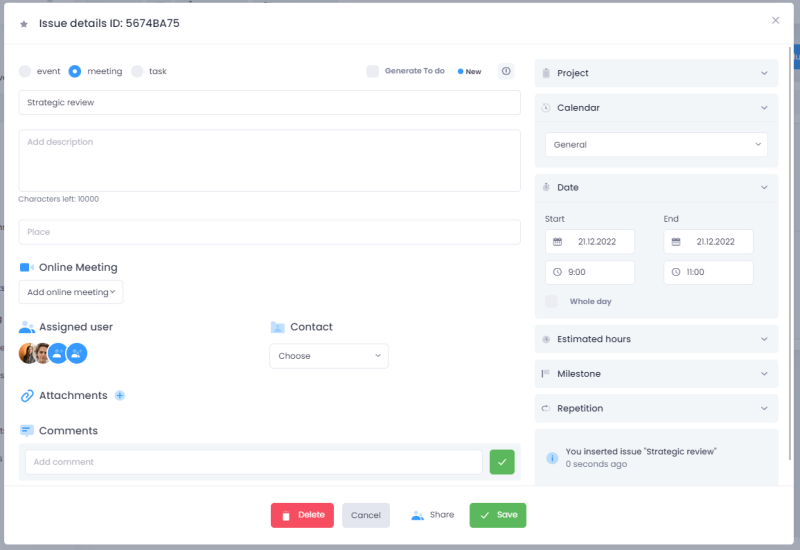
- subject,
- contact,
- date,
- author of the meeting (log: who created the meeting and when).
A reminder email will be sent the day before the meeting. In the future, we will improve the template options and it will be possible to indicate a different frequency of sending email reminders.
3. Postponing and canceling the meeting
Postponing the meeting
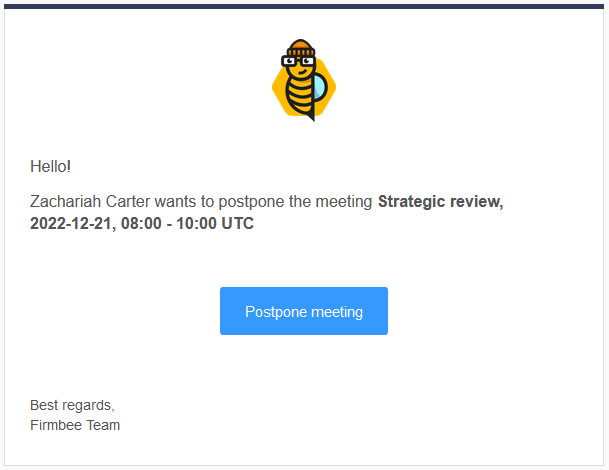
If the attendee clicks Postpone meeting, the author of the meeting receives the following email:
Subject: Request to postpone the meeting: [meeting name], [the date of the meeting]
Content:
Hello,
[user’s name] wants to postpone the meeting: [meeting name],
[the date of the meeting].
[Button: Postpone meeting]
The Postpone meeting button redirects to the view of the meeting details. The author of the meeting decides whether they change the date of the meeting (e.g., after additional email or phone arrangements) or cancel the current meeting and schedule a new one.
Canceling the meeting
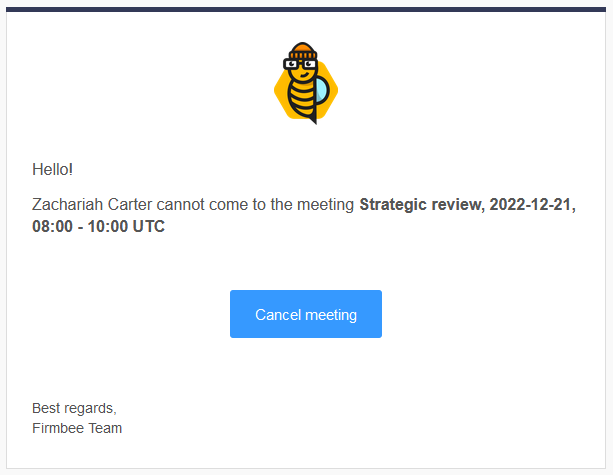
If the attendee canceled the meeting, the author of the meeting will receive the following email:
Content:
Hello,
[user’s name] cannot come to the meeting [meeting name], [the date of the meeting]
[Button: Cancel meeting]
If it was a 1:1 meeting, then the author of the meeting can cancel it. If there were supposed to be more attendees, then the author of the meeting decides whether the meeting can take place without that person.
4. Additional issues
A draft meeting – views
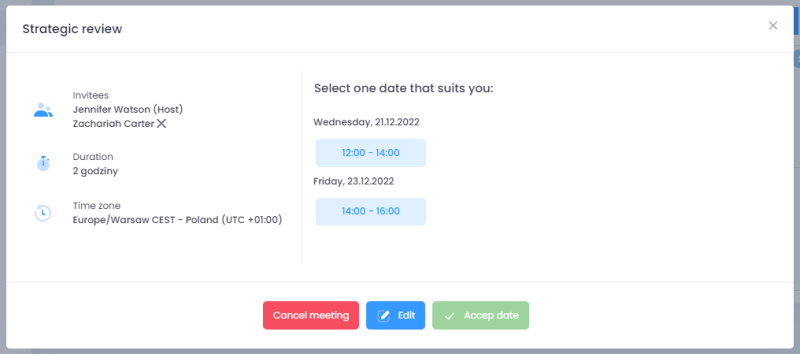
A draft meeting – the host view
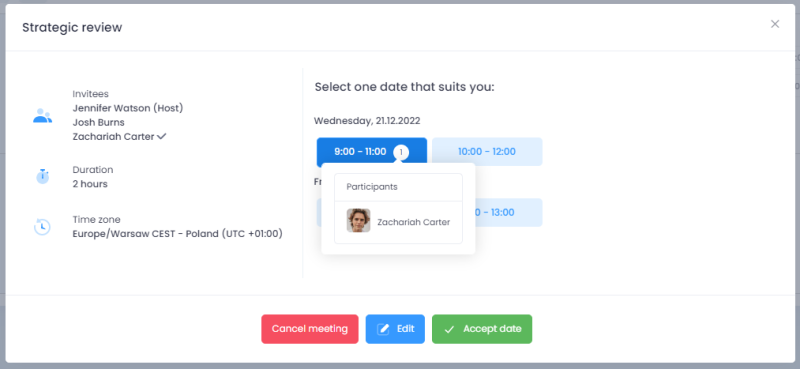
A meeting issue
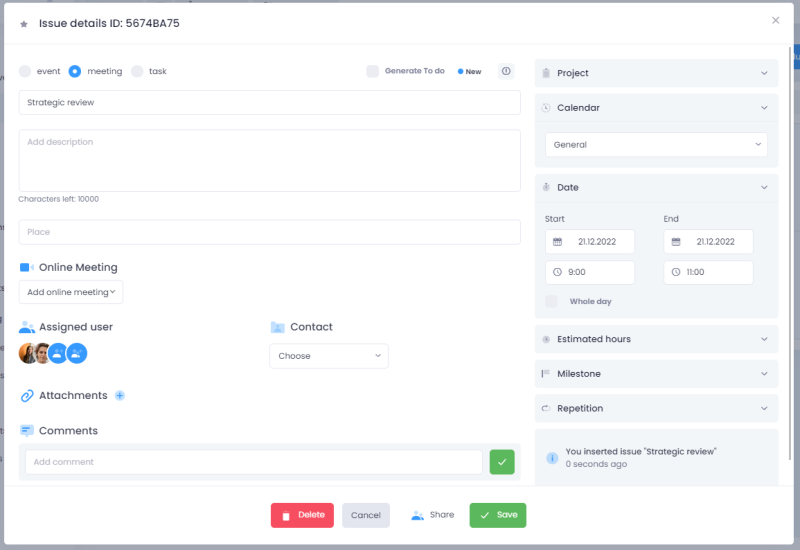
A draft meeting – the host view
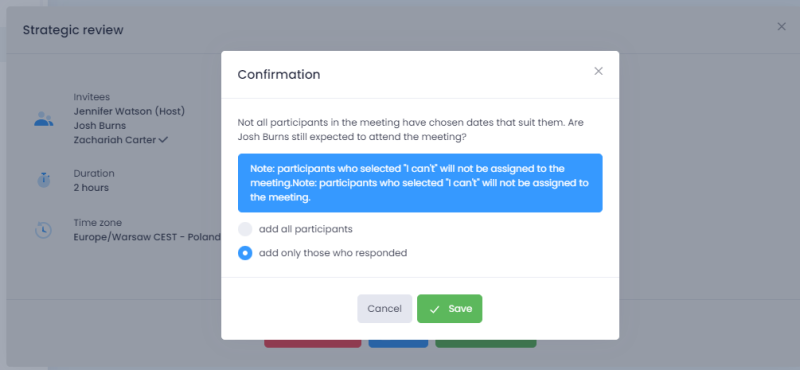
5. A tooltip
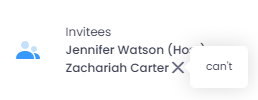
- Those who have indicated that they cannot attend the meeting have an x next to their names. When you hover over it, a tooltip (1) is displayed. If an attendee has indicated that they can attend the meeting, a check icon (v) is displayed next to their name. When you hover over it, no tooltip is displayed. Those who have not responded, have no icons next to their names.The host will never get such an icon next to their name, because they do not make a choice at this stage.
- If any of the proposed dates pass (2), and someone displays the dialog box, the passed dates will be grayed out. A tooltip will appear when you hover over them, and an alert will show at the top. The confirmation button is disabled.
- After hovering over the number icon, the host can see who has chosen a particular date.
- The host can choose one date from the list. Then, the button Accept date becomes active.
The Cancel button always closes the open dialog box.
A draft meeting – the attendee view
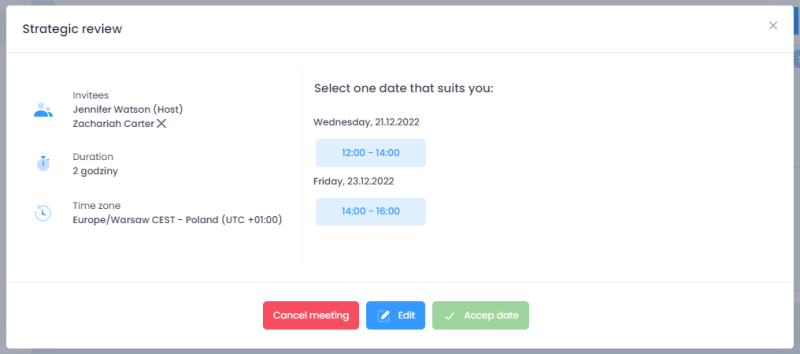
The user can’t see what options have been selected by other attendees.In this dialog box, not one, but several dates can be selected. The buttons at the bottom are also different. This page is sessionless (i.e., you don’t need to log in), and looks like the one described earlier in the documentation.


