Guests are external users with limited access to the elements of the system (reading or edition only), that were made available to them directly.
Elements that can be made available to guests are:
- projects/HR projects with resources (limited, as described in section 5.3)
- documents
- revenues
- offers
- expenses
- tasks
1. Who can grant access
Each user, who has the “allow you to manage guest access” option switched on in his advanced privileges can grant guest access. Users that have their roles set as administrator or manager have this option switched on as default.
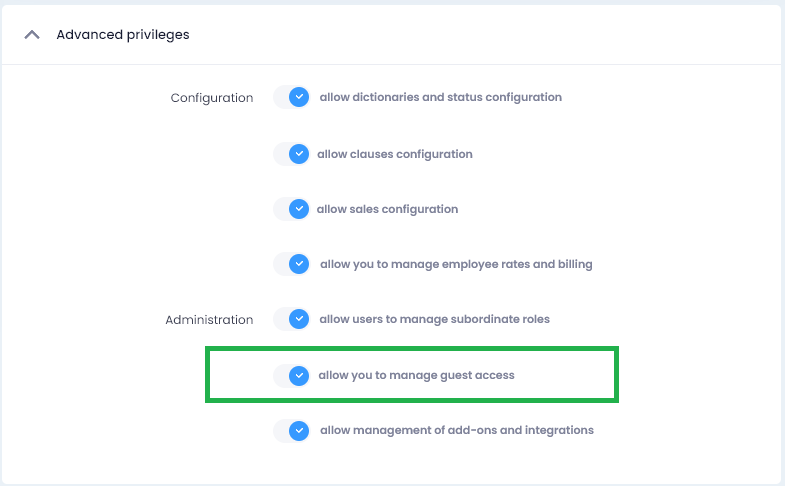
Users without access to guest management don’t even see the option of guess access. User cannot grant access, because he cannot see the action for access management and cannot see “Guests” tab in his account settings because option of granting access is inactive for his role level.
2. Sharing
Guest may be added by sharing an element wit him. To do so, choose “Share” option by the given record or by the detailed view of chosen element.
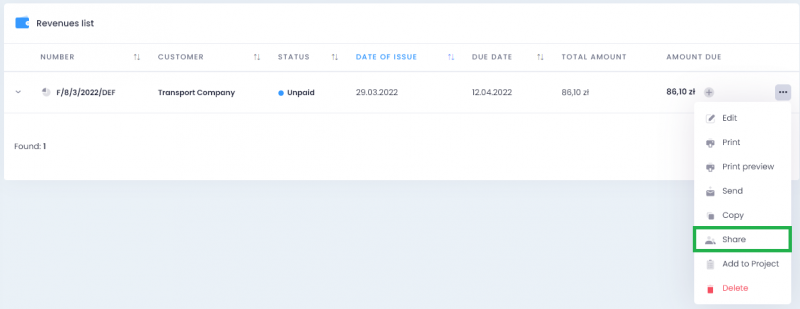
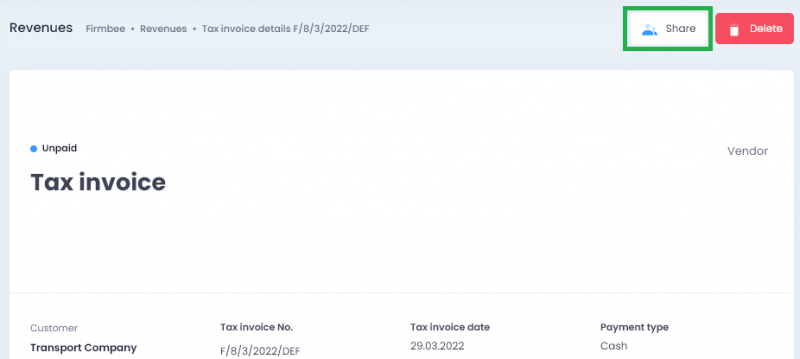
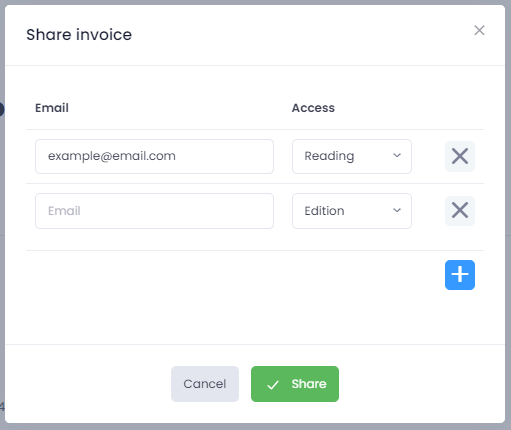
After clicking at the sharing action the window will appear to fill up with:
- The address of the user we share the element with
- The type of access to be granted: reading or editing (reading is chosen by default).
Both fields are obligatory.
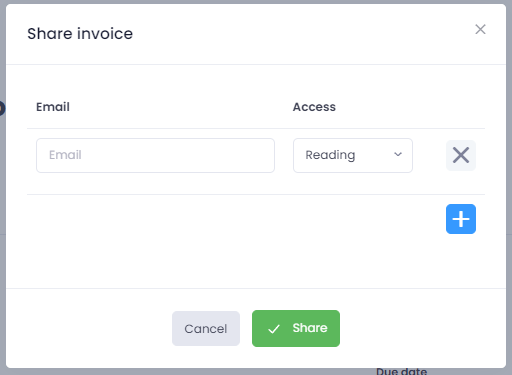
The same element may be shared with several individuals at the same time. To share with more people one has to click the blue “Plus” button. After the operation, the field will appear to be filled up with email address and type of access.
To remove the guest from the list one has to click the “X” button.
To confirm the action of giving access one should click the green “Share” button.
In the case of elements that were already shared with guests, the list of emails will be filled up with addresses. At this stage the user can:
- Add new guests
- Terminate access granted previously
- Change the settings of the access type
Guest access can be managed in the settings of the guests list (described in sections 6 and 7). There the user may see the list of all elements with access granted to each guest.
After adding guests, removal of guests or change of their access type one should click the green “Share” button again. This will update the status of guest access and:
- New guests with access granted will receive emails with the invitation
- Guests with access granted earlier won’t receive new emails with the invitation
- Guests, who have their access type changed will receive notification of the change
3. Access types
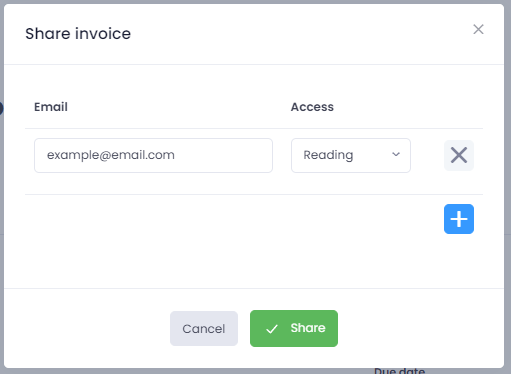
In the window, where the access is being granted, there is a section where one must choose the right type of access. There are two options available:
- Reading – means that the guest will see the element, but cannot edit it. The guest may add notes and comments to all available elements.
- Edition – means that guests can modify an available element.
Guest cannot add, archive, or remove elements from the system.
4. Invitation acceptance and first login of guest
Guest with access to elements of the system receives an email with the invitation. In the message, there is a link to accept the invitation.
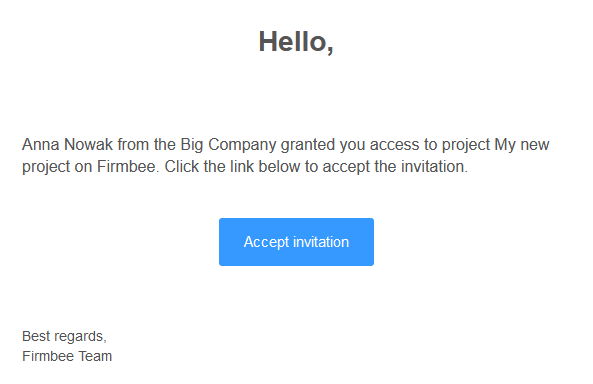
After clicking on the link the login/register screen will appear.
Guests that have no profile in Firmbee fill up registration form with their details:
- Name and surname (the name is obligatory)
- Email address (already filled up, the field is blocked and cannot be edited)
- Password (guest may give it himself)
- Password confirmation
- Terms and conditions acceptance checkbox
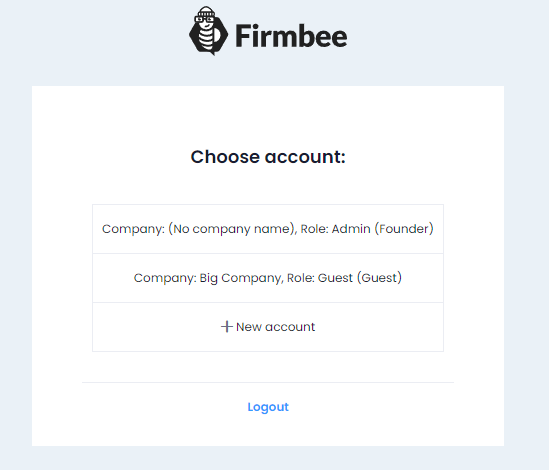
If a guest has the account in the system already, after the acceptance of the invitation the logging form appears. After logging the guest has to choose the account with the shared element. The access level next to the name of the account will be set as a guest.
5. Guest view and restrictions
The guest has restricted access to applications. Guest can see elements shared with him directly. For example: if project “XYZ” was made available to the guest, the guest will see the “Projects” tab with the “XYZ” project on the list.
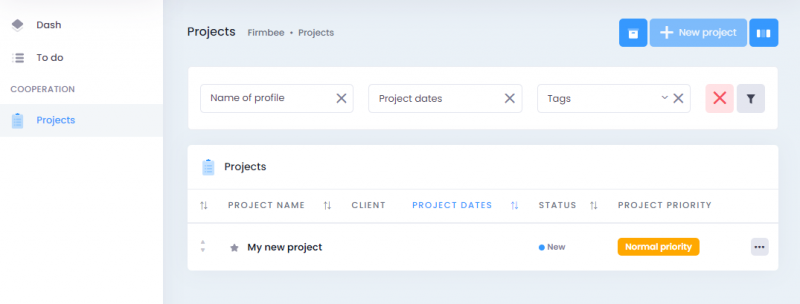
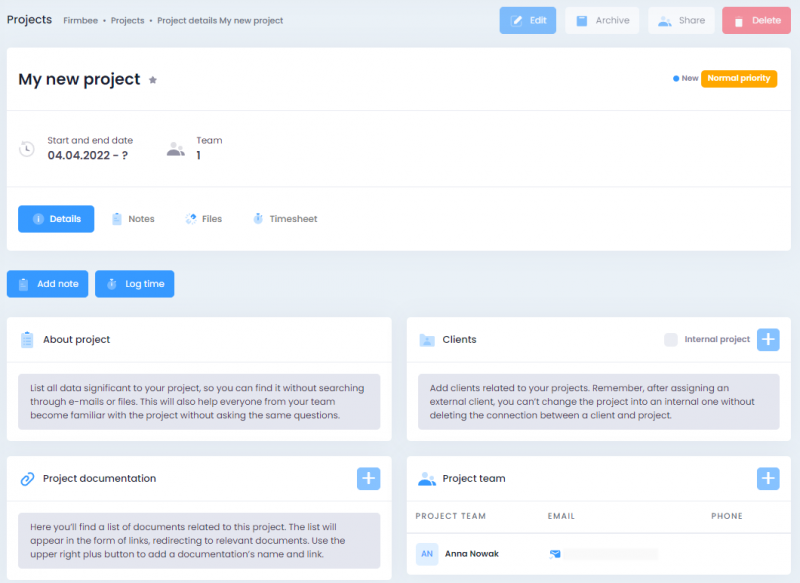
Access
Additionally to all shared elements guest has access to:- Personal and regional settings (with the same restrictions as users, who are not at the administrative level have)
- Desktop configuration
- “To do” module (additionally as a widget on the desktop)
Lack of access
Guest don’t have access to:- loggings of activity (“activities” tab in projects and HR projects)
- configuration settings (together with statuses and dictionaries management)
Restrictions in project/HR project
Projects and HR projects are shared with guests with several restrictions:- Guests don’t have access to information about: budget, hourly rates, costs (including spendings generated from logs of time), users in the timesheets. Guest can log and manage only their own working time.
- Guests don’t see documents and financial transactions (revenues, spendings) connected with the project/ HR project, except in the situation, when the document was shared directly with the guest. For example, a client, who has access granted to the “XYZ” project with an invoice that is connected to it, will see the project and the invoice altogether.
6. Guests management
Administrators of the system and other users that have guests management options active can manage guests in the configuration section. To manage guests one must go to the “Configuration” tab, choose the “Users” tab in the side panel, and choose the “Guests” tab.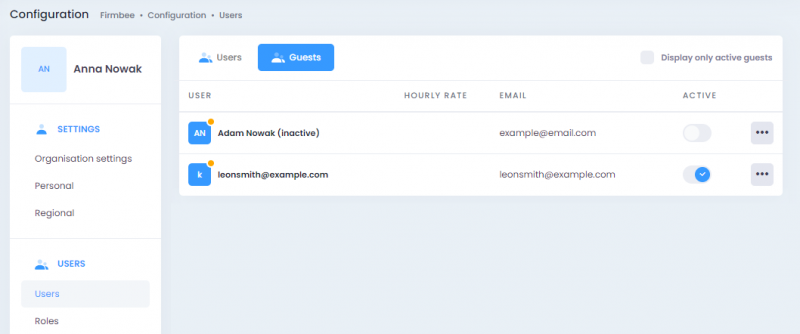
The following details are visible in the table:
- Avatar, name, and surname (in case of first logging, the avatar contains the first letter of an email address, and the name contains the whole email address, these will change when the guest fills up the profile)
- Email address
- Status: active or inactive (guest account may be activated or deactivated with the switch button).
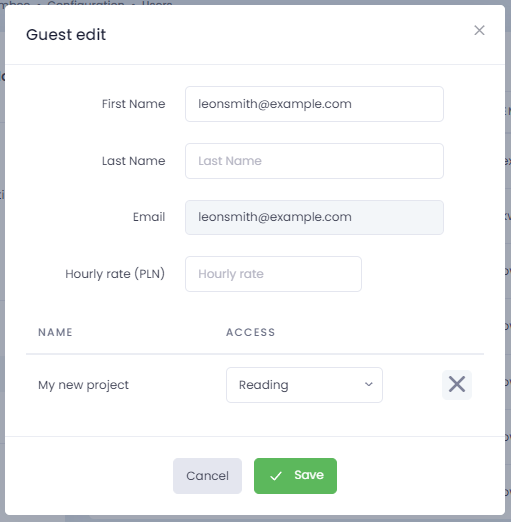
- Users can complete the information about the name and surname of a guest and his hourly rate in this location. To do so one should choose the “Edit” option next to the chosen name.

After this operation, the guest edition window will appear.
7. Access restriction/deactivation of guest
Users with guest management options switched on can block guest access to certain elements of the system or deactivate their profile.
8. Access removal
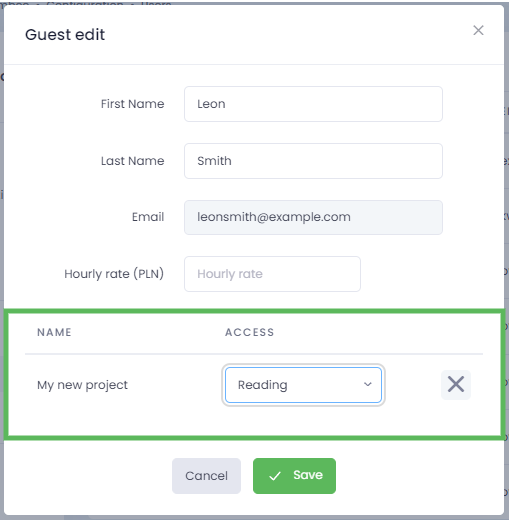
To restrict access to certain elements o the system one should choose the “Edit” option next to the given name of the guest. The window of the guest edition will appear with the list of elements available to him. Any element can be removed from the list with the “X” button. The type of access (edition or reading) can be changed on the list as well.
Guest deactivation
To deactivate the guest’s profile one should change the switch position to inactive. After this action, the confirmation window will appear.


After guest deactivation, he won’t be able to log to his account. Each time the guest will try to log into the system he will get the information about incorrect login or password (he won’t be able to reset his password).
Information about the fact that the guest is inactive will appear on the guests’ list next to his name.
The guest profile may be activated back by changing the switch next to his name into active position. After reactivation guest will obtain the same privileges as before deactivation.
9. Transformation of the guest into user
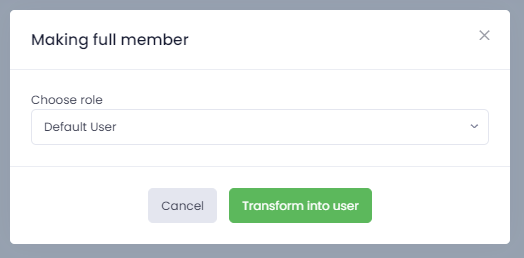
The quest can be transformed into rightful user of the system. To do so one should open the list of guests and choose the option Transform into user under the ellipsis sign.

The window with the role selection field will appear on the screen. Selecting of the role is mandatory.
