1. Calendar
The tab shows you events by day and time.
Calendar view
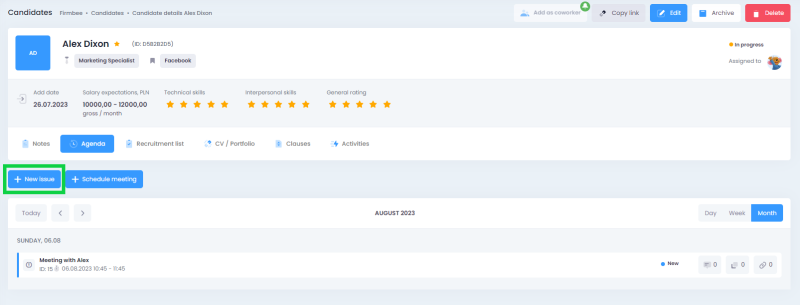
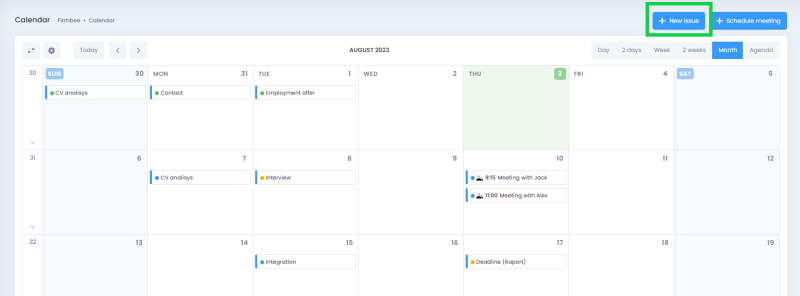
The month grid is displayed by default. The events are assigned to particular days. The users can add a new event by clicking on a day or by selecting a couple of days. They can also select the New issue button or Schedule meetingbutton.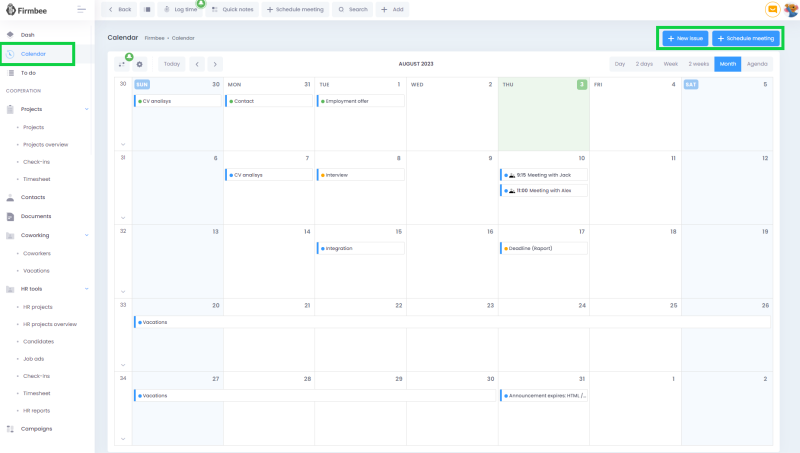
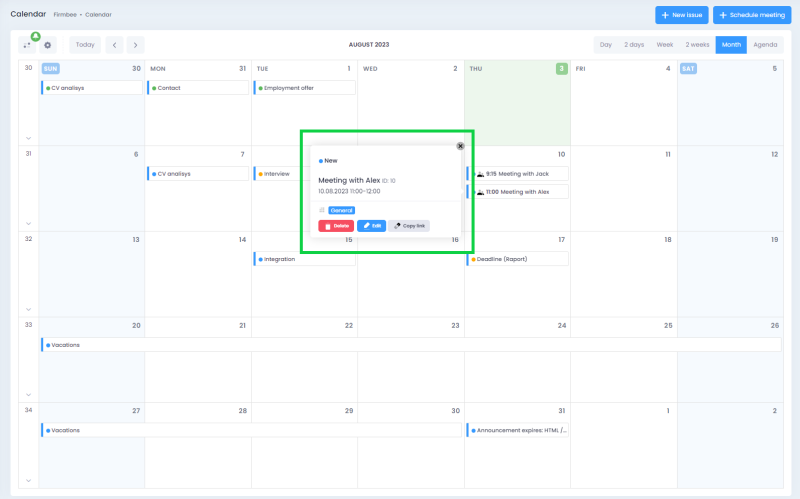
Events displayed in the calendar view include details such as title, status, and time (if optional).
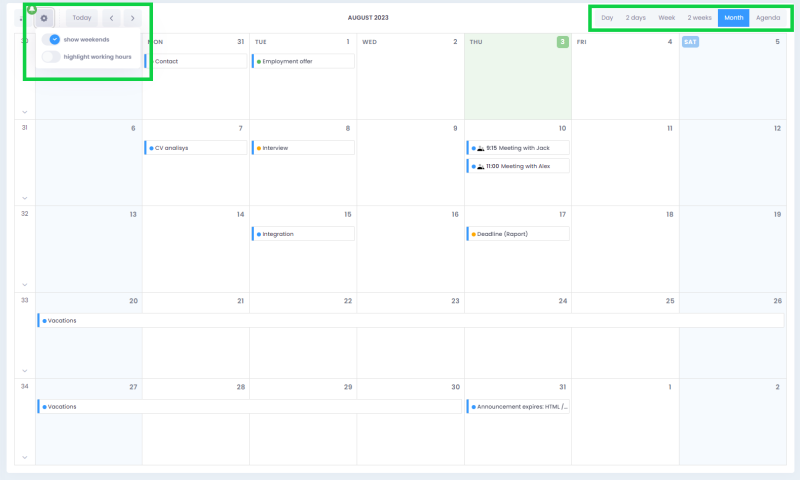
 The user can switch between a monthly, weekly, daily view. You can also disable the show weekends mode.
Filters
You can filter events by calendar and the event’s status. By default, this tab contains one, main calendar named General. By default, tasks from all calendars are on display but you can narrow them down by calendar type.Step 1.
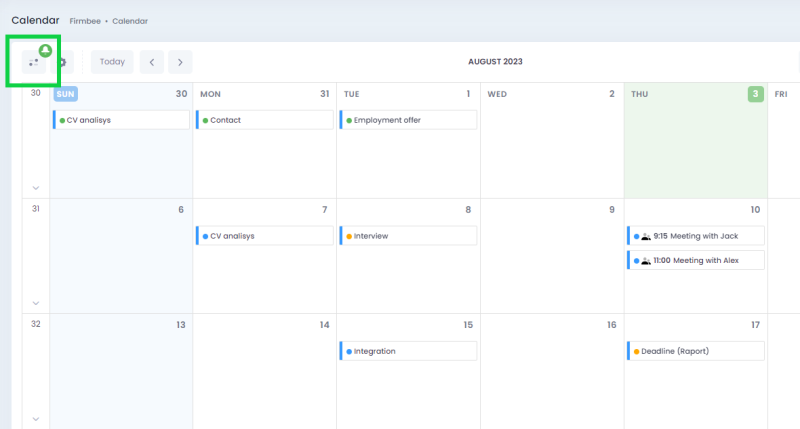
Step 2.
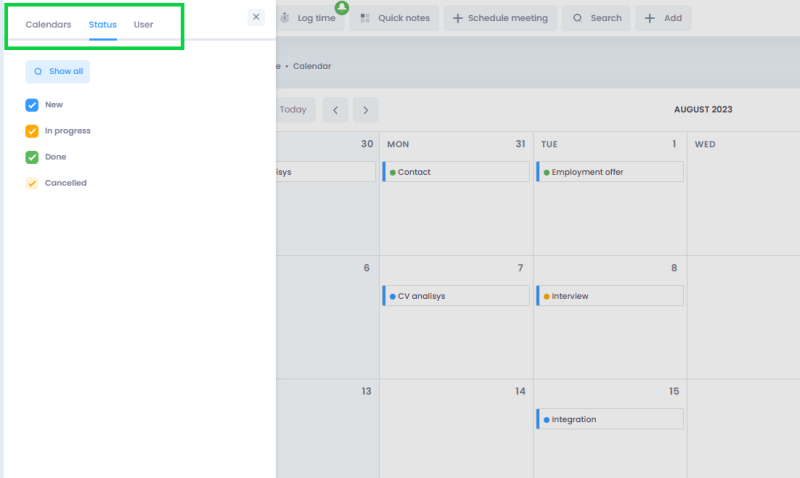
You can add a new calendar by using the New calendar button. You can edit: calendar’s name, distinctive color or delete it (except the default one). The calendar’s settings, filters and status are displayed in the drop-down sidebar.
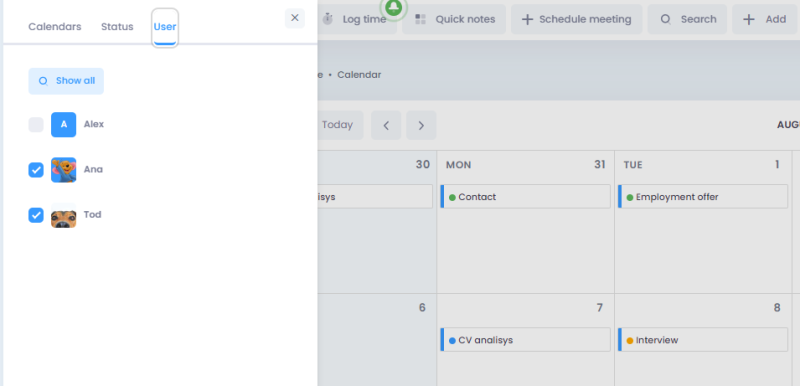
You can also filter issues by the types of users.
The user can change the settings of the calendar view and filter the users by their type. The view of the list is determined by the privileges of the role of the user:
2. Issues
Creating an issue
After you click on the New issue button, a window with a short form will be displayed. At this level, you’ll have to specify the type of issue. You can choose between:- event (selected by default),
- meeting,
- task.
- subject or descriptions (mandatory area)
- status:
- new
- currently in progress
- done
- canceled
- calendar
- dates – specify the start and end dates for events and meetings. You can also set a deadline for each task. Depending on where the creation of the issue is activated, a specific day is selected from the grid or the current day. It applies if you use the main button.
Step 1.
Step 2.
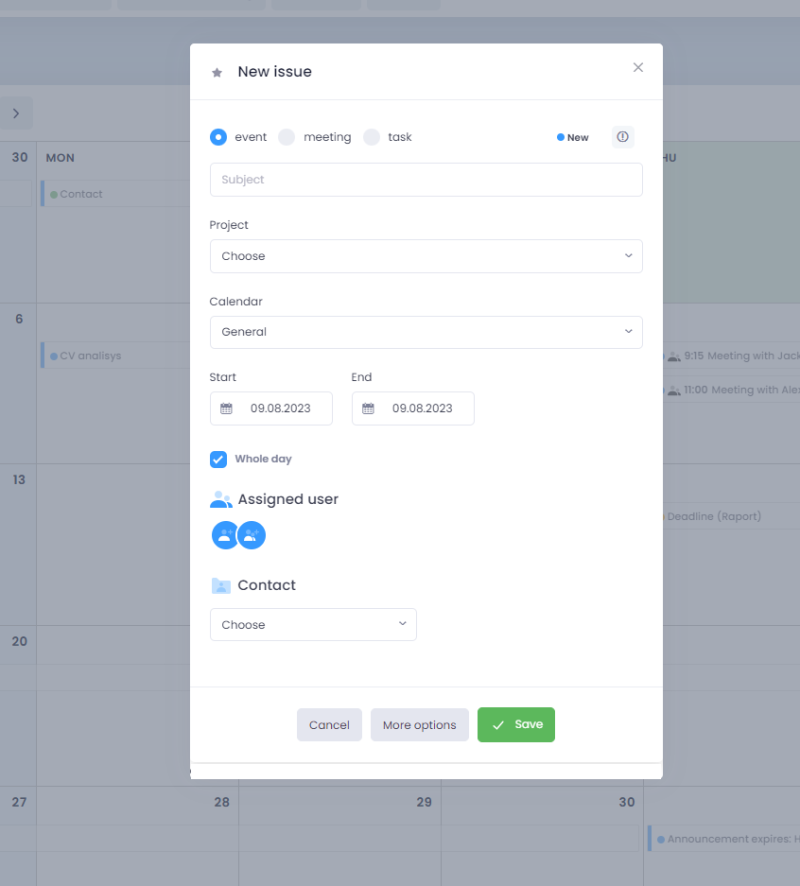
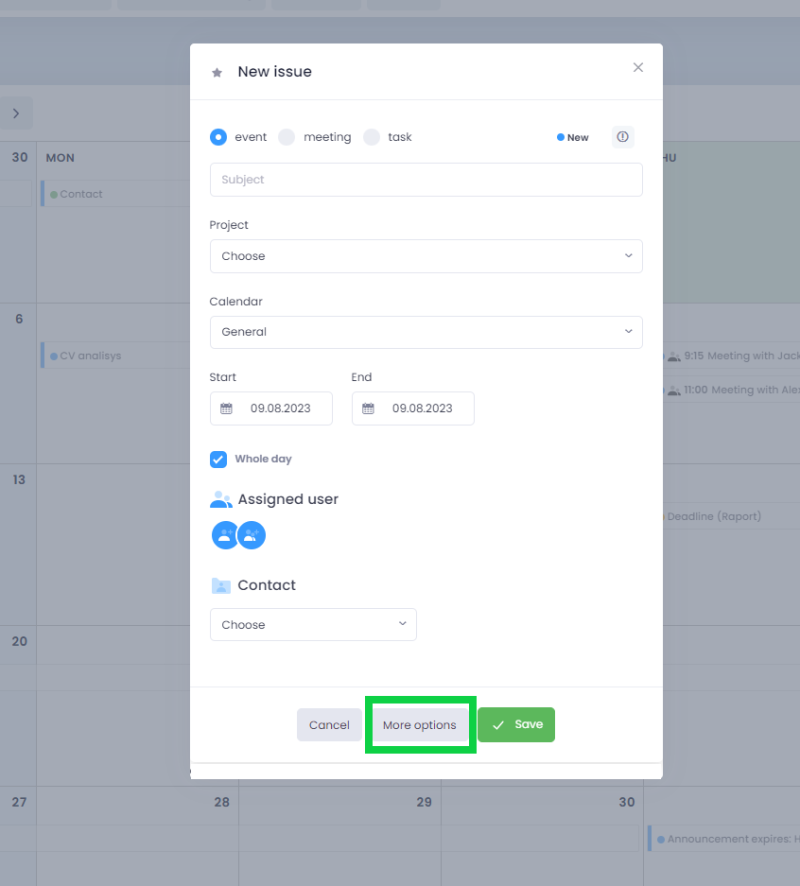
The user can add more details by selecting the More options button.
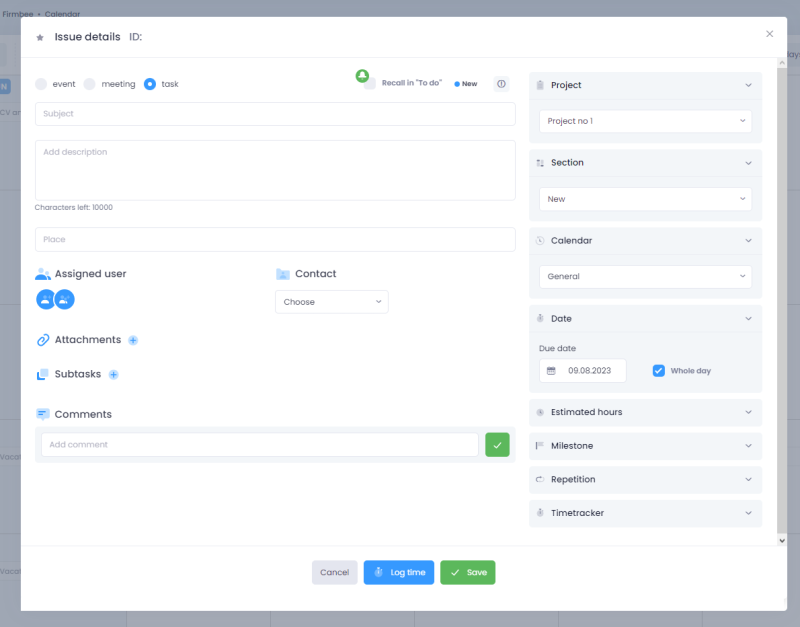
As a result, a window will be displayed with additional options to fill:
- Subject,
- Description,
- subtasks – only for the task mode,
- Place,
- Online meeting option (Type issue: meeting),
- Assigned user,
- Assigned contact,
- Attachments,
- Subtask (Type issue: task),
- Comments,
- Project,
- Type of calendar,
- Dates,
- Estimated hours,
- Milestone,
- Repetition,
- Timetracker- this option is available only for the task type which is associated with the project. From here, you can set the time log spent on an activity. After adding the time log in a task, you can see the information about who, when and how much time spent on it. Time logs are also displayed in the Timesheet project tab. Generating To do – enabled setting will remind you of the event on your desktop in the To-do section. Author – information about the author of the request. You can fill in or change this area.
Subtasks
Available only for the Task option. Subtasks can consist of a subject/short description, status and deadline.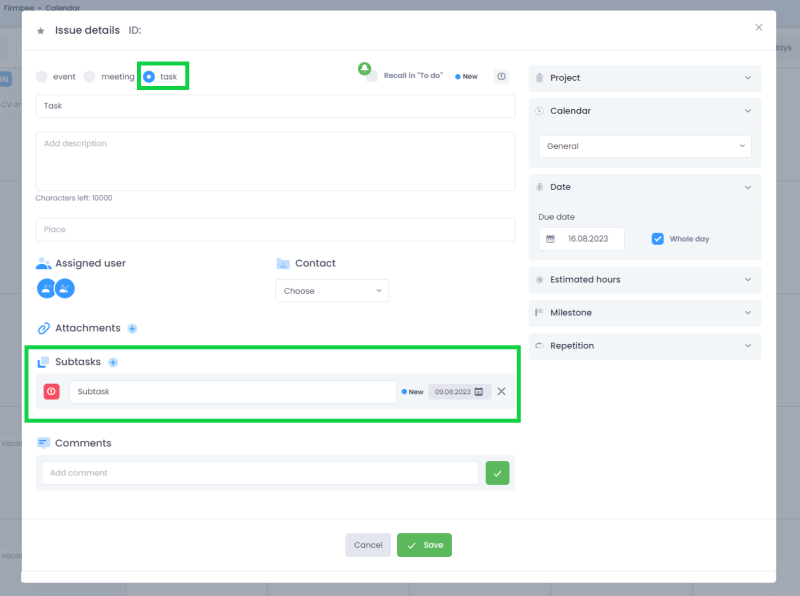
Attachments
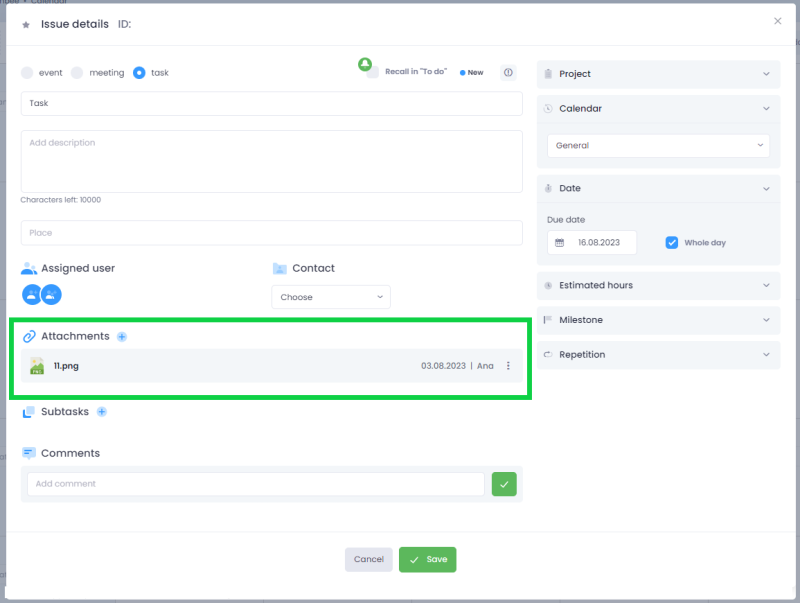
Next to the section’s name, there is a button for uploading attachments. Below you will see a list of files with details including: author, date of upload and file’s type. You can do the following actions for the files: file, view, download and delete.
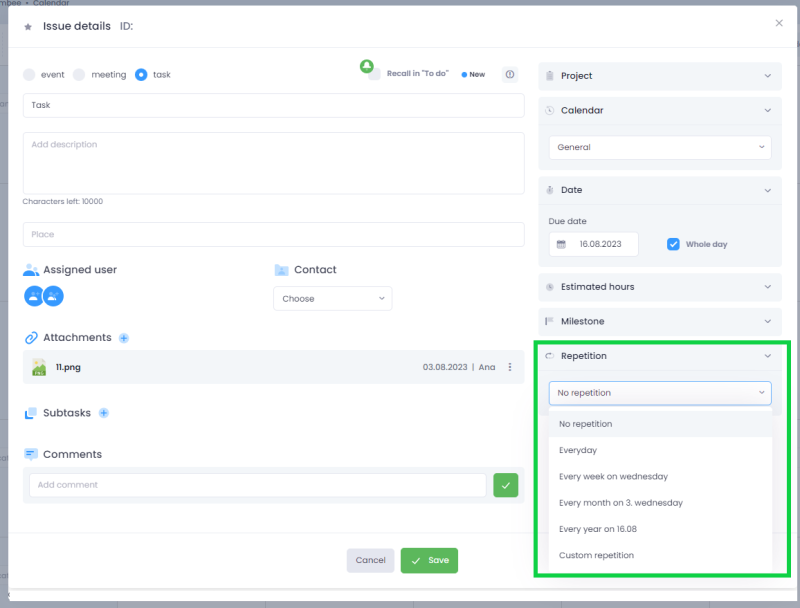
Cyclicality settings
The following recurring options are available:- everyday,
- weekly,
- monthly
- annual,
- custom.
A task set as recurring will be displayed in the calendar as agreed, e.g. – if Tuesday is a due date and the user has to set a recurrence for weekly, the task will be displayed every Tuesday. Cyclical tasks are also displayed in task lists and kanban but only the closest occurrences of tasks are shown there (according to the period applicable to the list).
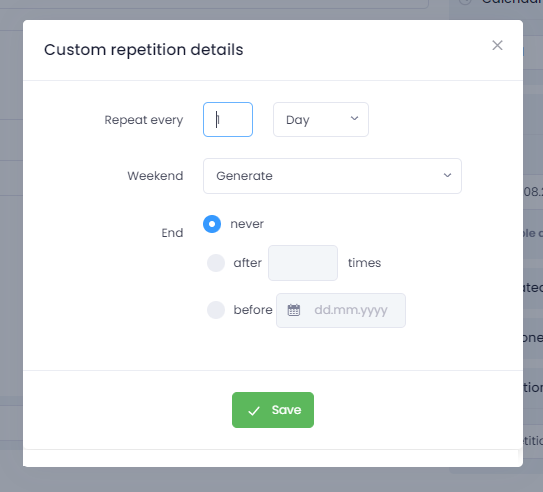
You can customize the frequency of occurrences in the custom settings. You can choose the Repeat without weekends option, set a repeat for every week, etc.
The user can specify when the repetition should end. You can choose between:
-
- endless,
- to the specific number of repetitions,
- to the specific date.
-
- only this request,
- this and following requests,
- all requests (also for the previous ones),
- commenting on events.
User assignments
To assign an event to the user, you have to expand the Assigned User section. After expanding, you will see a list of available users. You can add another user or remove an already assigned one. Clicking on the avatar displays a tooltip with the name and contents. You can also delete the assignment by clicking the avatar.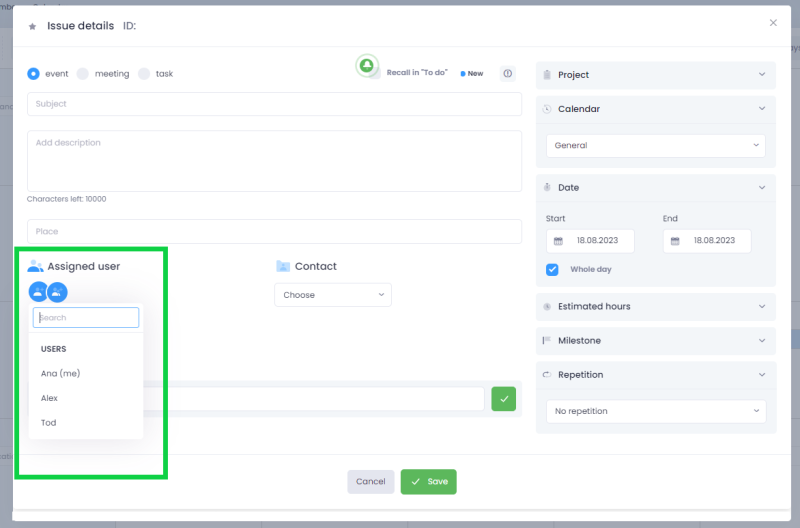
Assigning to contracts
An issue can be added to a specific contact. The connection will be displayed not only in the calendar but also in the details of the given record. To connect contacts, you have to expand the Contact section. After expanding, a list of contact type options is displayed: company, contact person, coworker or candidate. After choosing the type, another selection field appears with a list of the selected types. You can add links to several contacts and to different contact types. When you click on the avatar of the assigned contact, the tooltip displays the type and name of the contact. The avatar’s content display also a delete option – Click to remove the association.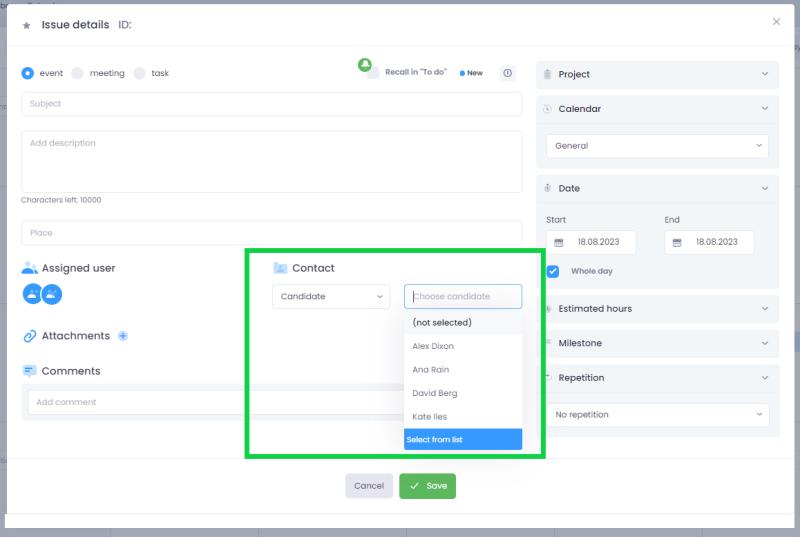 You can also add the events from the contact’s details (corporations and contact persons), coworkers and candidates. You have to select the New action in the Agenda tab. The link to the contact will already be completed in the issue form.
