1. Settings
Organisation settings
Here you can enter your organisation’s name, Tax ID and Company ID numbers as well as contact and address data. The company logo can be uploaded here. The data entered under this tab will be used to create sales documents.
Personal settings
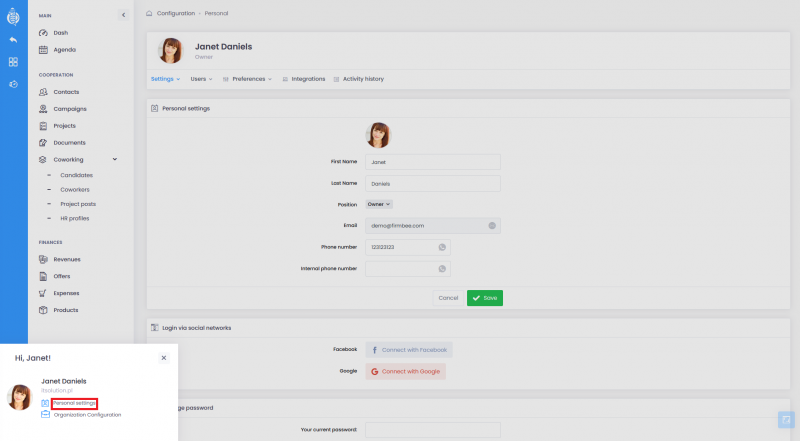
The logged-in user’s data is displayed here. You can change your password and manage your social media login settings.
User data
The personal settings section contains the following data about the user:
- The personal settings section contains the following data about the user:
If no graphics have been uploaded, a default avatar based on the first letters of the first and last name is displayed:
- first name and surname,
- position,
- email address – cannot be changed as it is also the login,
- phone number and internal phone number.

Login via social networks
In this section, you can connect to/disconnect from your social media profile.

Password change
To change your password, enter your current password, fill in your new password and confirm it.

Regional preferences
This tab displays the following data:
- language,
- default currency,
- currency placement,
- decimal separator,
- fiscal year’s start,
- date format,
- time format,
- time zone.
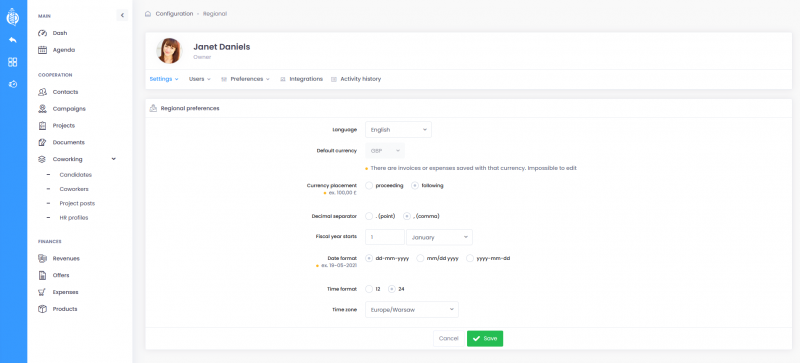
The data is filled in by default with the applicable and customary data for the selected country (selected during account registration). You can change them. The exception is the main currency, which cannot be changed after the first sales document is issued.
You can also change regional preferences. They don’t affect your other accounts. The exceptions are the fields of the main currency, the beginning of the fiscal year and the time zone, which can only be changed by the administrator.
2. Users
Users list
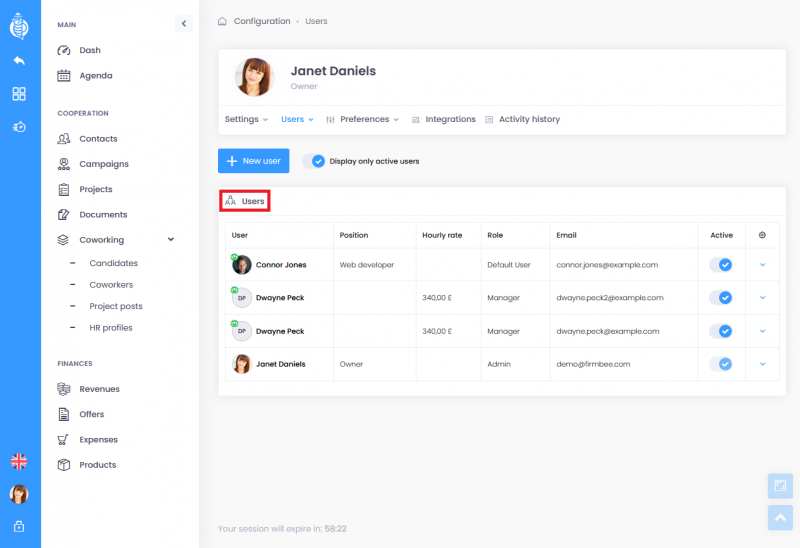
Here, you can see the display of your account. By default, only active users are visible. In order to display, deactivated users you need to deactivate the option Display only active users in the list header.
The table displays the following information:
- avatar and username,
- position,
- hourly rate,
- role,
- email address (which is also the login),
- active/inactive status.
Adding a user
You can add a new user in Configuration/Users. Select the New user button and fill in the form fields displayed in the window:
- first name and last name (mandatory fields),
- position,
- hourly rate (in the main currency of the account),
- role – mandatory field,
- email address – mandatory field,
- language.
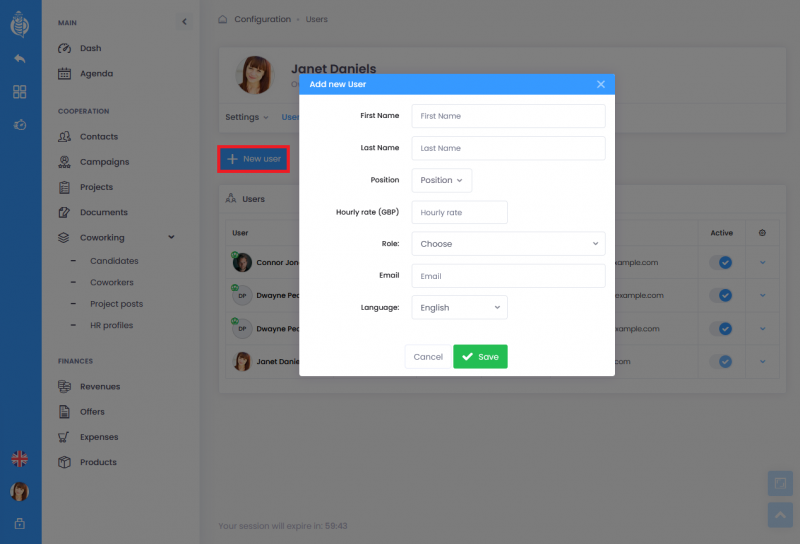
After adding, the new user will appear in the list.
Linking a user to a coworker
Users in the system can be linked to their corresponding profiles of Coworkers. This linking can be done by:
- selecting the Add as coworker action if the profile does not already exist. The selection of the option will initiate the display of the form for adding a Coworker. Some of the user’s data will be copied from the Coworker’s profile.
- selecting the link to Coworker’s action, if the profile already exists. A modal window will be displayed with a checkbox for the name of the Coworker.
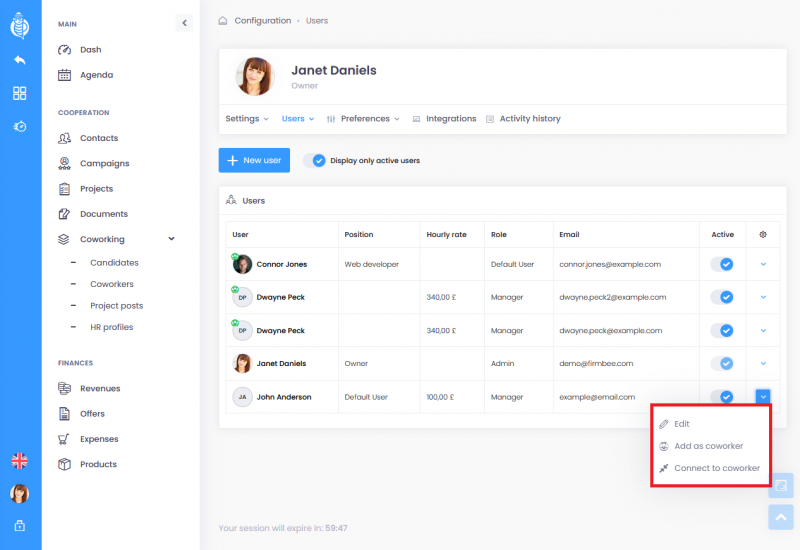
If you have linked a user to a colleague, the following will appear next to their avatar a symbolic green icon next to their avatar.
Deactivating a user
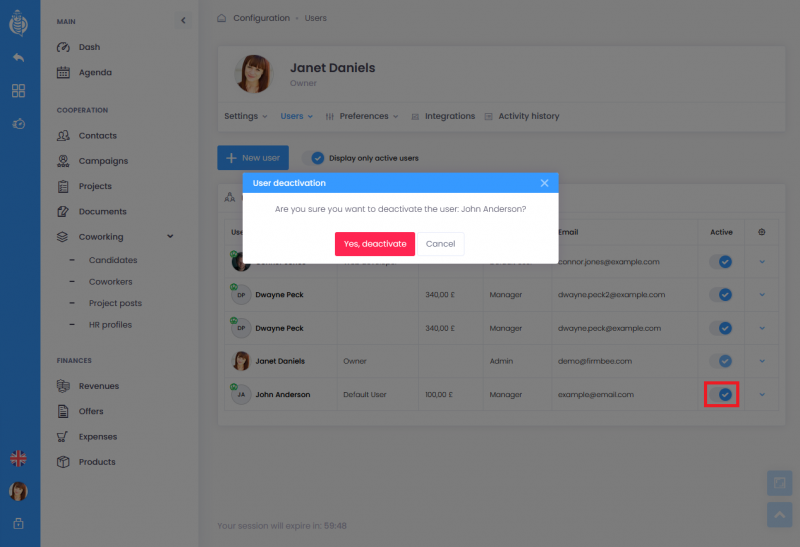
In order to deactivate a user, change the switch state in the user list in the column Active to Inactive. You will be asked to confirm your decision. After confirmation, the user will be deactivated. The user’s data will remain in the system, but it will not be assigned to the records. Only the administrator can deactivate and reactivate new user.
Roles
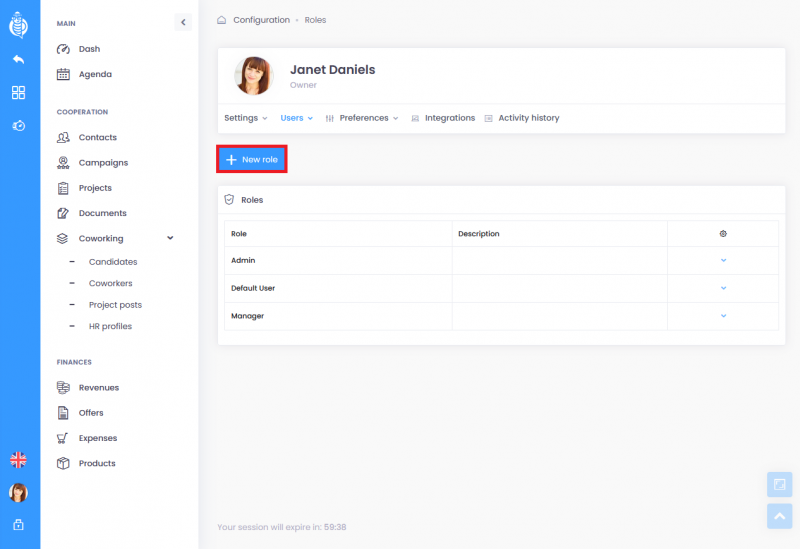
A new role can be created in the Roles sub-tab. After clicking New role, the following form will be displayed with the settings. Next, you should fill in:
- role name,
- description (optional field),
If it concerns a subordinate role, you should activate the Select superordinate role option and select this role.
If it is to be a primary role, activate Choose a primary role option and select the role which is to be superior in relation to the newly created role (e.g. a user is added to the HR Specialist role, and his primary role is HR Manager). The next step is to configure the rights to particular modules. More in the file Permissions section.
3. Preferences
Sales
The sales configuration is available to administrators and users with the ability to configure sales in the Advanced options section of the role.
Documents
In this tab, you can manage numbering series formats and settings default settings of sales documents. In section Numbering series,define new numbering series formats and manage existing ones. Each numbering series has a name, format and number of the first document. It is also possible to set the format as the default for a particular type of document. When defining the numbering series format, enter constants and expressions in place to which the relevant data will be substituted:
- %N – number (required),
- %M – month,
- %Y – year (required).
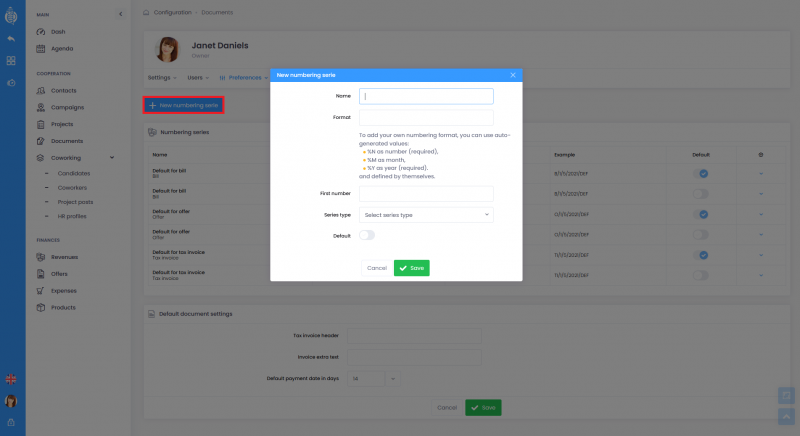
In this tab you can also complete the fields:
- name,
- format,
- first number,
- series type,
- default set.
4. Taxes
Individual taxes
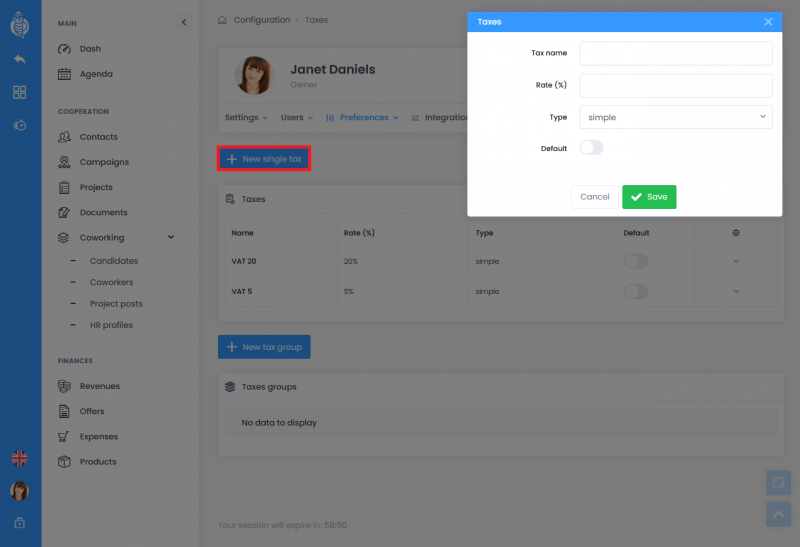
This tab contains selected taxes specific to youer country. The list displays the name, rate and type. You can edit and delete a tax rate if it has not yet been linked to sales documents. Adding a new tax is done in the form, where you should fills in:
- tax name,
- rate (percentage),
- selecting the type of tax from a list:
- simple (selected by default),
- compound,
- tax on tax.
Tax gropus
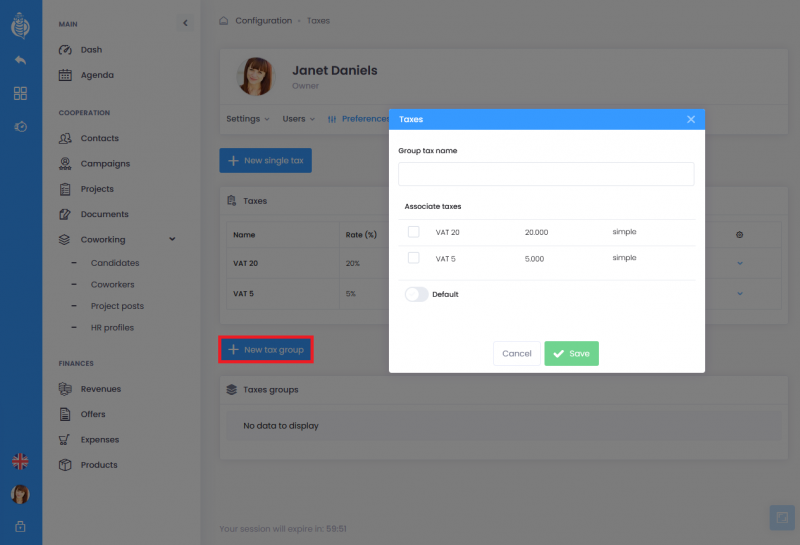
You can also create a tax group. To do so, select the action New tax group from the section displayed under individual taxes. A window will be displayed and you need to:
- fill in the Group tax name,
- select Associate taxes from the list of already existing tax rates in the account.
At least one of the taxes should be a simple tax type. There can be only one complex tax in the group.
Default tax rate
Mark a single tax or group of taxes as default. Select from the list view or from the details view.
Editing and deleting taxes
It is not possible to edit or delete a tax or a group of taxes after linking it to a sales document.
Expenses
In this tab, you may define and manage expense categories. It already contains sample expense categories that can be edited or deleted.
Dictionary
Dictionary configuration can be accessed by enabling with Allow configuration of dictionaries and statuses option in the advanced role rights section.
Adding a value from the configuration level
In order to add a new dictionary value, go to the configuration and under Preferences/Dictionary sub-tab, select the New option button. A window with a form for adding new value will appear. Select the module and field for which you want to add a value and complete it. It is possible to add option translation to other language versions. The value can be marked as a default choice for the selected field.
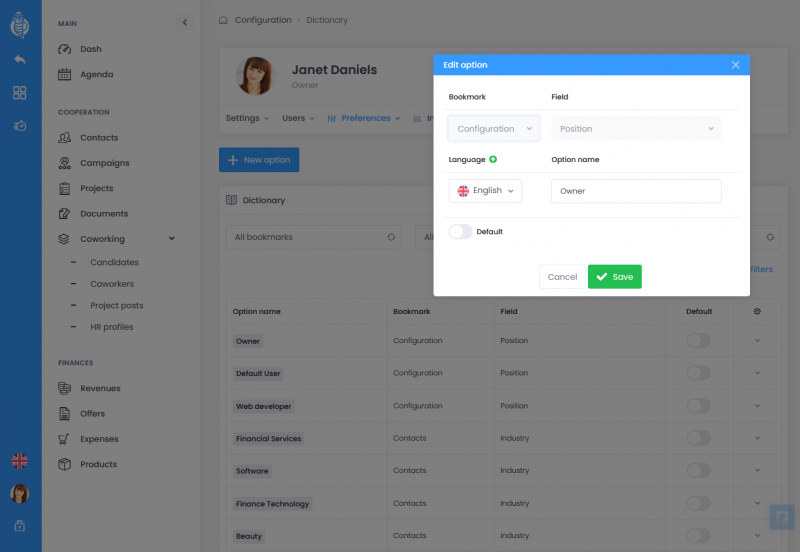
The list of available tag values can be filtered by module and field.
Adding values from the forms
New values can also be added from the level of forms for adding/editing a particular record. After clicking on the desired field, select the New option in the selection list.
A window with a form for adding a new value will be displayed. In this form, the option is active to use in the field immediately after saving it. If you disable it, the value will be added but not used in the given field.
Editing and deleting values
Once a value has been used, it cannot be deleted. Editing is allowed – changed values values will also update for existing records.
Statuses
The configuration of statuses is accessible to users with the option Enable configuration of dictionaries and statuses in the advanced role rights section.
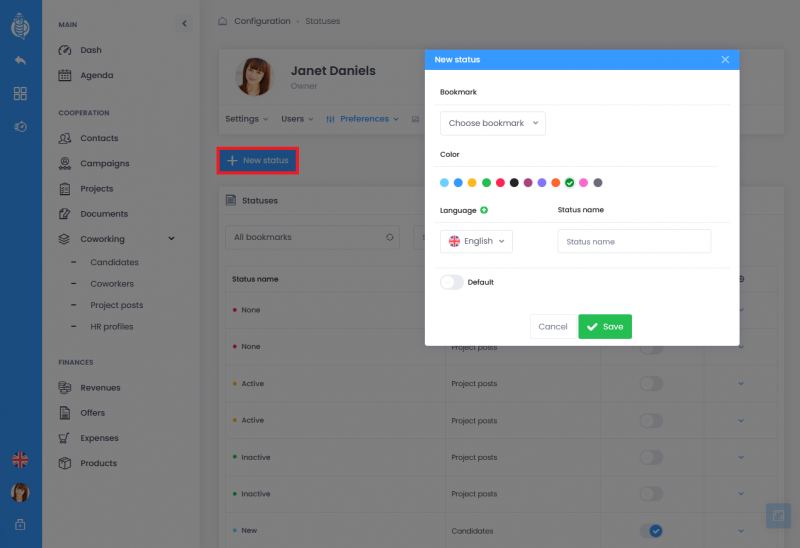
Adding a status from the configuration level
As in the case of dictionaries (directly next to a given status or in configuration/statuses). In the form for adding a new status, selects the module, fills in the name and select a colour (if you don’t change anything, the colour will be selected randomly). A given status can be set as default.
Adding status from within forms
Analogous to adding options to the dictionary.
Editing and deleting statuses
Once a value is used, it cannot be deleted. Editing is allowed – the changed values values will also be updated for existing records.
Clauses
More in the Clauses section
Email templates
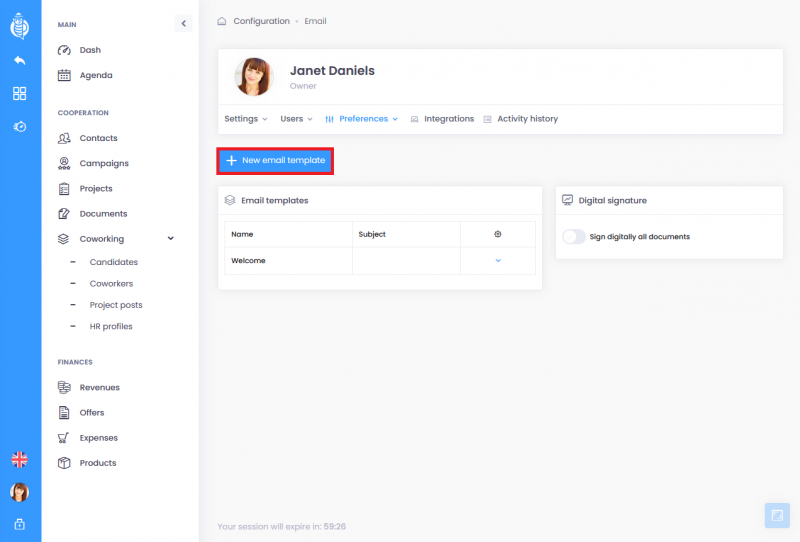
In Personal settings/Preferences/Email there is an email templates section. Add your own content templates that can be used in emails sent via the system. In order to add a template, it is necessary to complete:
- name,
- subject,
- content.
To do
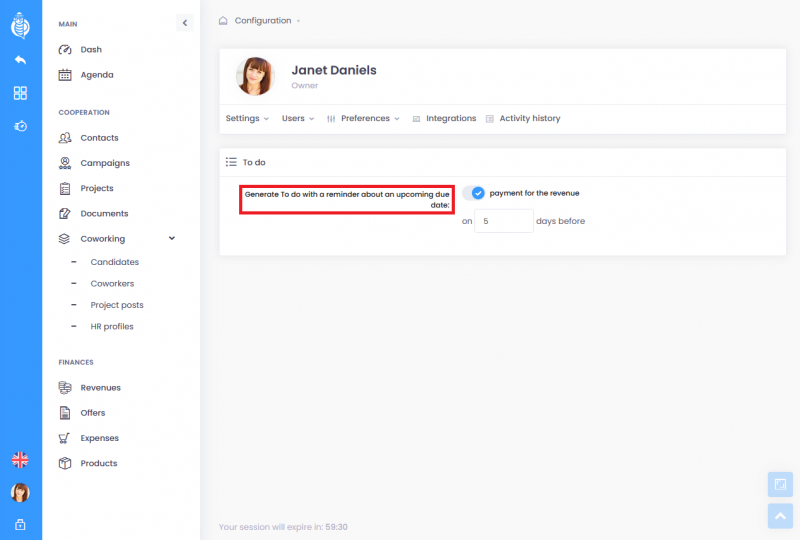
In the configuration to do (Personal settings/Preferences/To do) you can enable the automatic generation of reminders about payment deadlines. To enable the function, activate the switch Generate to do with a reminder about an upcoming due date for revenue and specify when reminders should appear on your desktop.
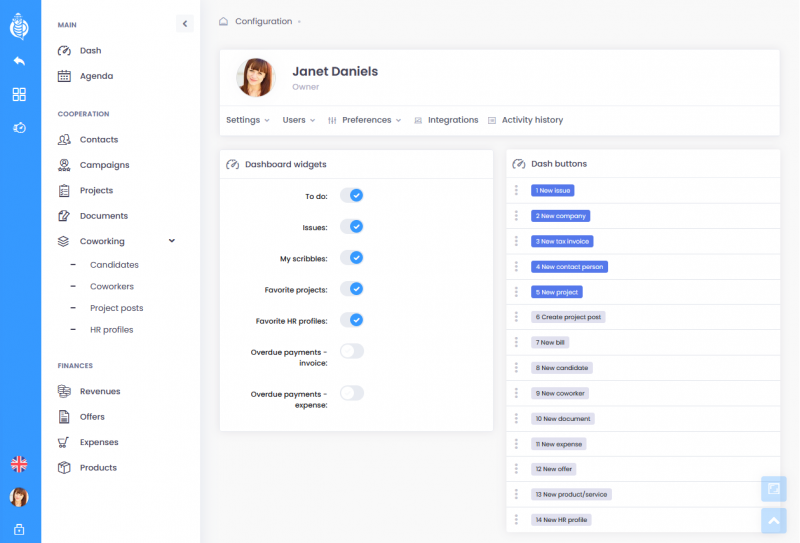
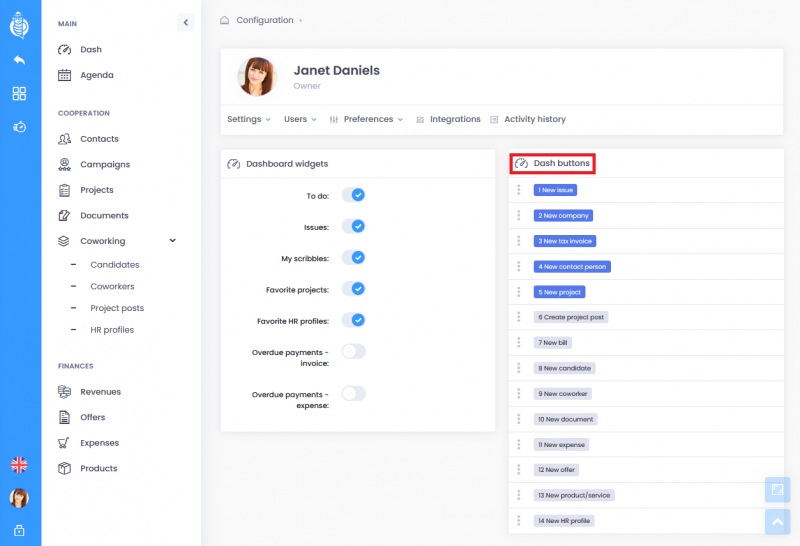
Dash
The user desktop is fully configurable. The following widgets are available in the view:
- quick actions,
- notifications,
- to do,
- note,
- highlighted projects,
- featured HR profiles.
Decide which widgets you want on your desktop. By default, all of them are enabled. This can be changed in the configuration in the preferences/desktop section. You can enable/disable widgets in the dashboard widgets section. Just change the state of the respective switch state to active or inactive.
