With the WordPress plugin, you can create or download data from WordPress and transfer prospective customer information to Firmbee to use as leads or for recruitment purposes. You can also create and publish a form on your website by using a drag & drop creator. There are ready-made form templates available for users to customize or a blank template.
Download the latest version of our plugin: WordPress Firmbee Lead Plugin
Once the form is designed, a code is generated to be embedded on the page. Data submitted via the form will automatically be saved in the Firmbee application. Leads can be converted into contacts and candidates assigned to specific recruitments.
1. Installing the WordPress plugin
To do this, you have to go to the Plugins tab in his WordPress dashboard. Then select Add New action and upload the ZIP file of the plugin.

After the installation, remember to enable the plugin – to do this, click the Activate button.

2. Configuring the plugin
From the dashboard panel, you can see a tab called Firmbee Leads Forms. After entering its settings connect the plugin to your Firmbee account – click the Connect link.
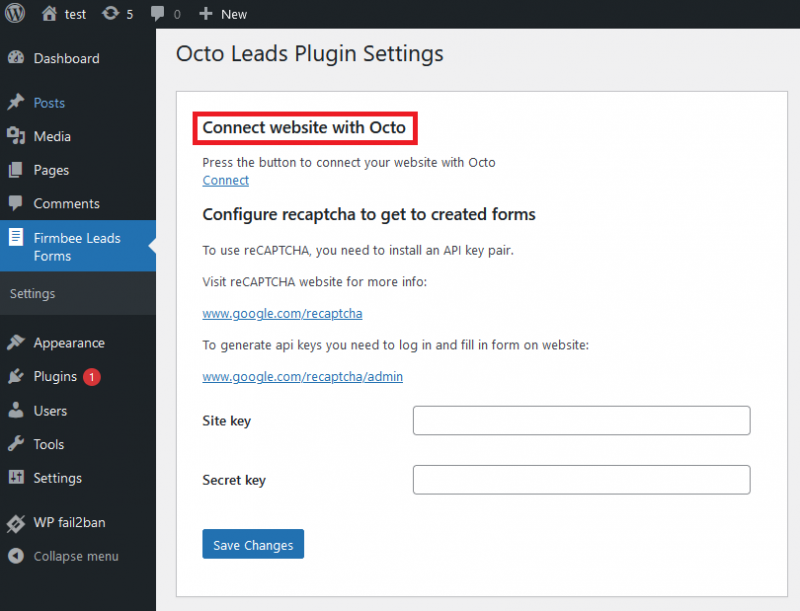
You will be redirected to the Firmbee login panel. After logging in, you will see a screen requesting permission to access the contacts, candidates and profiles modules. You have to click Allow, for the plugin to work properly.

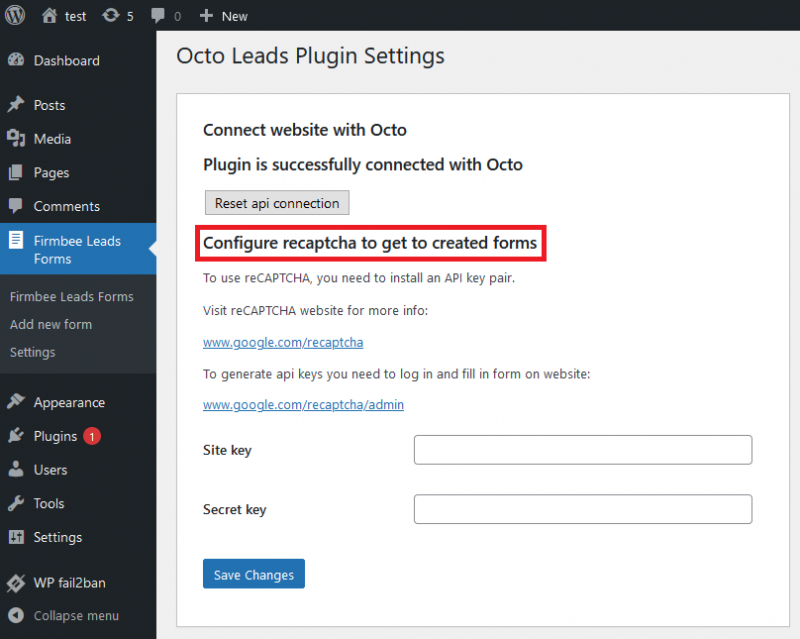
You can also configure the recaptcha settings (this option is not mandatory).
3. Creating a new form
To create a form, select the Add new form action in the forms list view. You will go to a new form creation view.

Form settings
In the settings section, you can:
-
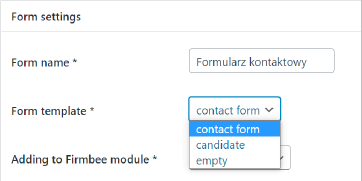
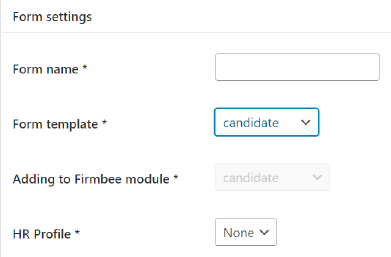
- fill in the Form name
- select a Form template
-
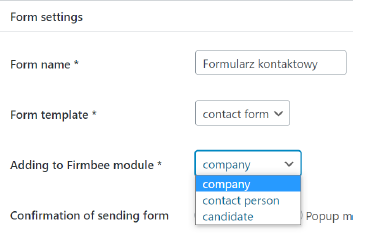
- Specify to which module in Firmbee transport the imported leads
-
- If you choose to import leads to the candidate module, you will also be asked to select an HR profile that will manage the recruitment process.
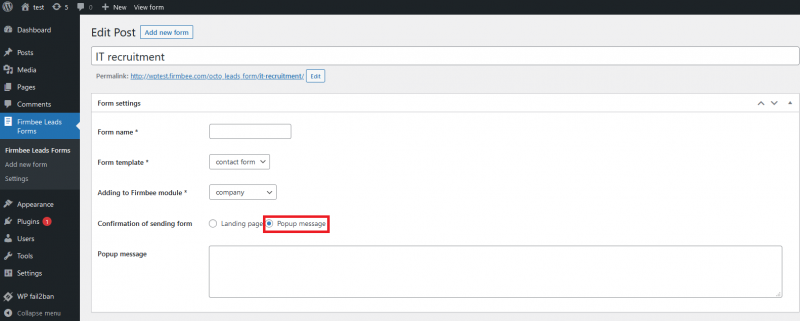
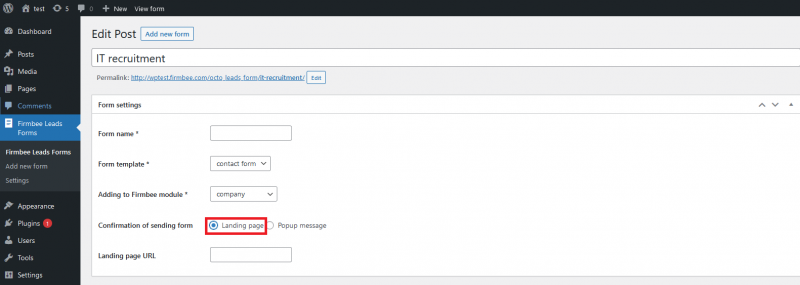
- You have to decide on Confirmation of sending form between:
- displaying the indicated content as Popup message – the text field has to be completed,
- redirecting to the Landing Page – you must fill in the address of the page to which the form user will be redirected after sending an announcement.
4. Configuring the form
Form templates
Depending on the selected template, the following fields are proposed:
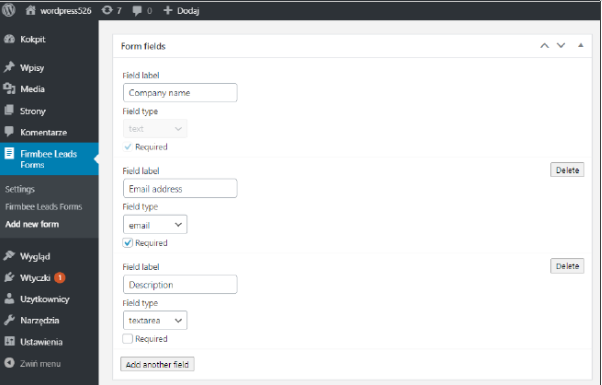
For the contact form:
- Email address – mandatory field by default,
- Company name or name and surname – the mandatory field with no delete option,
- Description
For the form dedicated to candidate application:
- Email address – field marked as mandatory by default,
- Name and surname – mandatory fields that cannot be deleted,
- Description,
- button to upload a CV file – max size 10 MB. If the file size exceeds the limit, the form will not be uploaded, and the record will not be saved in Firmbee.
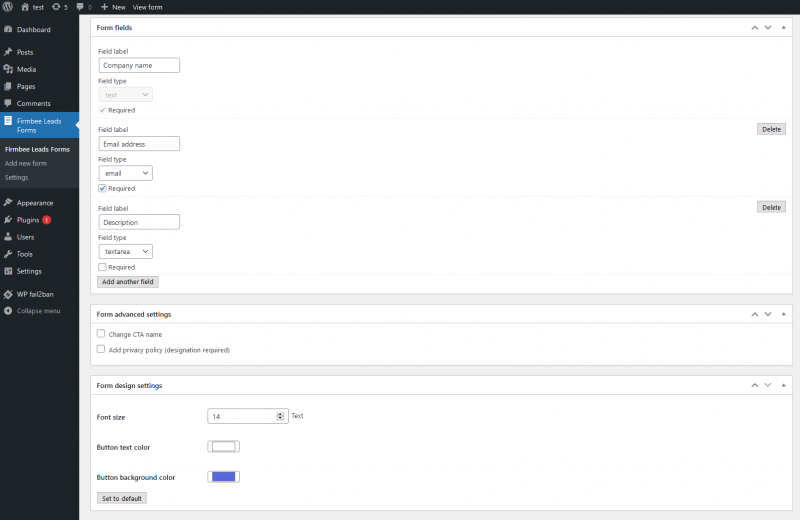
You can also use the option to create his form by selecting an empty template. In such a form, the fields required when creating a profile in Firmbee are:
- Company name – for the form which is associated with companies,
- First and last name – for the form associated with Contacts or Candidates.

Fields not visible on the form
Other fields required when creating a profile in Firmbee:
- status – saved as Lead for Companies and Contacts (as To contact),
- source – saved as Form (name of the form).
The above statuses and sources are automatically added to the application and cannot be removed in the configuration later.
Other fields
The user can also add new fields to the form. To do that, he has to click the Add another field button.

The user can choose between system-defined and custom fields. Properties of the system-defined fields are predefined and mapped to specific fields in Firmbee, while for the custom fields, the user defines the type and name of the header. The user can mark each of the fields as mandatory. The content of custom fields in Firmbee will be displayed as a note – the header is the name of the note, and the content of the field is content of the note.

Standard fields
- website – text field, validation for the presence of http:// or https://,
- city – text field,
- phone number – only digits,
- file upload – uploading files button, max size: 10 MB (if the file size exceeds the limit, the form will not be submitted and the record will not be saved in the application. Files are saved in the Attachments tab for the given contact profile,
- email address – validation for the presence of the @ symbol,
- LinkedIn – field for the link. Must contain https://.
Only available as standard for the link to the candidates module:
- position – the name of the position the applicant is applying for,
- CV – upload button for a file containing a CV. The document will be saved in the relevant section in the attachments tab of the candidate’s profile,
- Experience – select the list with a fork. One-choice field,
- Salary expectations – fields with financial widgets.
Custom fields
- single line text field,
- number – only digits,
- URL – link, must contain http:// or https://,
- textarea
- multiple-select field multiselect (the user additionally completes the item list),
- single-selection selectlist (the user additionally completes the item list),
- checkboxes (the user additionally completes the item list),
- radio buttons (the user additionally completes the item list),
- HTML code,
- date – datapicker,
- time – timepicker.
Selected fields can be marked as mandatory to be completed in the form. To do so activate the Required checkbox in the section of the given field.
Mandatory fields in the form
Selected fields can be marked as mandatory to be completed in the form. To do so activate the required checkbox in the section of the given field.

Deleting a field
You can delete selected fields from the created form (except those required by the system). To delete a field, select the Delete action in its section.

Advanced settings
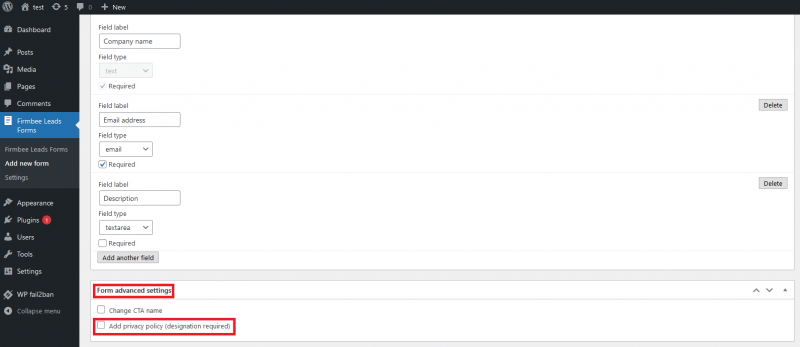
In the advanced settings section you can:
-
- Change the label of the form’s submit button. After checking the Change CTA name a field with Set to default button label will be displayed. You can change it.
-
- Add a privacy policy. After checking the checkbox, a field will appear for the content of the policy. With this setting active, submitting the form will be the same as accepting the privacy policy.
Form appearance
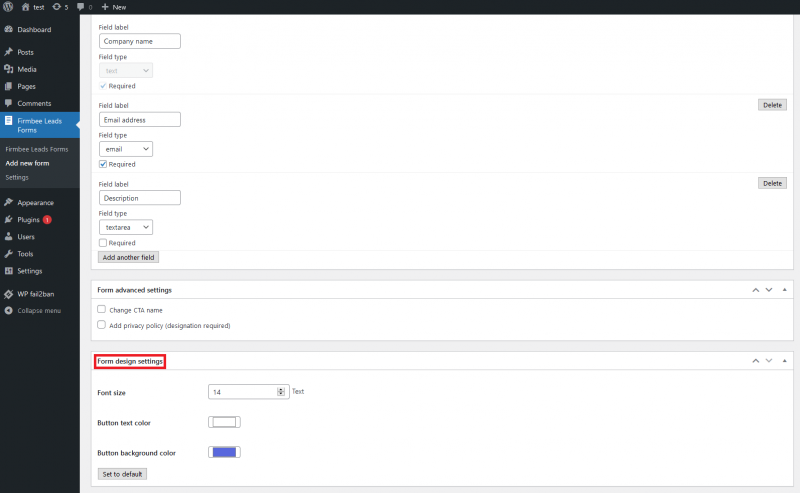
The user can configure certain visual elements of the form. He can set:
- font size,
- the color of the button text,
- the color of the button.
Publishing the form
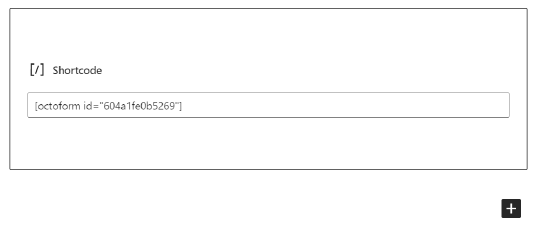
After saving the created form, a shortcode will be generated on the subpage.
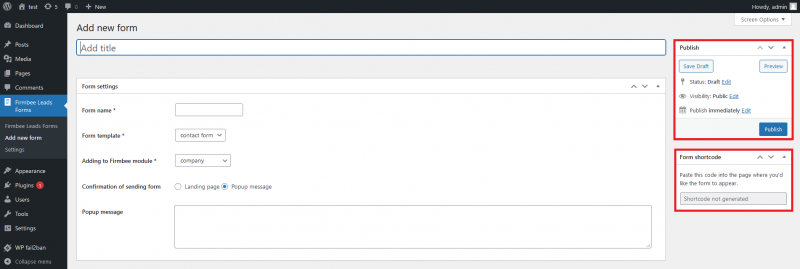
The generated shortcode should be embedded on a subpage dedicated to the form.
5. Campaign module in Firmbee
List of campaigns
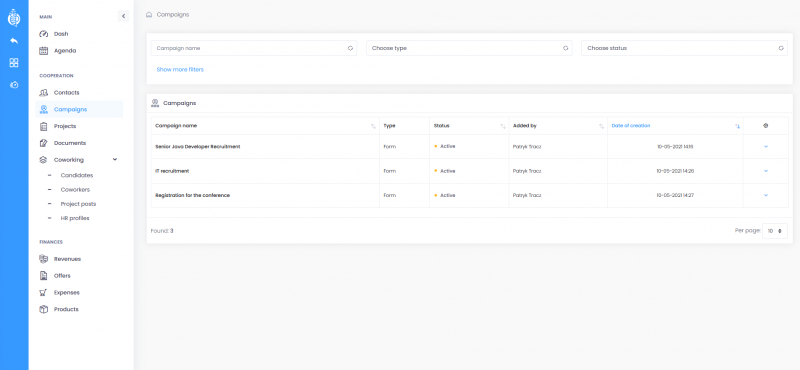
Information about forms created in the WordPress panel is displayed in the application in the Campaigns tab. The list shows the following information:
- campaign name,
- status:
- created – if the form is an unpublished draft,
- active – if it is active and the form code has been embedded on the page,
- inactive – if the form is not a draft, but the name has not been filled in and the shortcode has not been generated.
- campaign author,
- creation date.
Campaign details
After clicking on the campaign name, a modal window with details is displayed. The information visible on the list below is available, but also:
- a link to the published form,
- Form template used,
- related module in Firmbee,
- Show leads button.

List of leads
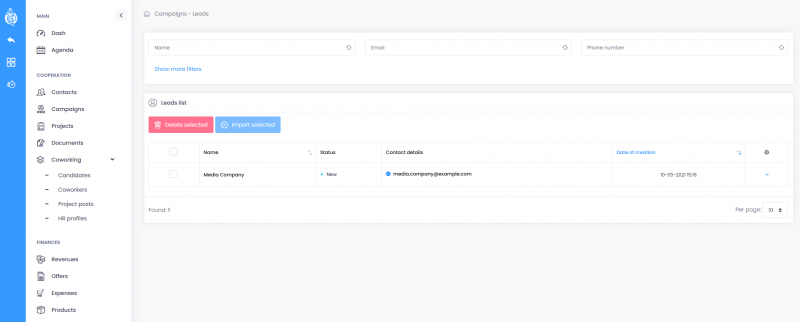
Data from completed forms go into the appropriate campaign inside Firmbee. To check the list of the records generated from the form, select Show leads button from the list or campaign details.

The information available on the list:
- name – is a link to the details of the lead,
- status: new or imported,
- contact details: e-mail address, phone number,
- creation date (form data generation).
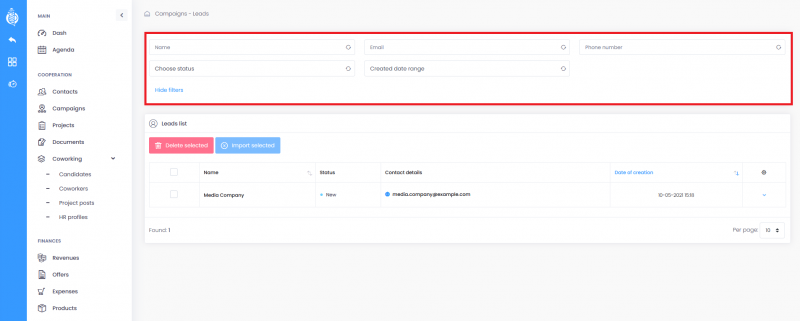
Filtering a list
Leads in the list can be filtered by:
- first name and surname or name,
- email address,
- phone number,
- status,
- creation dates.
Importing and deleting leads
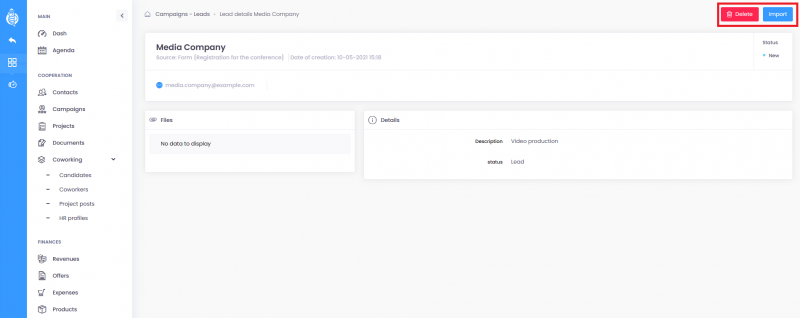
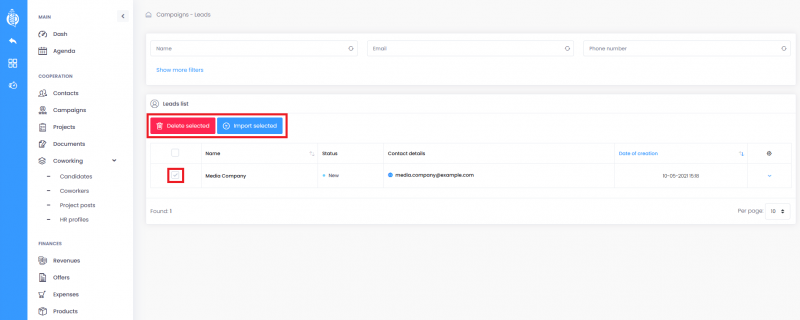
Leads can be imported and deleted in 3 ways:
- by selecting the Delete/Import action for a record in the list of leads,

- by selecting the Delete/Import button in the details of the lead,
- collectively by checking boxes of selected rows in the list and selecting the action
D
Import blocking
If a record has already been imported then:
-
- the import action in the list and in the details of the lead is blocked,
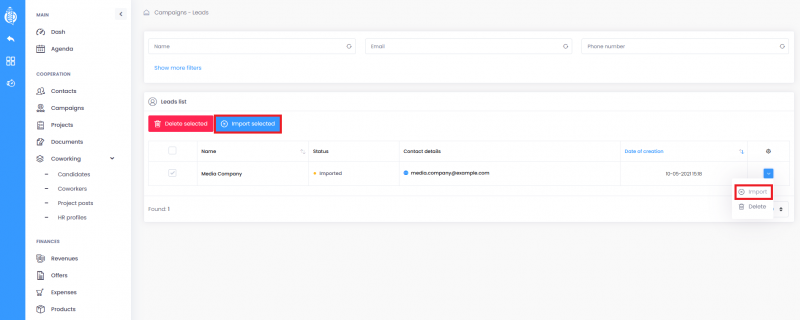
- in case of bulk import of leads, already imported records will be skipped.
6. Permissions
For the Campaign module, the choice of permissions is limited to access (none, private or public) and read (at the organization, role or record owner level). In addition, you can set whether the role user should have access to:
- import leads,
- delete leads.
To do this, the relevant switch must be enabled. The options are available after expanding the additional settings for the campaign module.
The administrator and manager roles have organization-wide scanning enabled and permission to import and delete leads. The access of the default user is limited to the private level. The settings for the manager and default user can be changed.
The import of leads depends on the right to add contacts and candidates. This means that:
- import records into the contacts tab if you have enabled the option to add to the contact module,
- import records to the candidates tab, if you enabled the option to add to the candidates module,
- you cannot import any records if you don’t have the access rights to the given tabs.


