The following article is devoted to prototyping in Figma. Today, you will learn how to create interactive components, organize your designs and share your prototypes. Keep reading to learn more.
Prototyping in Figma – table of contents:
Usability testing
Interactive interface prototypes allow you to map put the path of user’s journey through your application. You can use them for research to find out how users interact with your interface. This is called usability testing, and it helps you find problems that users may encounter.
Usability testing in the early stages of developing an application helps minimize the losses a company could bear by launching an untested application to the market. Sometimes ideas that seem great to designers turn out to be unintuitive to users.
Creating prototypes
You can create prototypes in the Prototype tab in the Properties panel.

Prototype options

When you do not select any layer, you will see the settings for the prototype in the Prototype tab.
- Device – select Device and Model
- Preview – here you can see how the settings you change will affect the appearance of the prototype you share later.
- Background – you can select a background color to customize the prototype to match your brand
- Flows – you can choose the initial frame of the prototype
Useful tip: A flow starting point will be created automatically when you add your first connection between two frames.
Flow
A flow is the network of frames and connections in a single page. You can create several separate flows, such as a flow for creating an account, another for viewing products or completing transactions.
To create a connection you must have the Prototyping tab active, then select a frame or object in a frame and use the circular node to drag a connection to another frame.
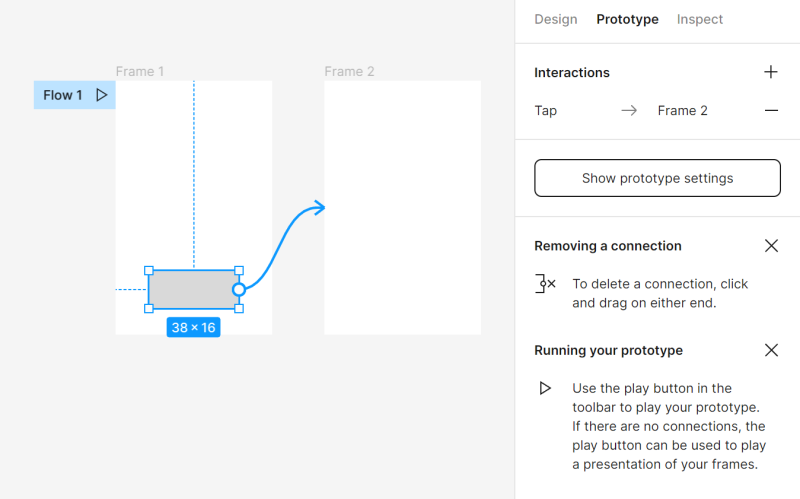
You can adjust the settings of the added connections in the Interactions section of the Properties panel, after clicking on the connected object. You can specify the type of interaction.

Once you click on a given interaction, you have access to additional settings.
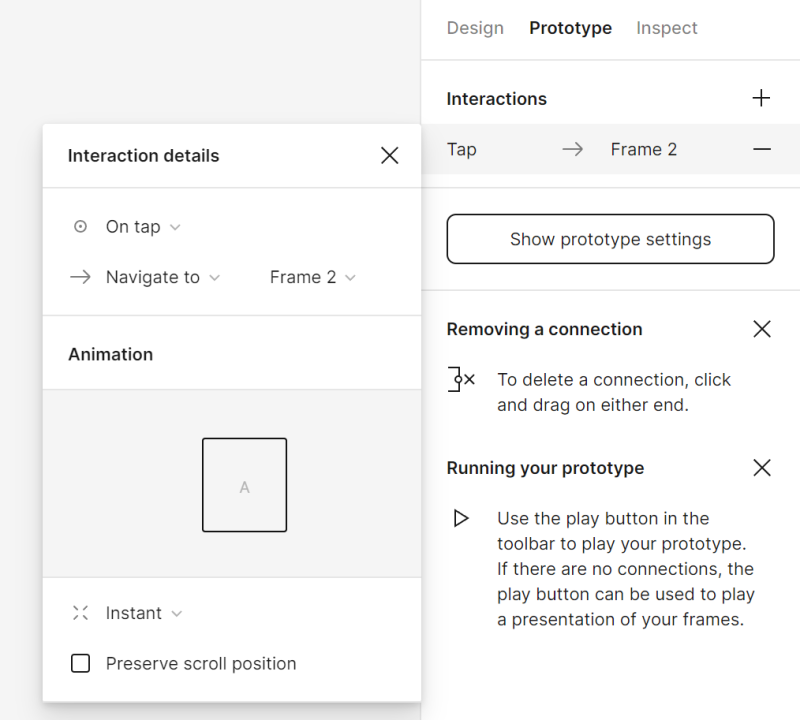
a) Interaction details – specifies the type of interaction (On tap, On drag, While hovering, While pressing) and what the interaction should cause (Navigate to, Change to).
b) Animation – here you can specify how the element should behave after the interaction.
To remove the connection, click and drag on both ends.

Sharing prototypes
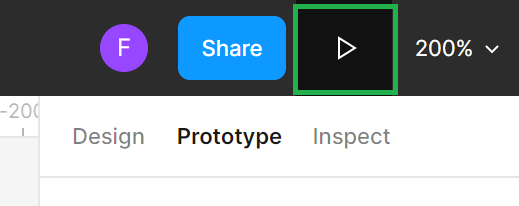
To share a prototype, you must first preview it with the Present button. In the prototype preview, the Share prototype button in the Toolbar will be available.

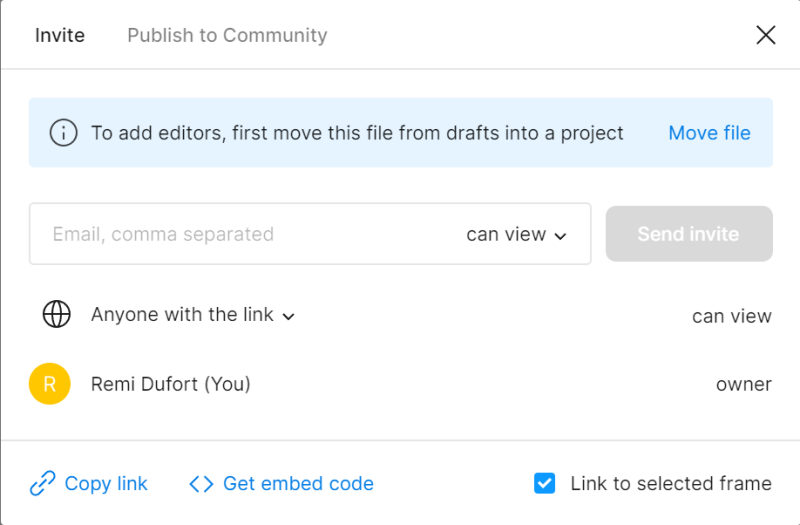
When you click the Share prototype button, a window opens where you can set the access level (Can view, Can edit) and specify who can open the file (Anyone with the link, Only people invited to this file).
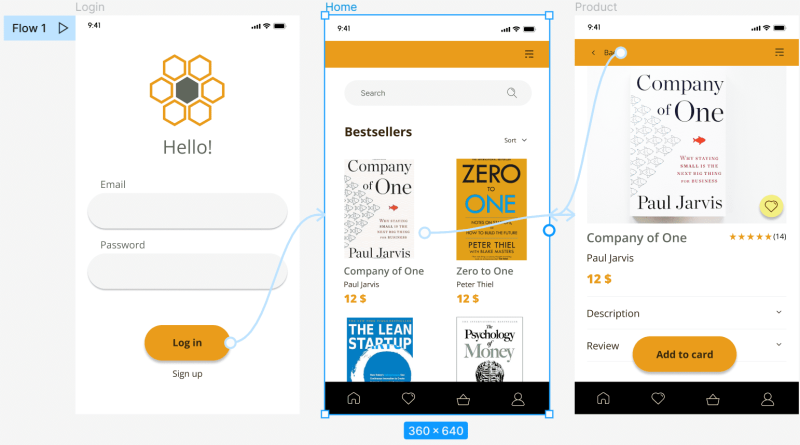
Task 7. Add connections between your screens.
- Link the “Log in” button to the Home frame.
- Link the photo and product name that are in the Home frame to the Product frame.
- Use the “Back” button and create a connection to return to the Home screen.
After adding connections, you can preview them with the Present button and check how your prototype works.
You’ve just learned more about prototyping in Figma. Other resources: What is UX research?
If you like our content, join our busy bees community on Facebook, Twitter, LinkedIn, Instagram, YouTube, Pinterest.
Author: Klaudia Kowalczyk
A graphic & UX Designer which conveys into design what cannot be conveyed in words. For him, every used color, line or font has a meaning. Passionate in graphic and web design.
