In this article we will discuss the elements of the Figma interface. Getting acquainted with the interface at the beginning will make your later work much easier. We will discuss the file browser and application interface when editing a file. Read on to find out more.
Figma interface – table of contents:
File browser interface in Figma interface
The first thing that you’ll see after logging in to Figma will be the File browser, which will allow you to navigate your account. From here, you can access your projects, teams, and resources. The file browser interface consists of 3 sections: Navigation bar, Sidebar and Files.
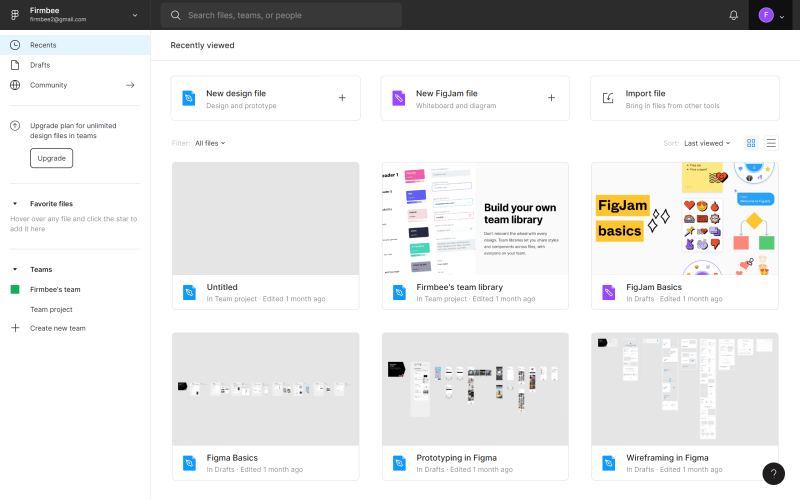
1. Navigation bar is located at the top of the screen and allows you to perform certain actions at the account level.

A) User name – here, the name of the active user is displayed. When clicked, you can switch between the accounts you are logged into on a particular device.
B) Search bar – in this section, you can quickly search for projects, coworkers, and files by name.
C) Notifications – this is where notifications will appear about everything that will happen on your account.
D) Account menu – here you can manage your account settings and installed plugins.
Useful tip: If you are using the Figma desktop app, you can easily switch between projects and the file browser. Projects open as new tabs, and the file browser is marked with the Home icon.
2. Sidebar – this is the interface area located on the left side of the screen. It allows you to navigate through files and prototypes.

Recents – in this tab the files and prototypes you have recently viewed or edited are displayed first.
Drafts – here you will see all the draft versions you have created. Additionally, you will find the Deleted tab where you can view archived files.
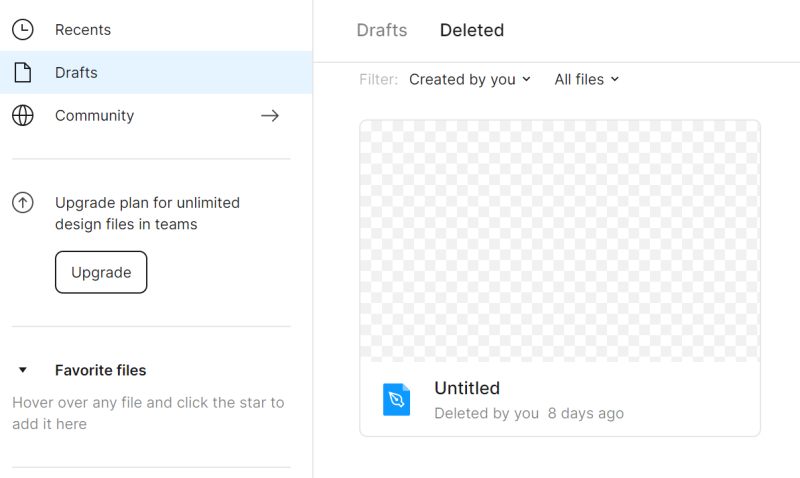
You can restore or permanently delete already deleted files – right-click on the file to see these options.

Community – this is a space where you can browse files and plugins shared by other Figma users. We will return to this section in our next blog post.
Teams – here you will see all the teams that you belong to.
3. Files – in this section, all your files will be displayed.
For each page in the File browser, you can choose how to display the files: Show as grid or Show as list. By default, the grid view is set.

Files may be filtered and sorted according to your needs.


Above the list of files in the Recents and Drafts tabs, there are buttons for adding files: New design file or New FigJam file. Each file type has its own set of features and tools.
Design files will let you create your interface designs.
FigJam files are digital whiteboards used for, among other things, online meetings and workshops.

Task 2.1. Get acquainted with the File browser interface in Figma and open your first project. Use the New design file button.
File interface
Your user interface when editing a file in Figma consists of four sections: Canvas, Toolbar, Layers panel, Properties panel.
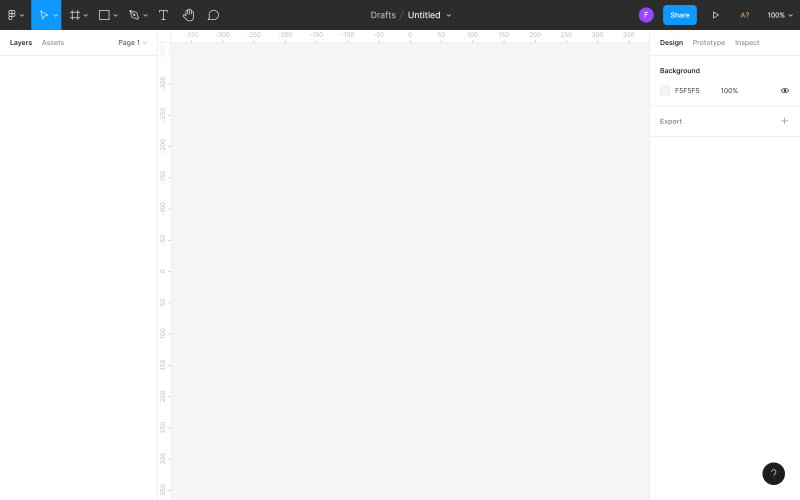
1. Canvas is the main area, located in the center of the screen. This is the space where you will work.
2. Toolbar is the bar located at the top of the screen. Here you will find the necessary tools and functions you need to design interfaces.

a) Main menu – in this place you have access to the list of all functions in Figma. Keyboard shortcuts are also displayed on the list.
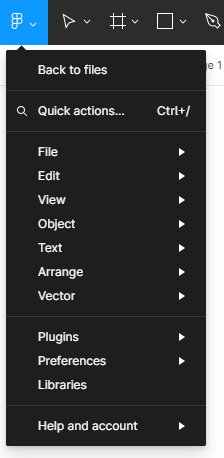
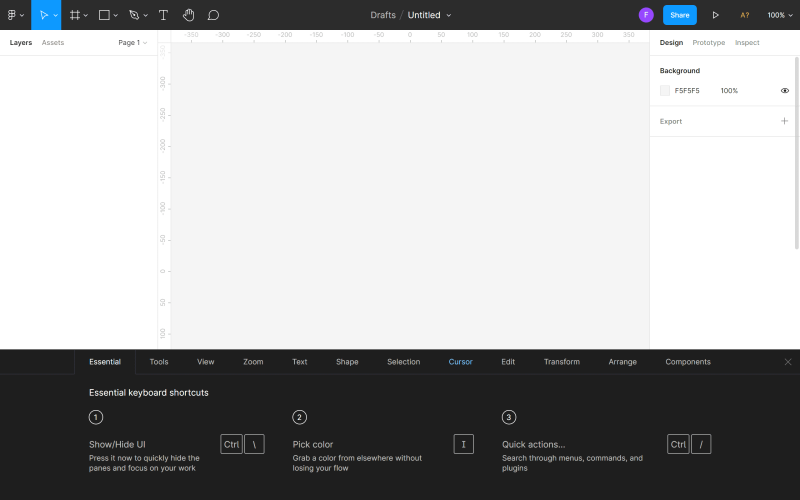
Useful tip: You can view all Keyboard shortcuts in a special panel. In order to switch it on, click on the Main menu > Help and account > Keyboard shortcuts.
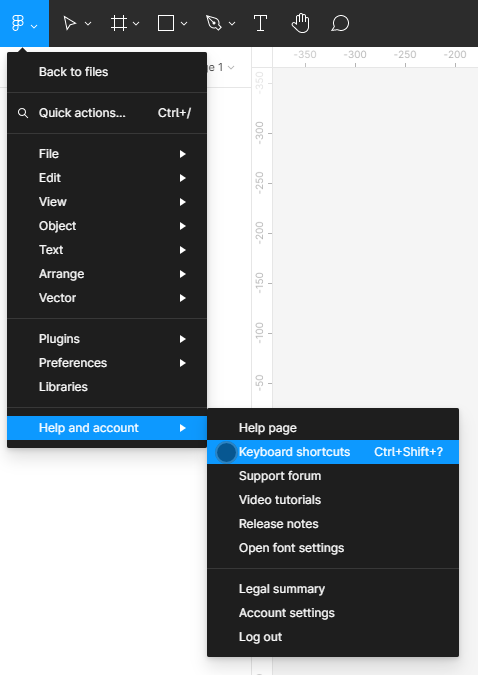
The Main menu contains the following options:
- Back to files – it moves you to the File browser.
- Quick action – here you can search for functions you need by name.
- File – it lets you Save and Export files.
- Edit – here you will find basic functions for editing files, such as Undo, Redo, Copy, Paste and advanced functions for selecting objects.
- View – it allows you to control the Grids and Rulers view settings, it also contains functions for zooming and navigating within a file.
- Object – here you’ll find all the functions needed to work with objects.
- Text – it allows you to format text (Bold, Italics, Alignment) and create Bulleted and Numbered lists.
- Arrange – it lets you organize objects using many variants of Align and Distribute functions.
- Plugins – here you can manage installed plugins. Plugins extend Figma’s functionality and make the design process easier.
- Integrations – using this function you can share your designs in connected applications.
- Preferences – here you can customize Figma’s settings, when it comes to dragging objects and the visibility of selected elements.
- Libraries – this module will contain components and styles that you can use in your file.
b) Move and scale tools
- Move tool lets you move objects in Canvas and reorder layers in the Layers panel.
- Scale tool allows you to resize layers without distorting them.
c) Frame and Slice tools
- Frame tool lets you choose the screen size of the device you will be designing on.
- Slice tool allows you to export a specific part of the screen to a new layer.
d) Shape tools – here you will find basic geometric shapes and the Place image function.
e) Pen and Pencil tools
- Pen tool is used to create custome shapes.
- Pencil tool allows you to add hand-drawn images.
f) Text tool – it creates text layers.
g) Hand tool – it allows you to move around the project and click within the file without selecting and moving objects accidentally.
h) Comment tool – it allows you to quickly exchange ideas with team members.
i) File name – here you can see and change the location of the file or its name.
j) Users – here you’ll see the people who are currently viewing or editing a file.
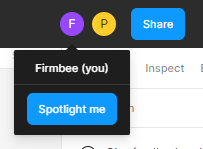
Useful tip: When you work in a team, you can click on another user’s avatar to enable the observation mode and track their actions in real-time. The canvas and avatar of the tracked user will be marked with a colored frame when the Observation mode is on.
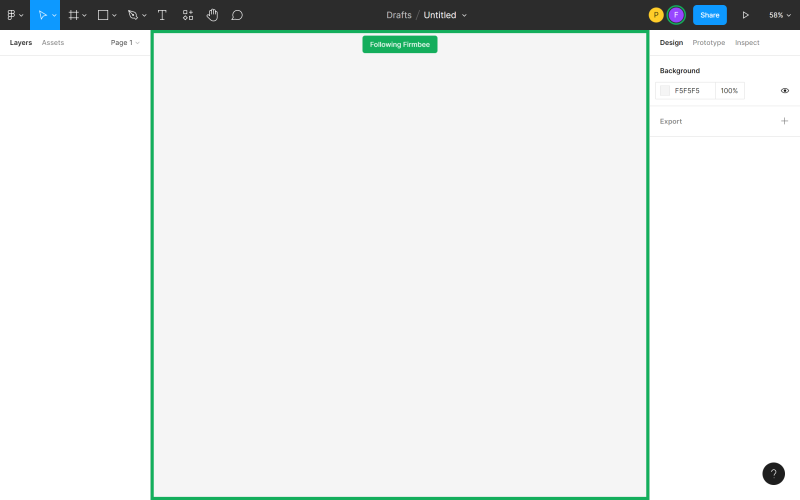
You can also make yourself more visible so other team members can easily track your actions. Click on your avatar and select Spotlight me.

k) Share settings – here you can manage other users’ access to the file.
l) Present – this option allows you to preview the file and interact with the created prototypes.
m) Zoom/view options – here you can quickly adjust the file view options.
3. The layers panel is the area on the left side of the screen. He4re all components and layers of the file will be displayed.
a) Layers – here you will see all objects added to the Canvas. Each object is a separate layer. Next to each layer you will see an icon that indicates its type.

You can change the name of the layer by double-clicking on the selected layer in the Layers panel.
Useful tip: It’s not easy to remember about changing the names of default layers, but try to bear it in mind. This will keep your file in order and make it easier to find a specific element when you want to edit it. However, if you still happen to forget about it, nothing is lost. There are plug-ins such as “Clean Document” that will help you clean up the mess.
New object layers are placed in the parent frame or group. This makes it possible to collapse and expand the view of the frame and group layers.

You can lock and unlock each layer. To do this, click on the Padlock icon that appears next to the layer name when you hover over the layer. You will be able to distinguish locked or invisible layers very easily from other layers, as they will be marked with a suitable icon.
Useful tip: The possibility to lock layers is very useful, especially when some of them are in the background. This will help you avoid moving elements accidentally.
Here you can also switch off and on the visibility of the selected layers. To do this, click on the Eye icon. You can very easily differentiate between locked and disabled layers on the list of layers – they are marked with suitable icons.

b) Assets – In this tab you will see the components that you can use in your file. These can be icons, buttons, or other more complex user interface elements. To find a specific component use the search box. Components can be searched for in the current file and the libraries, you have access to.

c) Page – You can add an unlimited number of pages in each file. Each page has its Canvas backdrop, so you can create separate prototypes in one file.

Useful tip: You can adjust the width of the Layers panel. To do so, grab the right edge of this panel – your cursor will turn into a white double arrow. Then drag the edge until you get your preferred width.
4.Properties panel is the area on the right side of the screen, which consists of three tabs: Design, Prototype, Inspect.

a) Design – here you can view and adjust the properties of all layers: frames, shapes and texts.
b) Prototype – here you will find the settings of the prototype and connections between elements in the file.
c) Inspect – in this tab you can see how to put the individual objects of your project in code. The available formats are: CSS, Android and iOS.

Task 2.2. Get familiar with the file interface in Figma. Make sure you already know the names of the main elements of the interface so that it will be easier for you to navigate through the file when doing practical tasks.
That’s all you need to know about Figma interface. Check out our other articles: Scaling scrum.
If you like our content, join our busy bees community on Facebook, Twitter, LinkedIn, Instagram, YouTube, Pinterest.
Author: Klaudia Kowalczyk
A graphic & UX Designer which conveys into design what cannot be conveyed in words. For him, every used color, line or font has a meaning. Passionate in graphic and web design.
