This is part 4 of the JavaScript blog post series that will take you from beginner to advanced. By the end of this series you will know all the basics you need to know to start coding in JavaScript. Without further ado, let’s get started with the fourth tutorial.
Snippets and control structures – table of contents:
In this blog post we will continue with where we left from the third blog post. At this stage you should have your Google Chrome browser open and more specifically have your JavaScript console open. If you for some reason closed them, it would be a good time to open them back up.
If you are on a Mac, the keyboard shortcut to open up the console is to press “Option + Command + J”, after you open up Chrome. If you are using a Windows device, you can use the keyboard shortcut of “Control + Shift + J”, to open up the JavaScript Console, once you open up Chrome. Or you can also go to the menu at the top and go to View -> Developer -> JavaScript Console.
Upgrading our coding set up to snippets
Until this point in the course, we could have written everything line by line and executed it line by line. It wouldn’t be the most convenient way to run things, but it would work nonetheless. Starting with this tutorial, we will write code that takes multiple lines of code to create a complete set of instructions. In order to achieve that we will use something called “snippets” in Google Chrome. Without further ado, let’s upgrade our setup from JavaScript console to Chrome snippets.
Currently you should have your console open, and if you followed the previous tutorials you should have a screen that looks like this:
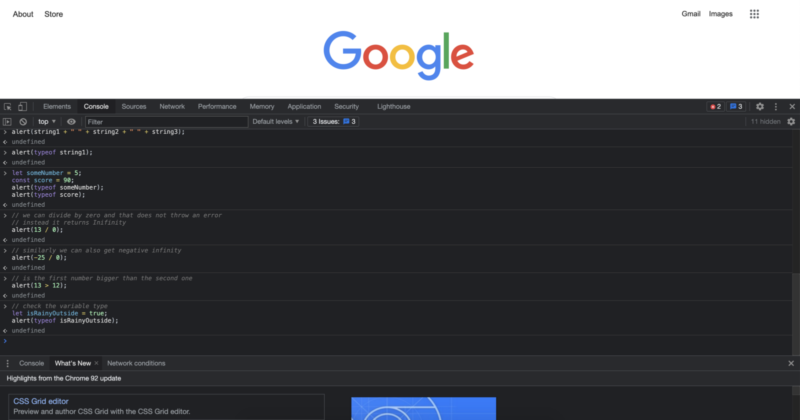
When you look at this screen, or your screen for that matter, you should see: Elements, Console, Sources, Network, Performance, Memory, Application and so on written next to each other at the top bar of the dark area. If you are seeing them in lighter colors, that’s completely fine too. It means that you are using the light mode, which can be the default mode for day time. The screen that I show currently uses the color scheme for dark mode in Chrome console settings. If you see the Elements, Console, Sources, Network and so on showing up, in either color scheme, you are good to go.
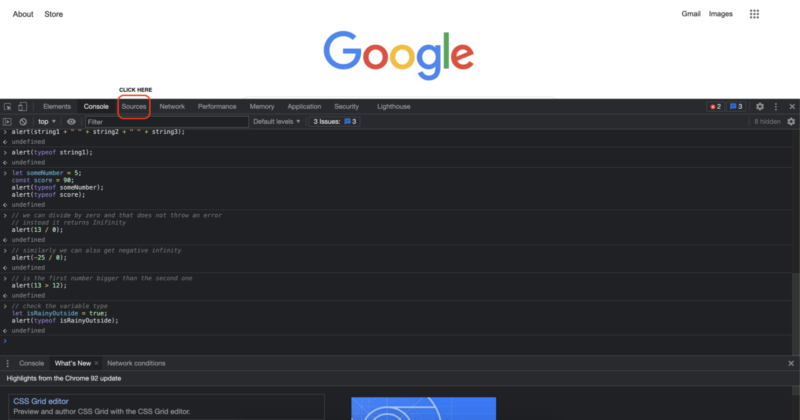
If you take a closer look at the top bar of the console, you can see that the writing of “Console” looks slightly at a different color. Go ahead and click “Sources” right next to it.
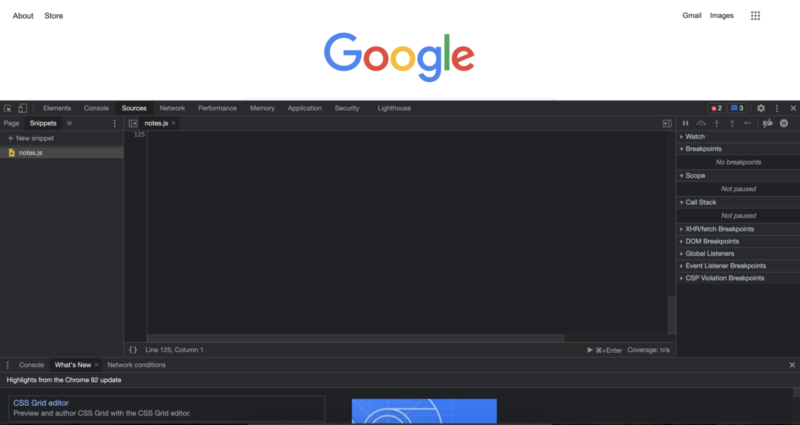
Once you click on sources you should be looking at a screen that somehow looks like this.
One difference you might expect if that you probably won’t see the “notes.js” file, as I have created it previously. Other than that it should look pretty similar to this. To create a new file click on the “+ New snippet”. Once you click on it, it will create a new JavaScript file for you and you can name it however you like. In this tutorial we will name it “index.js” as it is a common practice to name the first or the primary file as “index.js”.
If you want to follow this tutorial word to word, after clicking on “+ New Snippet”, you can enter the name “index.js” and hit the enter key on your keyboard. Now we can click inside the opened file on the major area that opened up, to start coding JavaScript.
Let’s start with something that we already know that works. And that is:
alert("Hello, World!");
You can either write it out yourself for extra practice or copy and paste the code part to the file we created. I highly recommend typing it out yourself as this is how you learn it in many cases. Once you type it, if you hit the enter key, you will see that the code is not executed. Instead your cursor will just go to the next line, as with any other text editing area. There are two main ways we can execute our code. First one is to click on the play button that is located at the bottom right corner.
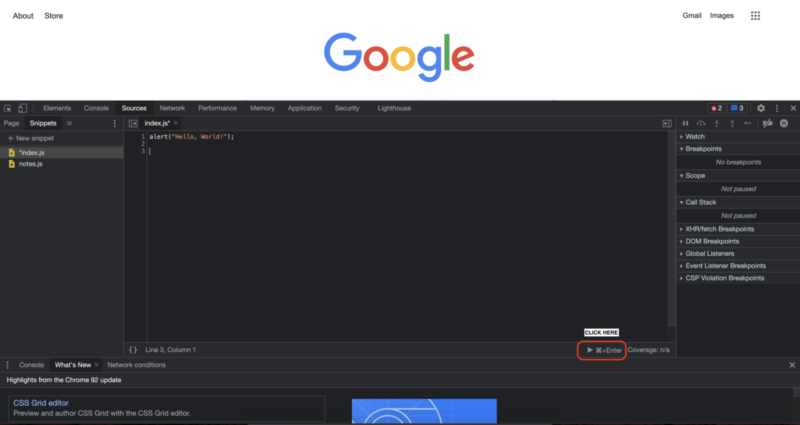
If you click on that play button, it should execute our code and display us the results.
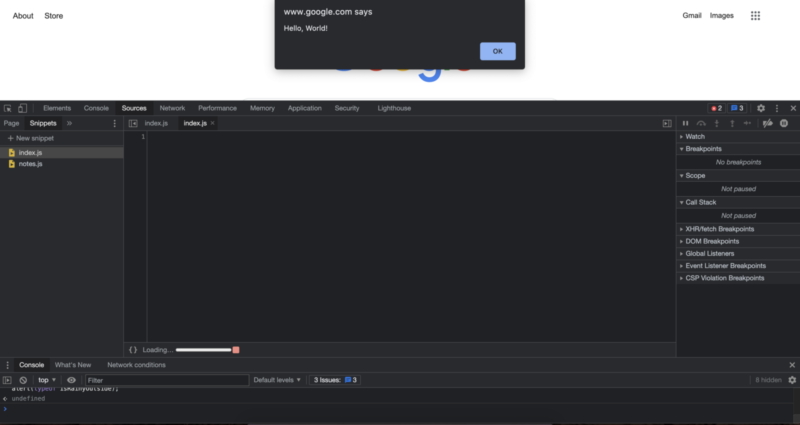
Once you click “OK”, let’s also run our code using the other main way. The second main way to run your code, or run your snippet is to use the keyboard shortcut. As we can see, it already shows us the shortcut when we click on the run button. That keyboard shortcut is “Command + Enter”. To do that, we can press the Command key and then hit the Enter key. Doing that will also run our code and give us the same results as clicking on the play button.
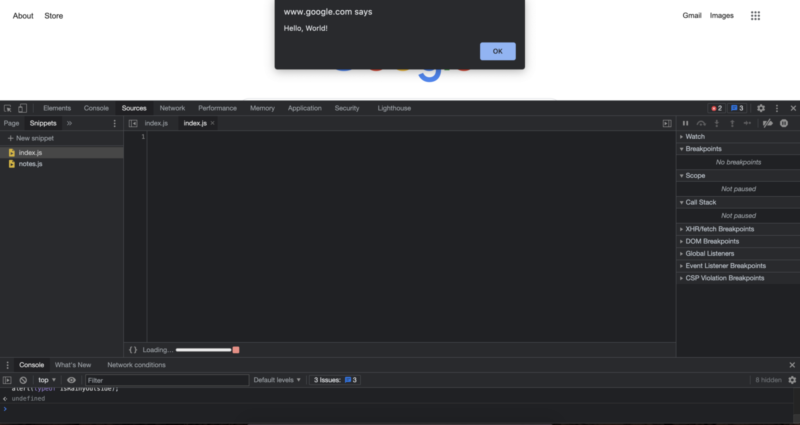
And with that, now you know the two ways to execute our JavaScript code in the Chrome snippets.
If you want to create new files to maybe takes notes about JavaScript, or to practice some JavaScript code, you can always create new files by clicking the “+ New snippet” and name your files as you like. Now that we have our new coding set up ready, lets see some more JavaScript.
Control structures
When we write code, we have to account for many scenarios and actions the user can take. This preparation for different scenarios can come from different sources such as the device our code runs, screen size to be displayed, different types of browser the user might have and so on. But how do we make sure we can be prepared for different scenarios? If you write different codes one after another, would executing all of them makes sense to the user? To answer all of that and more, we will use control structures.
Control structures allow us to guide the execution of the code, so that our code can adapt to different conditions. There are multiple common elements used for control structures. In this tutorial we will start with the simplest one and move from there. The first one we will see uses If, else, else if statements to control the execution of the code.
If, else and else if
This is the simplest control structure to get started with. What it allows us to do is to execute some piece of code if a certain condition is true, and execute another piece of code if another condition is true. Let’s see that with an example. Let’s assume that, if it rains outside, I will take my umbrella with me. Otherwise, I won’t take an umbrella. We can translate the exact logic and reasoning to code as follows:
(Before writing this code we will comment the code from the previous code we have in the file by placing two forward slashes in front of it, so it does not get executed, but you still have a copy of it. After adding the forward slashes it should look like this:)
// alert("Hello, World!");
let rainy = true;
if (rainy){
   alert("Take an umbrella");
} else {
   alert("No need for an umbrella");
}
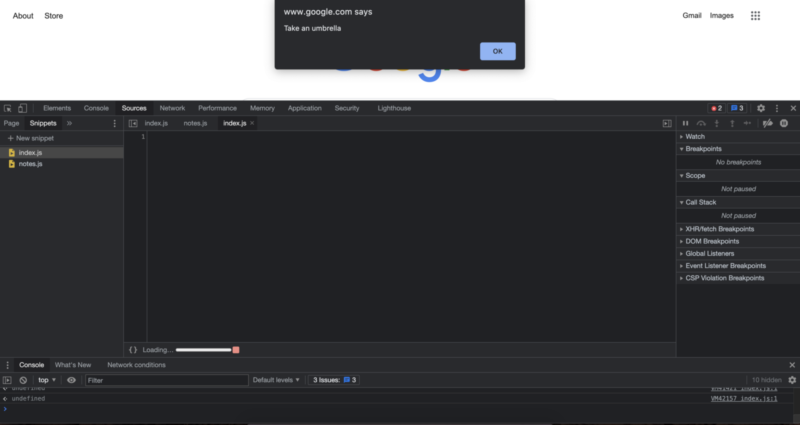
Running this code would give us the following output:
// alert("Hello, World!");
let rainy = false;
if (rainy){
   alert("Take an umbrella");
} else {
   alert("No need for an umbrella");
}
Whereas running this version of the code that says there is no rain, would give the following output:
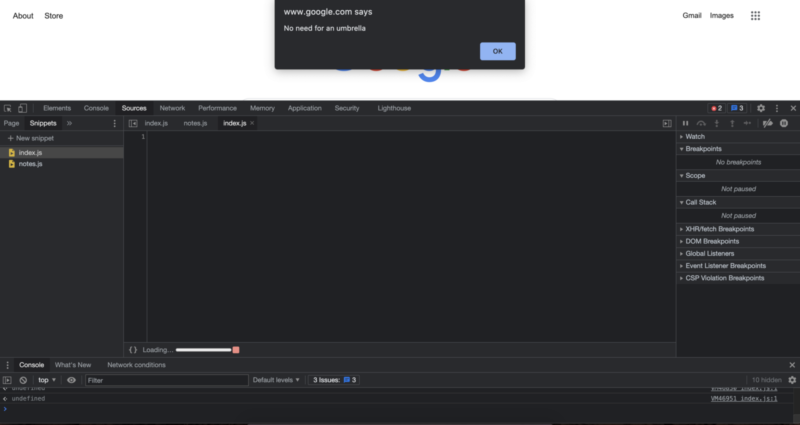
When you are typing out the code to make changes to the code file, if you take a closer look at the file name, you will see that it will have an asterisk before the file name. This means that the code file we write is not fully saved. This may not make a large difference if you are writing only couple lines of code that you can always write, but more often than not you will want to save your code, so that you can reuse or review it later on. We can save this code file the same way we save other files, so that would be “Command + S” on Mac and “Control + S” on Windows.
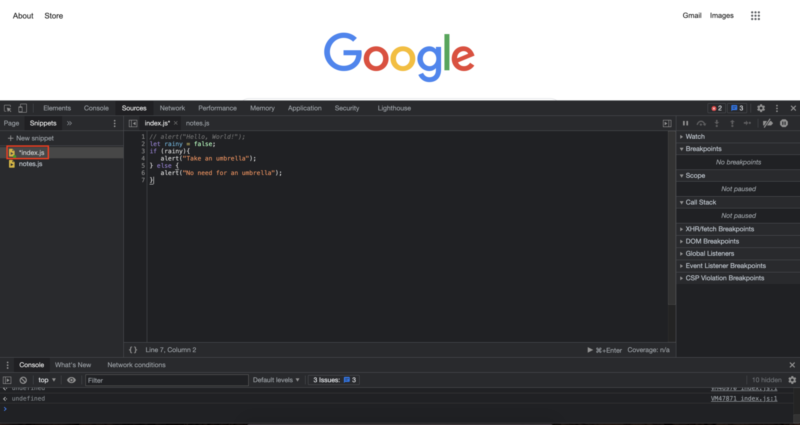
In our case, because we are executing our code right after writing it, it automatically saved our file when we execute the code. So if you are going to write some code and leave it for hours, it is good idea to save your code every now and then to make sure you are not losing any significant progress.
It is great that we can have our code adapt to a binary condition using an If and an else statement, but what it we have multiple things to consider, which will most likely be the case in real life. For example, what if it is cold and you need to get a hoodie when it is cold. One way we could do that would be an “else if” statement and we can do it as follows:
// alert("Hello, World!");
let rainy = false;
let cold = true;
if (rainy){
   alert("Take an umbrella");
} else if (cold) {
    alert("Get a hoodie with you, not an umbrella");
} else {
   alert("No need for an umbrella");
}
The output of this code would look like this:
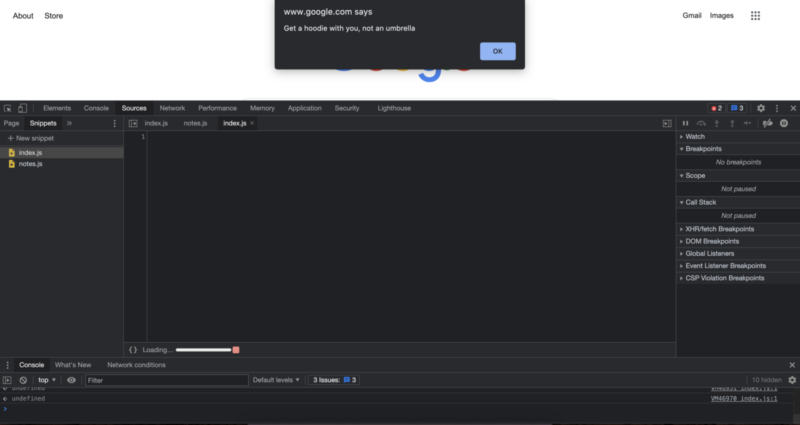
So if a certain condition is true, the first code that is in between the parentheses will be executed. In our case, since the first condition checks for rain, we will alert the user that they should take an umbrella. If that condition is false, meaning that there is no rain, we will keep checking for other conditions by using an “else if” statement. One thing that is significantly different from the “else if” statement is that, we can check for as many condition as we like with else if statements.
The important thing to remember here is that, your code will be checked from top to bottom, for correctness or trueness. Meaning that with the current code, if the weather is both rainy and cold, it will not recognize the cold weather, since the first statement is correct. We can also verify this by changing the code to have both rainy and cold conditions.
// alert("Hello, World!");
let rainy = true;
let cold = true;
if (rainy){
   alert("Take an umbrella");
} else if (cold) {
    alert("Get a hoodie with you, not an umbrella");
} else {
   alert("No need for an umbrella");
}
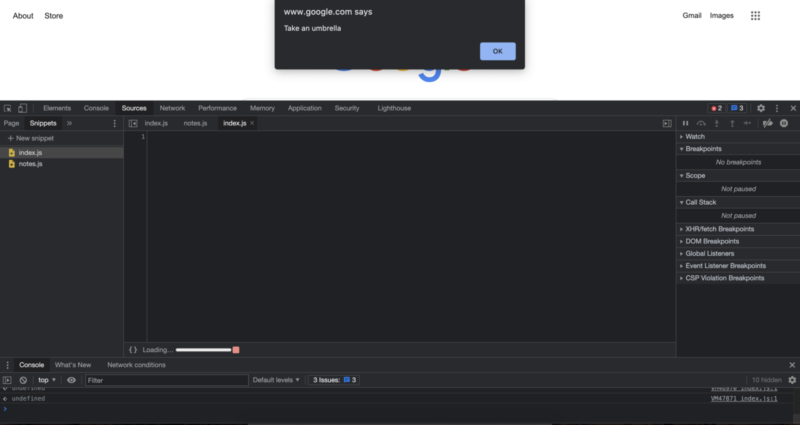
Now you may be wondering, how can I solve this? Which one is more important, the weather being cold, or being rainy? Should you pick one condition and sacrifice the other condition? Do you even have to make such a choice? Well, not really. This is a very common problem and it has a very common and relatively simple solution. We can use an “and” expression to cover multiple scenarios. To tell JavaScript that we want to use an “and” to connect our programming logic, we will use two of this symbol: “&”. And because our code is checked from top to bottom, we will use the most comprehensive option to the first if statement. The updated code then, looks like this.
// alert("Hello, World!");
let rainy = true;
let cold = true;
if (rainy && cold) {
    alert("Wear a hoodie and take an umbrella with you.")
} else if (rainy){
   alert("Take an umbrella");
} else if (cold) {
    alert("Get a hoodie with you, not an umbrella");
} else {
   alert("No need for an umbrella");
}
Running this code would give you an alert that looks like this:
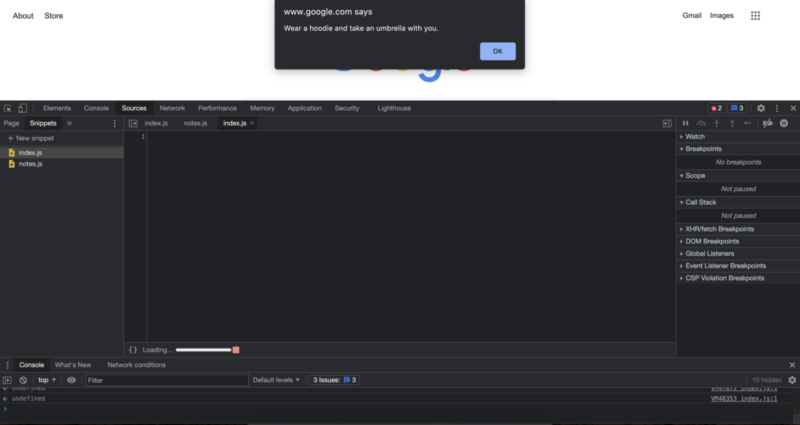
Much better. Now we can combine multiple different scenarios, including different combinations of these scenarios. But what if we want to consider a scenario that is not cold but rainy. And assume that we want to tell the user to not to get a hoodie specifically, and to only get an umbrella. To do just that, we can use the logical “not”, we can use it in our code with the exclamation mark before the condition we want to specify. Let’s add that condition to our code so it is more complete.
// alert("Hello, World!");
let rainy = true;
let cold = true;
if (rainy && cold) {
    alert("Wear a hoodie and take an umbrella with you.")
} else if (rainy && !cold){
   alert("Take an umbrella, but not a hoodie.");
} else if (rainy){
   alert("Take an umbrella");
} else if (cold) {
    alert("Get a hoodie with you, not an umbrella");
} else {
   alert("No need for an umbrella");
}
When we are adding a new condition to an if else tree, as long as it is the more comprehensive condition we can place it somewhere at the top. This way, we have much less chance for errors compared to the opposite approach. One side affect of injecting new code to existing code is that some of the code may become redundant or may not work in the most efficient way. We will not heavily focus on the efficiency part, but for now we can see that we cover both the cold and not cold conditions for a rainy weather, so we can optionally remove the condition that just checks for “rainy” condition. Doing this code adjustments is also called “Code Refactoring”, in the refactoring process the point is the make code incrementally more clean and efficient.
// alert("Hello, World!");
let rainy = true;
let cold = true;
if (rainy && cold) {
    alert("Wear a hoodie and take an umbrella with you.")
} else if (rainy && !cold){
   alert("Take an umbrella, but not a hoodie.");
} else if (cold) {
    alert("Get a hoodie with you, not an umbrella");
} else {
   alert("No need for an umbrella");
}
When we want to check for an either condition to be true, we can use the “or” operator, which is the pipe symbol used twice on your keyboard and looks like this “||”.
Let’s see an example to that with another example. To add more examples to the same file without interfering with the new commands, we can comment out the previous code we used by wrapping the previous code inside these symbols that we have seen before:
/*
*/
Which is a forward slash an asterisk and the same symbols in the opposite order to close of the commented part. Let’s wrap our current code inside these symbols so that they do not interfere with the new code to be come. Now your code file should look like this:
// alert("Hello, World!");
/*
let rainy = true;
let cold = true;
if (rainy && cold) {
    alert("Wear a hoodie and take an umbrella with you.")
} else if (rainy && !cold){
   alert("Take an umbrella, but not a hoodie.");
} else if (cold) {
    alert("Get a hoodie with you, not an umbrella");
} else {
   alert("No need for an umbrella");
}
*/
From now on we will focus on the new parts we are adding to the file, so that we can focus on learning one thing at a time. You can optionally keep the previous code in the commented mode, move them to a new file for your references, or if you don’t want to see it any longer, you can delete it for a cleaner file.
Let’s continue with our example to an “or” case. Consider a scenario where you visit your fridge for food and drinks every time you feel hungry or thirsty. How would the code work for that?
let hungry = true;
let thirsty = false;
if (hungry || thirsty) {
    alert("Go to the fridge and check what you have in there.");
}
Executing this code, as you also probably have guessed it, would give us the following result:
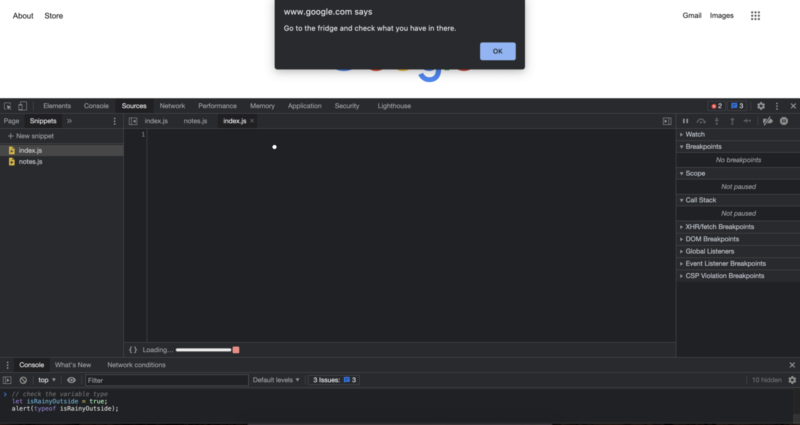
Until now the examples we used came from close to real life scenarios, but a lot of the time you will be dealing with numbers in code. You have seen numbers previously in this series, but we did not talk too much about the comparison or the operations we could do with them. Now that we learned about if else statements, let’s see some more about numbers.
When we are dealing with if, and else if statements we are checking for trueness of a statement. But can we also make a meaningful if statement if all we have is numbers? For example, what if I want to get an umbrella if there is more than 50% chance of rain, can we achieve that with code? Yes we can, and here is how it would go.
let chanceOfRain = 70;
if (chanceOfRain >= 50) {
    alert("Get an umbrella.");
}
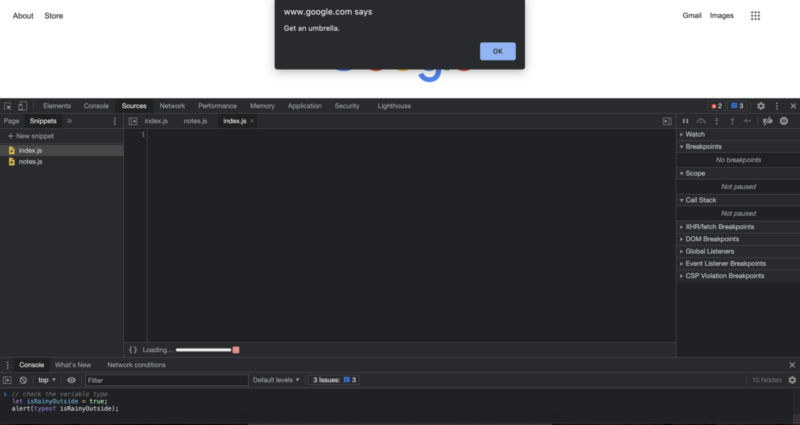
When we are dealing with numbers, we need a way to convert it to some kind of trueness or falseness for the if statement to work. There are multiple ways we can achieve that depending on our use case.
For example, we can check if two numbers are exactly equal to each other with three equal signs like this:
let a = 10;
let b = 10;
if (a === b) {
    alert("They are the same.");
}
This would give us the alert that says “They are the same.”.
We can also check for not being equals with the following code:
let a = 10;
let b = 5;
if (a !== b) {
    alert("They are not the same thing!");
}
Running the code above will give us the alert that says “They are not the same thing!”.
We can also check for specifically which one is greater, greater equal, smaller or smaller equal. You can find a summary of the signs for your convenience.
// === checks for equality
// !== checks for not equality
// > greater than
// >= greater than or equal to
// < smaller than
// <= smaller than or equal to
Lets also see couple more of them for extra practice and code exposure. Here are couple of example codes that will all display the alert they have inside the if statements:
Greater than:
let a = 10;
let b = 5;
if (a > b) {
    alert("a is greater than b");
}
Greater than or equal to:
let a = 10; let b = 5; if (a >= b) { alert(“a is greater than or equal to b”); } [/code]Another example to greater than or equal to:
let a = 10;
let b = 10;
if (a >= b) {
    alert("a is greater than or equal to b");
}
Smaller than:
let a = 5;
let b = 10;
if (a < b) {
    alert("a is smaller than b");
}
Smaller than or equal to:
let a = 5;
let b = 10;
if (a <= b) {
    alert("a is smaller than or equal to b");
}
Another example to smaller than or equal to:
let a = 10;
let b = 10;
if (a <= b) {
    alert("a is smaller than or equal to b");
}
Using a combination of these comparison or equality signs, we can create complex codes that can adapt to different conditions.
Arithmetic operations
When we are dealing with numbers another thing we want to perform is arithmetic operations. Most of the arithmetic operations should be pretty familiar but there are also programming specific arithmetic operators that might be less familiar.
Here is a summary of the arithmetic operations we use in JavaScript with their meaning for your convenience:
// * multiplication
// / division
// + addition
// - subtraction
// % modulo operation, gives us the remainder after division
// ** exponentiation
The first four will work as you expect:
let a = 12;
let b = 5;
let c = a * b;
// c will be 60
c = a / b;
// c will now be 2.4
c = a + b;
// c will now be 17
c = a - b;
// c will now be 7
The modulo operation will give us the remainder after dividing the first number to the second number. If we continue with the previous a, b and c code:
c = a % b;
// c will now be 2
c = 18 % 5;
// c will now have the value of 3
// because 18 divided by 5 will give us the remainder of 3
The exponent operator performs exponentiation in JavaScript. It is represented with two asterisks sign and takes the first element to the power of second element.
c = 2 ** 3;
// c will now have the value of 8
// because 2 * 2 * 2 equals 8
This was a relatively long tutorial, and you made it! We have upgraded our coding setup and learned quite a lot in this tutorial. In the next tutorial, we will continue with more ways to control the flow of our code!
Author: Robert Whitney
JavaScript expert and instructor who coaches IT departments. His main goal is to up-level team productivity by teaching others how to effectively cooperate while coding.
