Shopify is a Canadian e-commerce platform that operates on a SaaS model or subscription basis. This means that after purchasing a certain monthly (or annual) package, a store owner can run his online store. According to statistics, the site is used by more than 1.7 million merchants, mostly from the United States. The number of customers who have purchased from Shopify stores was 457 million in 2020. In today’s article, we will show you how to open a Shopify store in 6 easy steps.
How to open a Shopify store – table of contents:
- Store creation and configuration
- Selecting a store template
- Setting metadata
- Domain configuration
- Experts Marketplace
- Navigation, pages and blogs
Store creation and configuration
- Creating an account
- Store configuration
- General – company data, time zone settings, weight unit selection and currency,
- Notifications – notifications sent to customers (e.g. order confirmation), marketing notifications, etc..,
- Shopify Markets – information on international trade,
- Payments. Shopify provides the Shopify Payments service, which makes it easier for merchants to accept online payments because they don’t have to set up a third-party provider themselves. Unfortunately, this service is only available in the following countries:
- Australia,
- Austria,
- Belgium,
- Canada,
- Denmark,
- Germany,
- SRA Hong Kong,
- Ireland,
- Italy,
- Japan,
- Netherlands,
- New Zealand,
- Singapore,
- Spain,
- Sweden,
- The United Kingdom,
- United States
- Gift cards,
- Store language,
- Check out – the process of placing orders. At this stage, the store owner can decide:
- Whether the buyer must register before making a purchase,
- What buyer data is needed to make a purchase (e-mail/phone number),
- What information the buyer must provide in the form,
- Whether the delivery address is the same as the mailing address,
- Whether the vendor gives you the option to sign up for a newsletter.
- Files,
- Billing – the billing cycle is 30 days and includes subscription fees, shipping labels, transaction fees together with application fees. Tax registration information can also be managed here,
- Shipping and delivery – in this tab, you can set the dimensions and weights of shipments, and delivery methods and optionally pick up orders at the stationery store,
- Sales Channel – sales channels help reach new customers, using, for example, Facebook, Google, or Pinterest,
- Legal pages – the store owner is on the obligation to prepare rules and regulations, and it is best to consult a lawyer. The seller can apply ready-made templates in English or create documents concerning: the return policy, privacy policy, terms of service, shipping as well as legal notice. Such terms and conditions should also include information about the vendor’s intention to install a user tracking pixel, which it will use, for example, to analyze Google Analytics data,
- Taxes – in this tab, you can calculate sales tax according to location of the store,
- Plan – here you can edit the subscription plan selection,
- Metafields – with metafields store owners can customize the look and functionality of their Shopify store. It works by saving information that is unlikely to be recorded in the admin panel. They can be added to products, customers, orders and other elements of the store. For example, meta pool can contain information about: part numbers, related products, downloads, etc…,
- Locations – a store owner can configure the location from which he sells products, ships them, stores inventory and fulfills orders,
- Users and permissions – in this tab you can manage the users associated with the organization by clearly defining their roles. Each role contains information about the permissions that users assigned to.
Any user can test the Shopify platform for free for 14 days. To take advantage of this opportunity, go to the shopify.com homepage and press “Start free trial.“
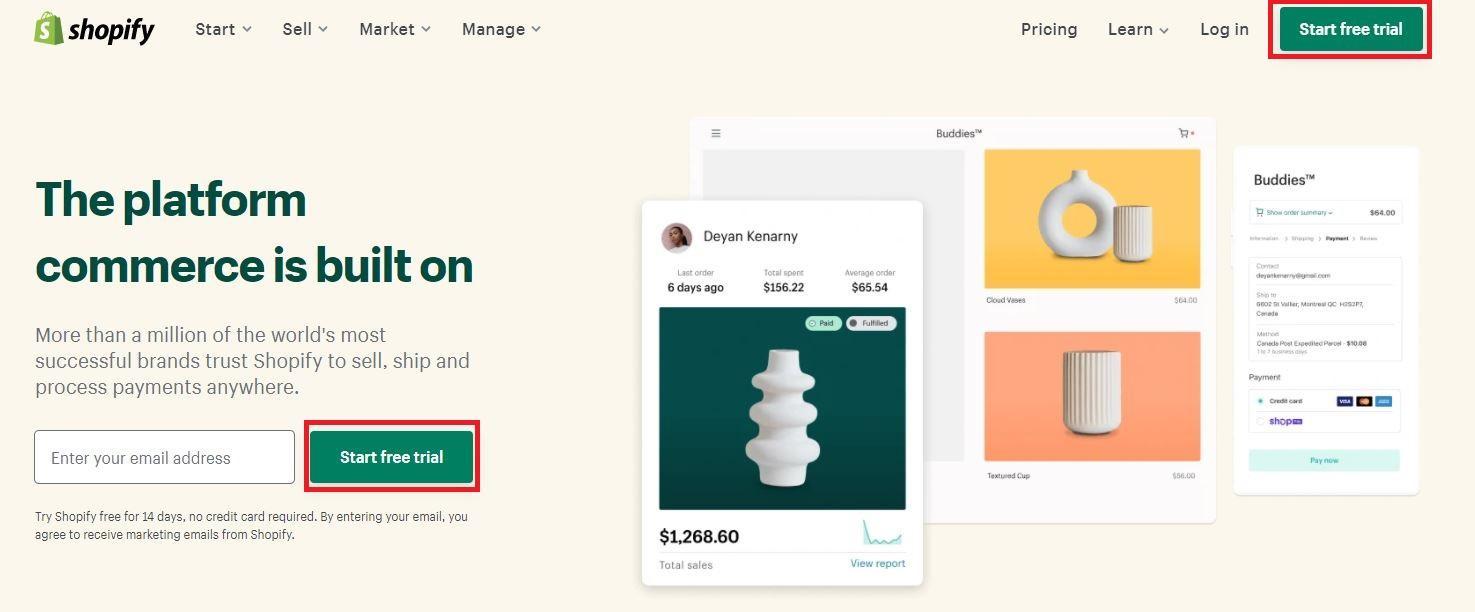
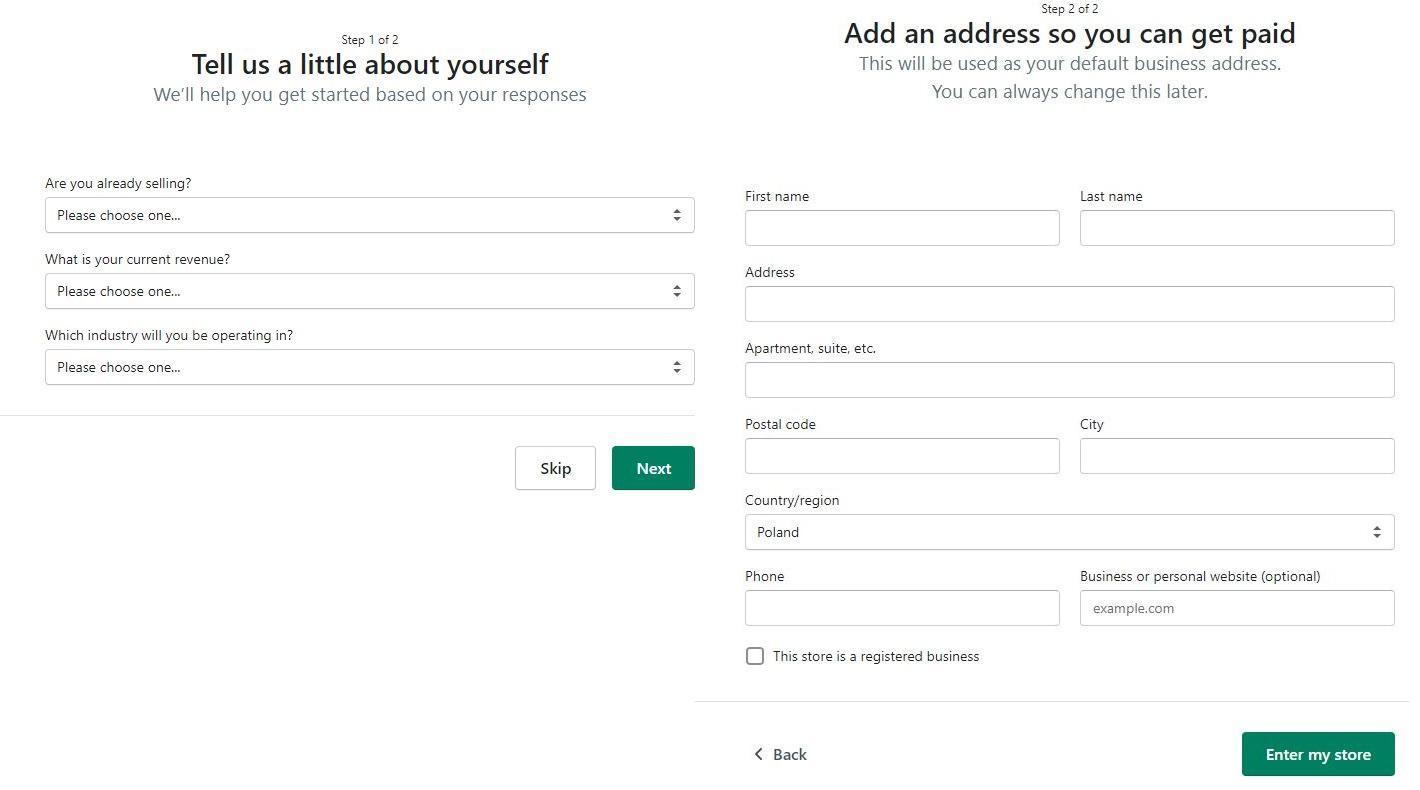
In the next step, you need to enter your e-mail address, password and store name. In the next step, a short questionnaire will be displayed, in which you should provide basic information about yourself.
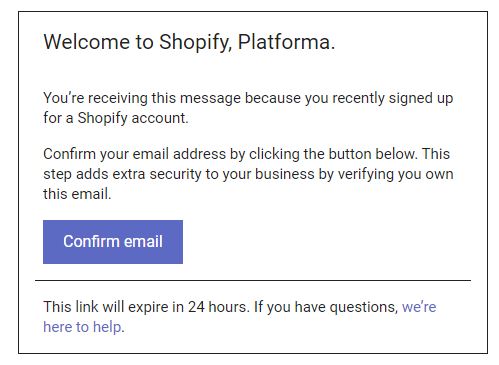
The platform will send an email asking to confirm your registration to the address you provided when you set up your account.
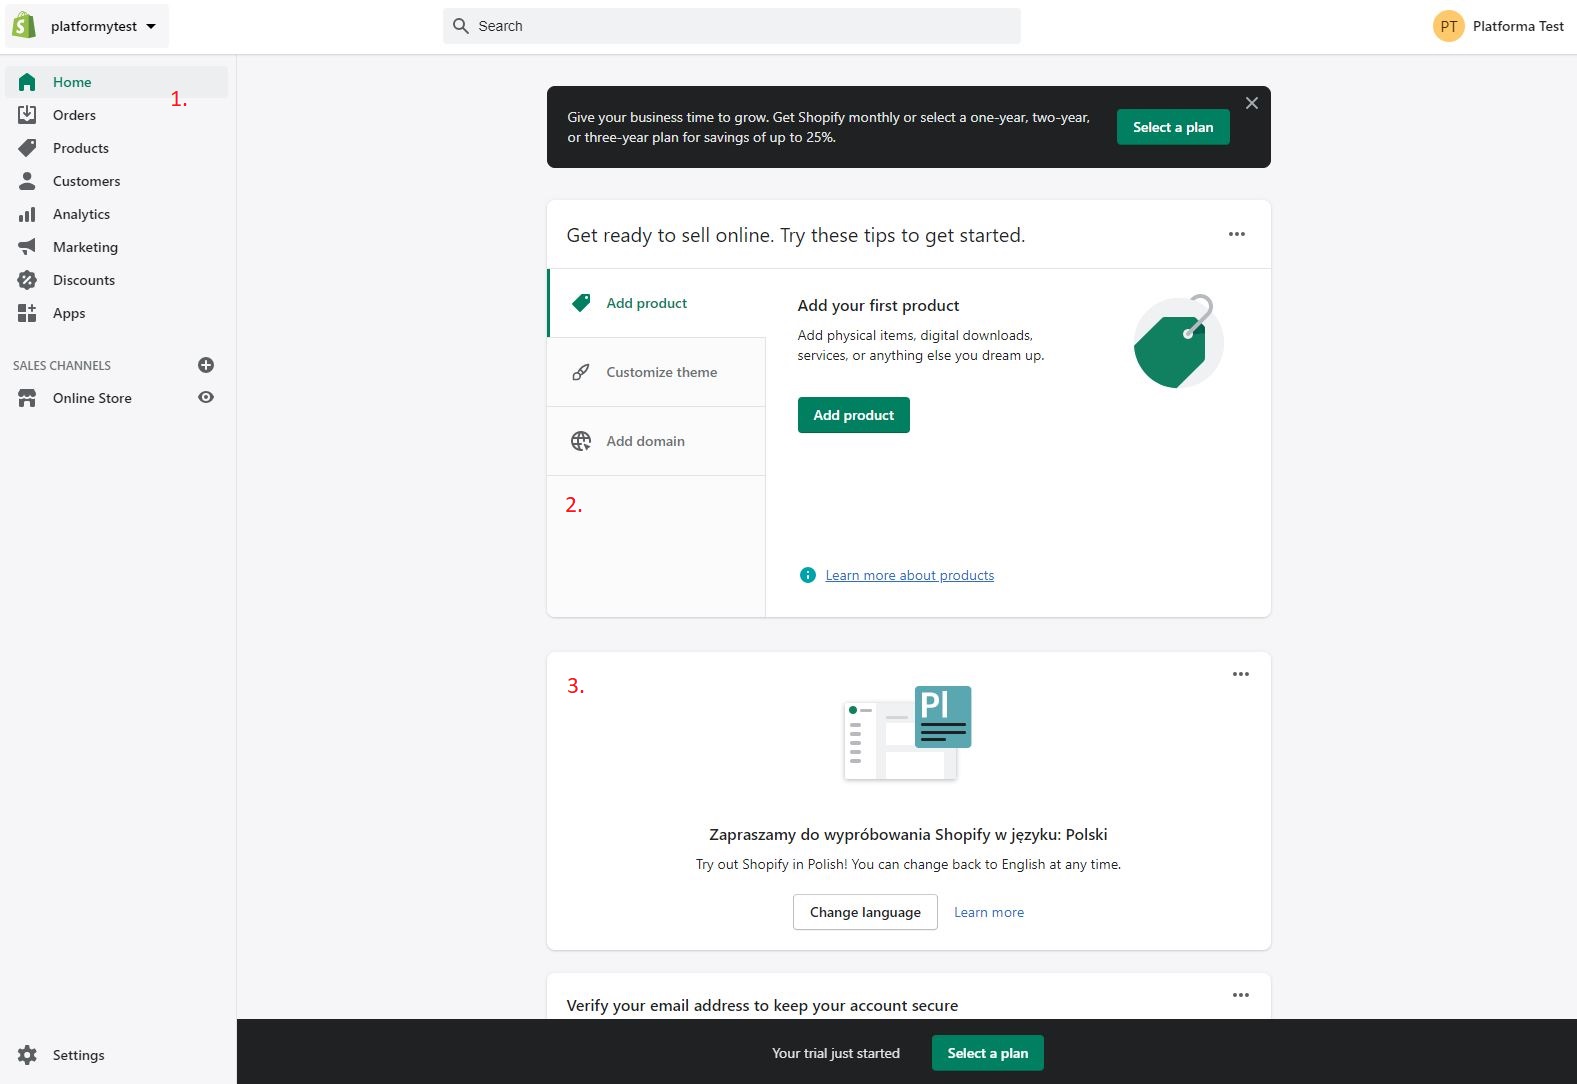
After logging in, to operate the store you’ll find a menu on the left where you order, add products and analyze data (1). In the middle there are prompts from Shopify to help you complete your store (2). Here, you can also change the language to your native language (3).
In the lower-left corner, there is Settings, icon. When pressed, which displays a panel as in the following screenshot.
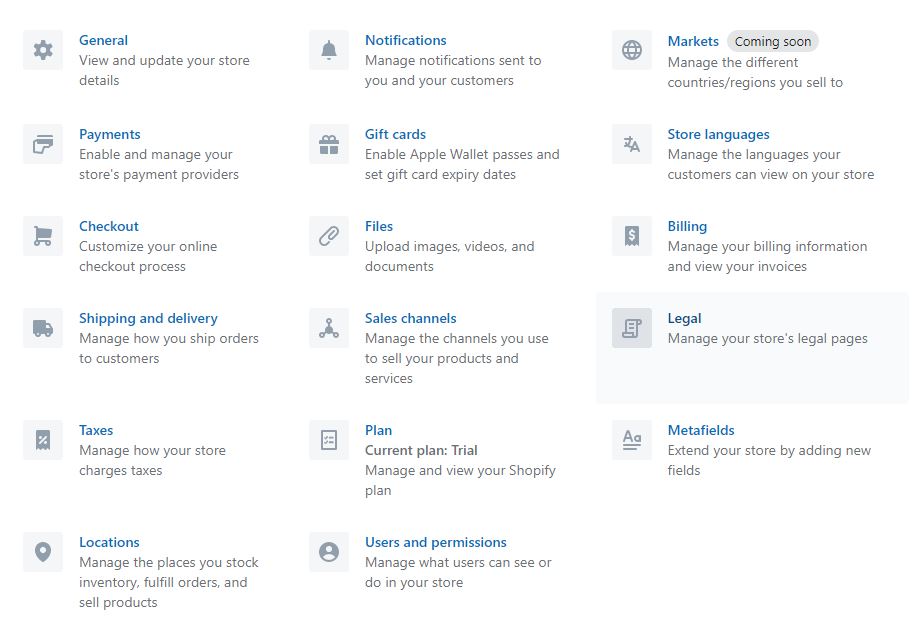
Using these tabs, you can set:
Merchants whose business is located in a country that does not support Shopify Payments can select payment types, which are listed at this link.
Selecting a store template
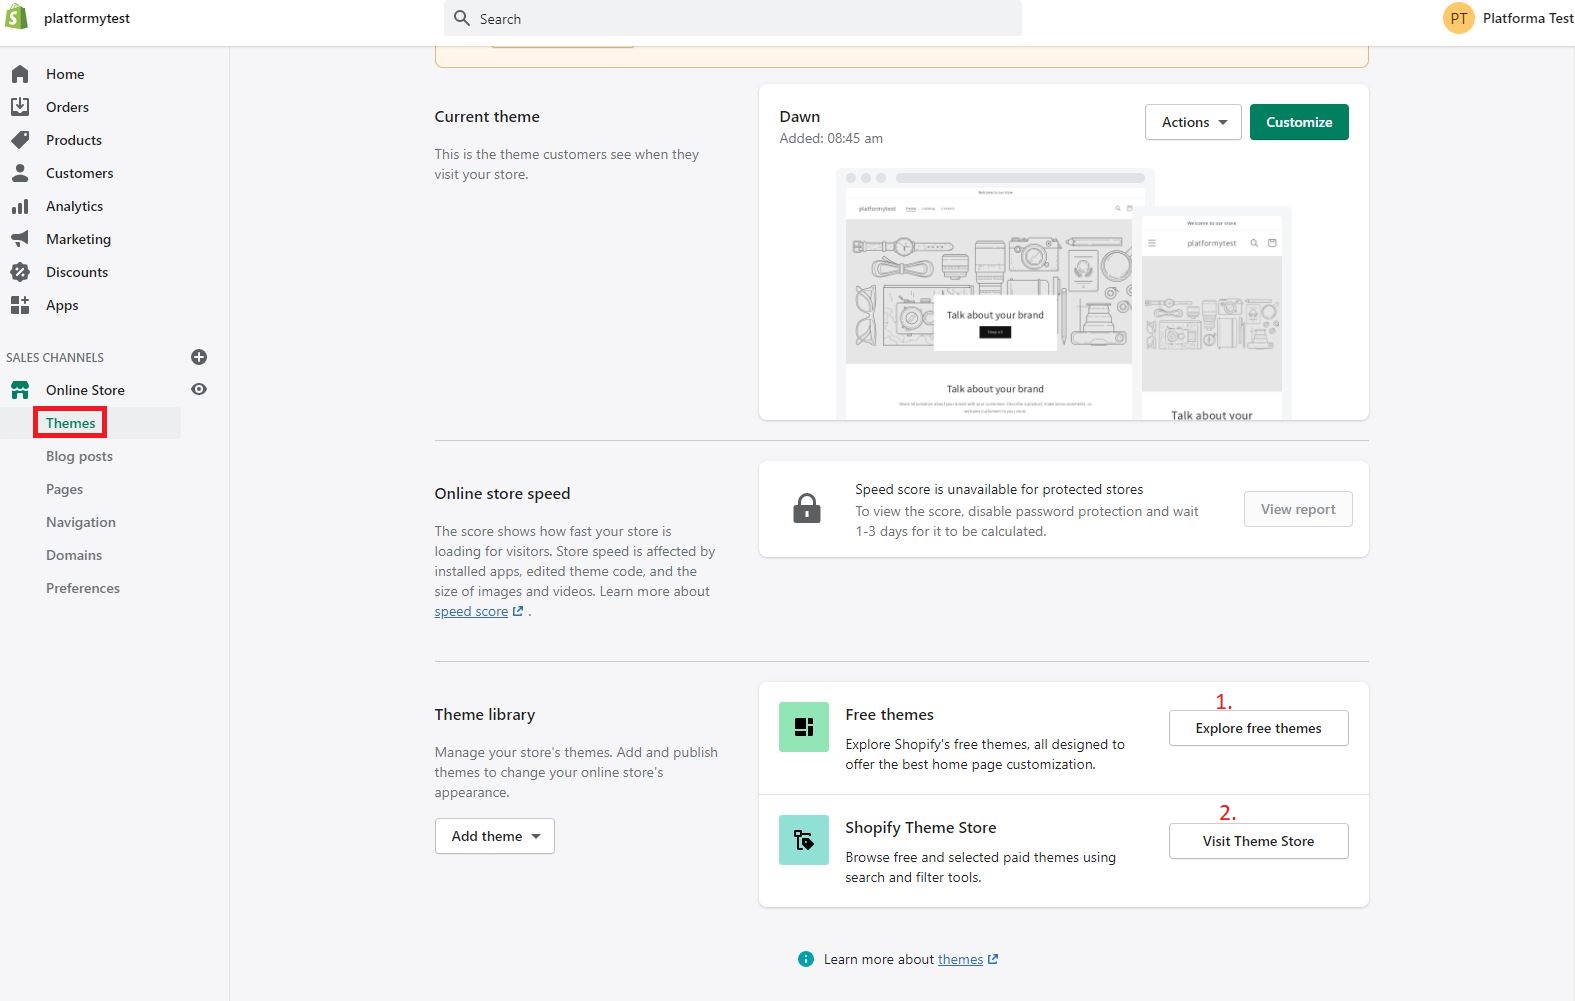
In the administration panel, each newly created store has a default template. If owners want to change it, they can browse from a database of free templates (1) or buy some in the template store (2). Before making such a purchase, the seller can try out the paid template to see how it will look and, with the help of an editor, can customize it to his needs.
To do this, he needs to take a path: Shopify Template Store → “Try out template“. All templates that Shopify provides are responsive, that is, they adapt to the size of users’ screens. The store owner can customize the template, i.e. add/hide elements, change their order and undo changes if necessary. They can also edit the language in which the store will be displayed.
Before editing the template, it is a good idea to prepare:
- Logo and favicon in the best possible resolution (Shopify allows you to create a logo using the Hatchful wizard),
- Photos promoting offers in good quality with a maximum resolution of 2048 x 2048 pixels,
- Color scheme – in this way, the color scheme will be based on colors that harmonize with each other,
- Addresses to profiles on social media.
Setting metadata
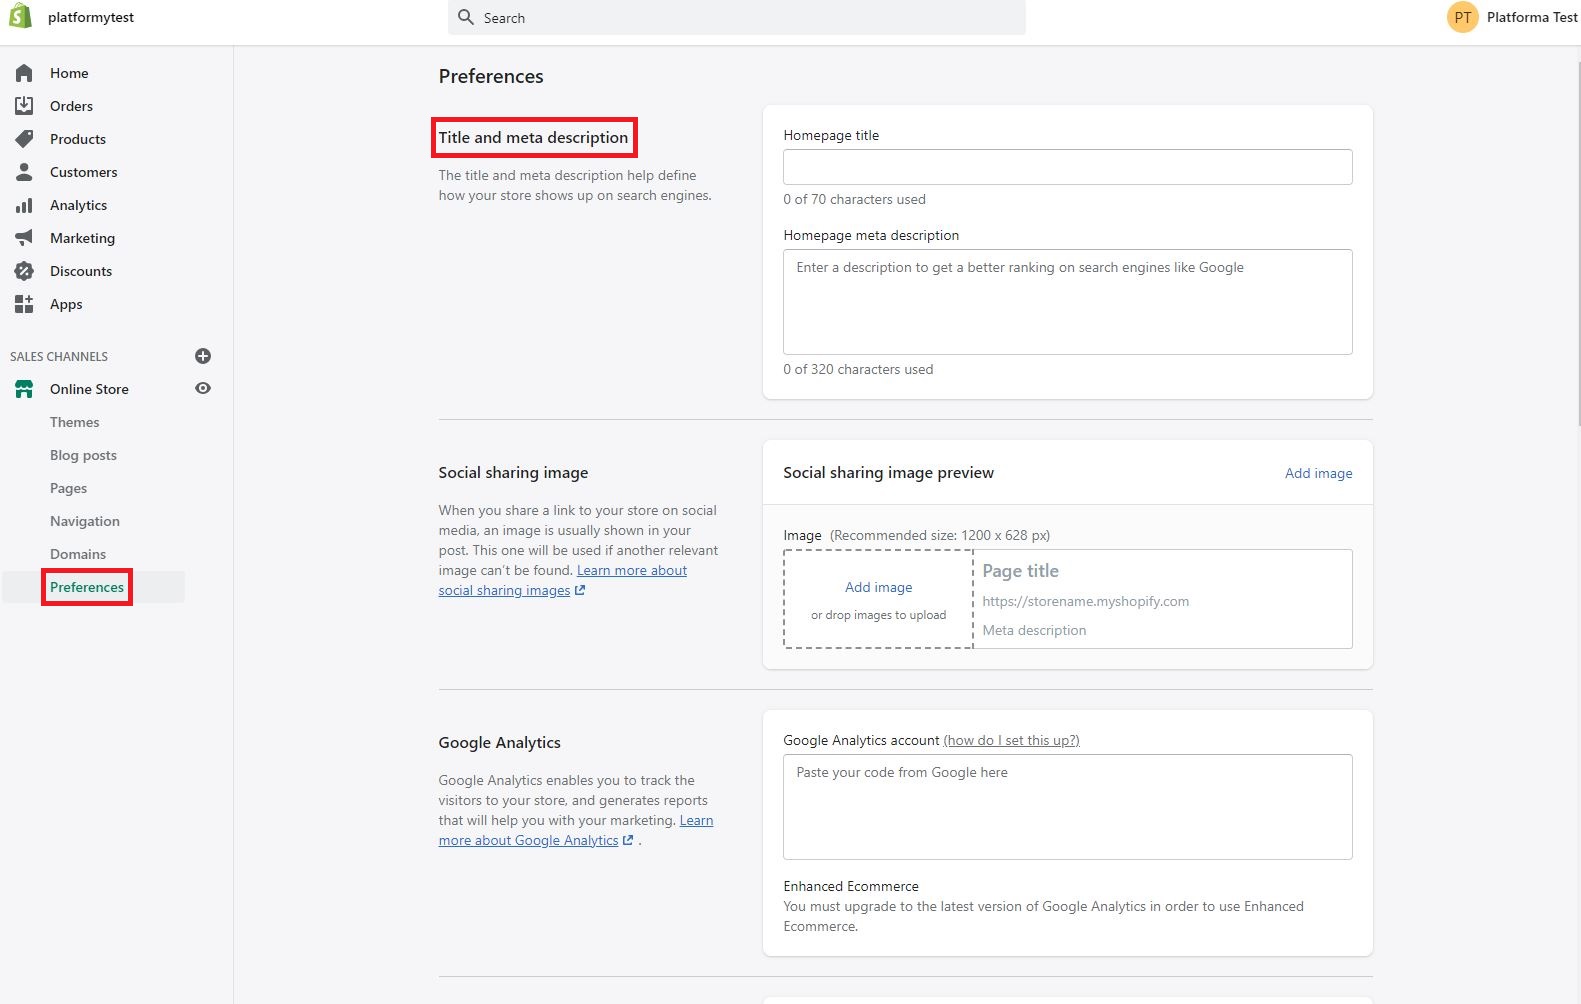
Completing the metadata for the home page and subpages will allow you to optimize your store for search engines. One component is the meta title, which is the text that the user sees in the name of the tab in the web browser. It can contain a maximum of 70 characters. Another component is the meta description, which is also visible in search results and can be up to about 140 characters. The metadata should contain information that encourages the user to click on the store card. You can set these set in the Preferences tab.
Domain configuration
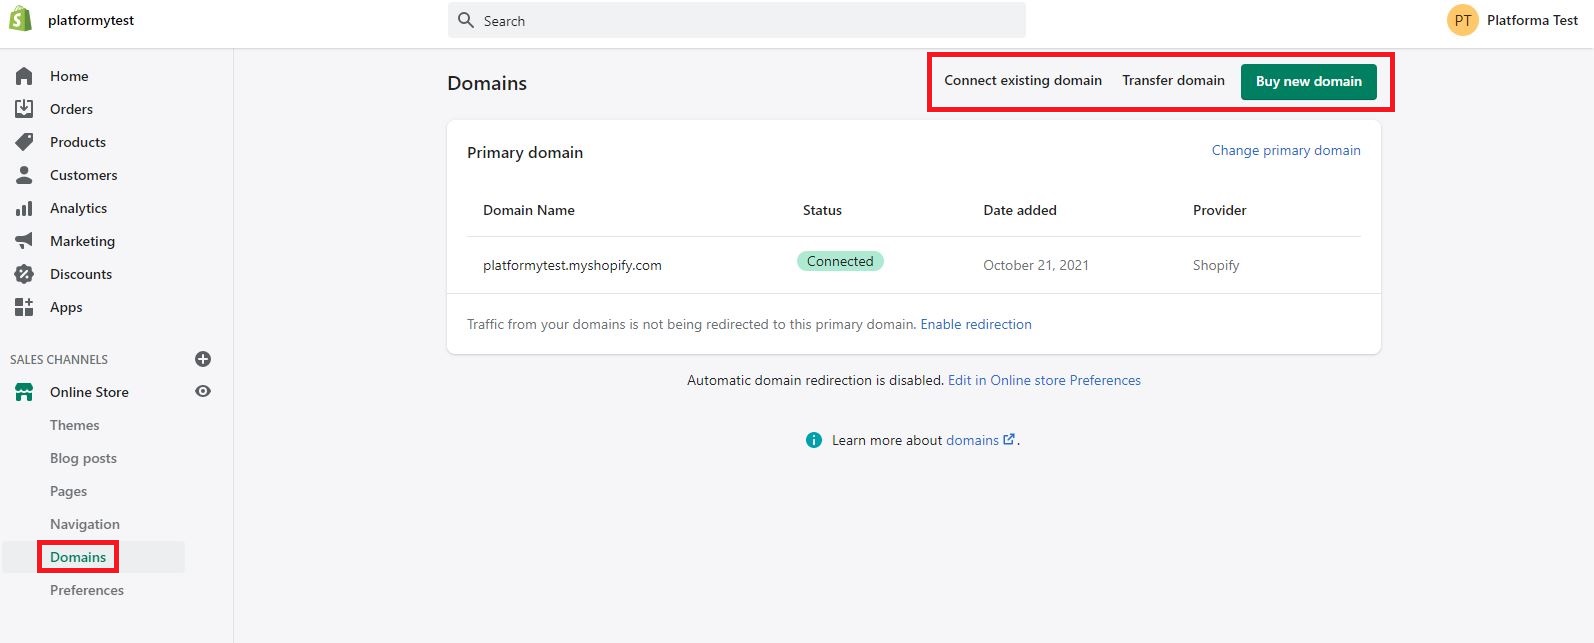
A domain is a website address where customers can find a particular online store. Every Shopify user gets a free domain according to the www.nazwa-sklepu.myshopify.com template. However, it is a good practice to invest in your domain, which will inspire more trust in customers and be easier to remember.
The store owner has three options for configuring his domain:
- Buying a new domain from Shopify – this way provides easy management of domain settings in the administration panel. It is registered for one year and can be renewed annually. Shopify does not provide email hosting services, while an SSL certificate is automatically created,
- Buying a new domain from a third-party provider,
- Transfer of the existing domain.
Experts Marketplace
Experts Marketplace allows sellers to partner with a professional to help them run their stores. Experts are not Shopify employees – they are third-party freelancers and agencies who use their knowledge and experience to offer services in marketing, sales, copywriting, store configuration, programming, The Shopify admin is a panel for store owners to pay the selected experts for their work. All invoices are settled in USD currency.
Navigation, pages and blogs
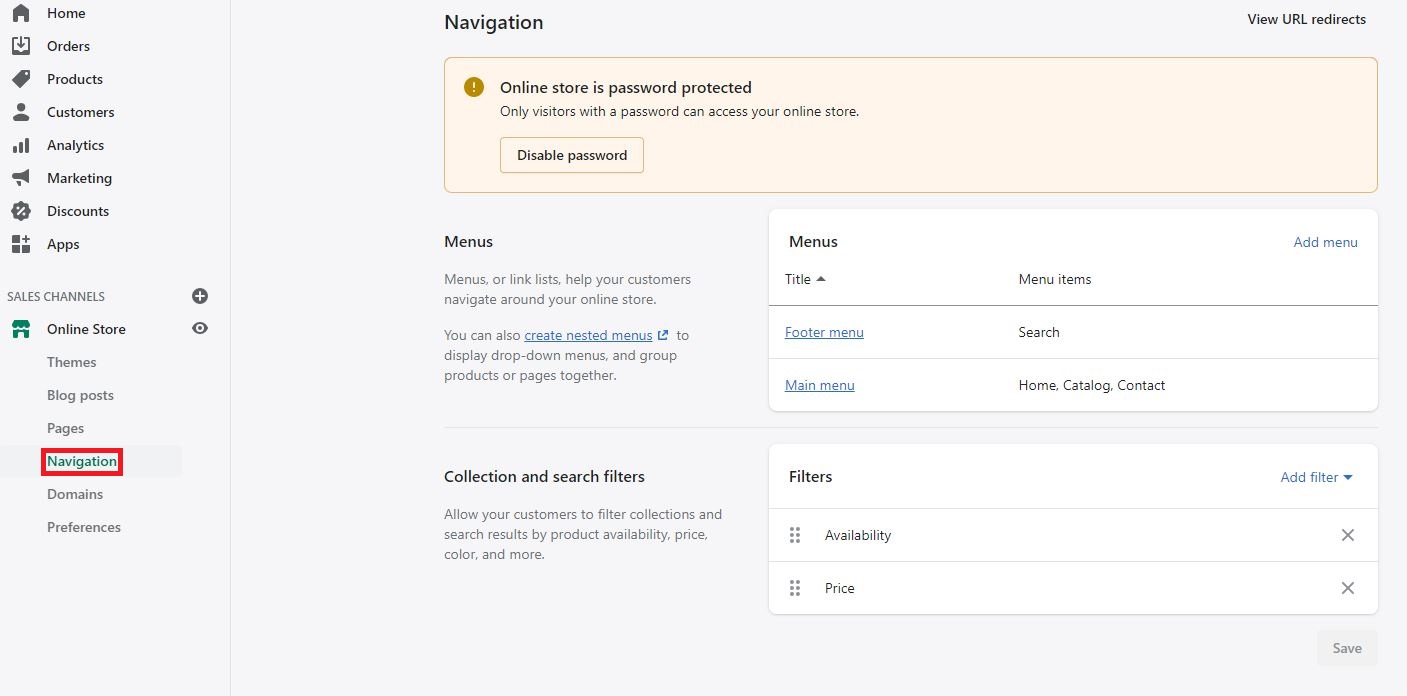
The appearance and location of the menu depend on the selected template. You can change it at any time in the administration panel → “Navigation“. By default, each store has two menus set: main and footer. The main menu is visible on every page of the store and initially consists of two elements: The home page and Catalog. In the footer menu, shoppers will usually look for information about the store’s policies and contact information.
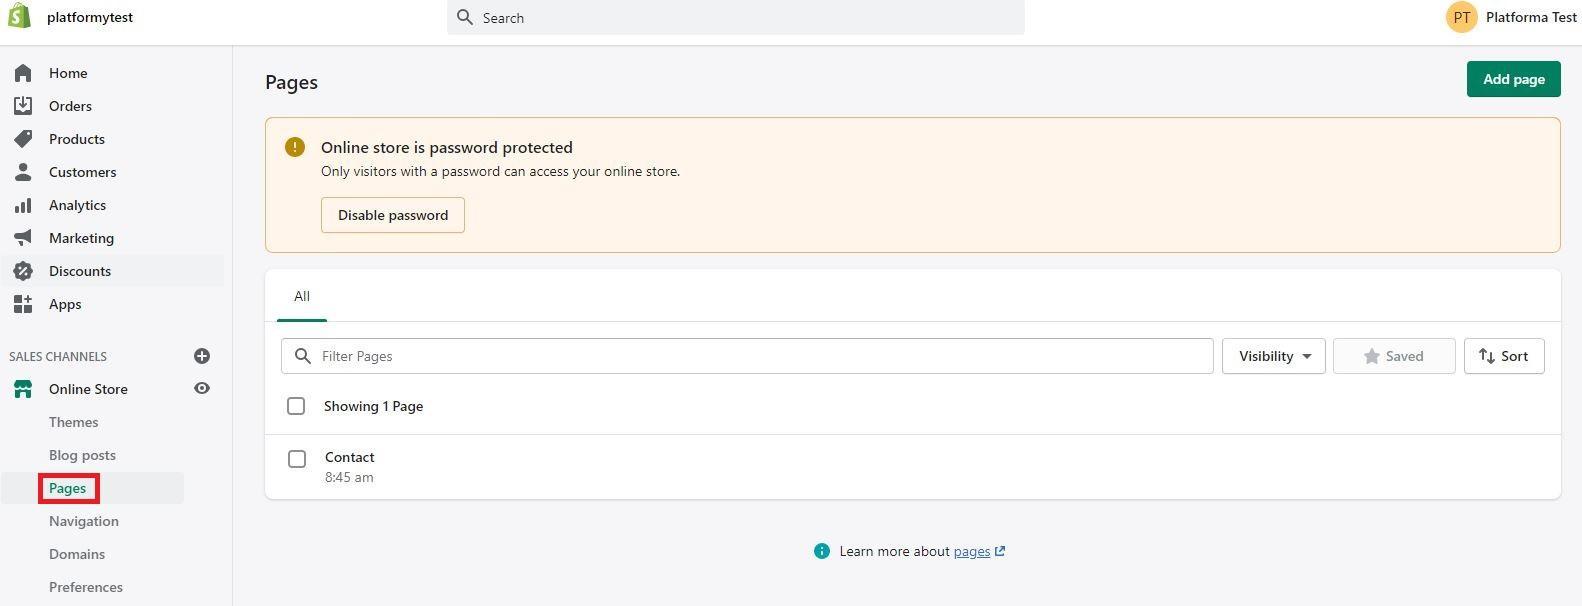
You can also create web pages in the administration panel, which usually contains rarely changing information, such as About Us, and Contact Us.
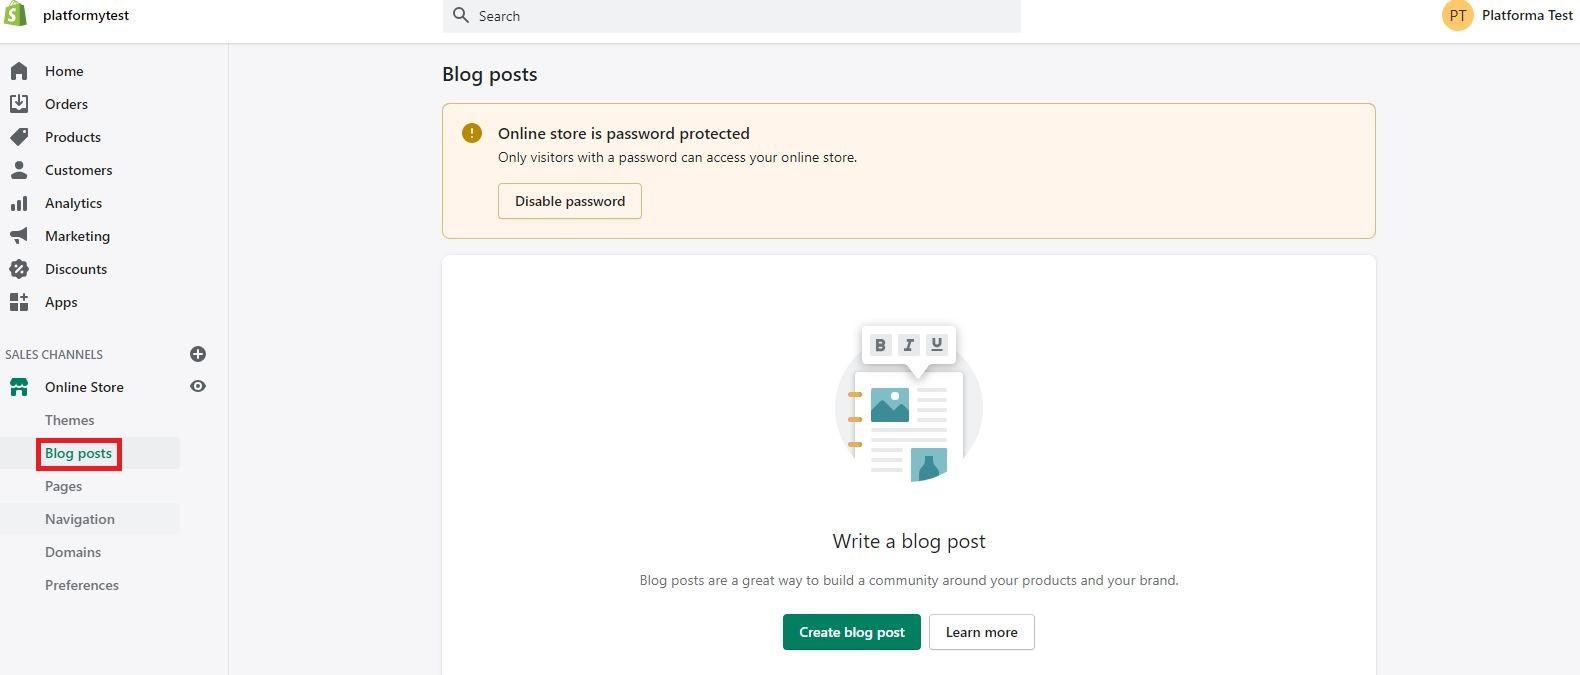
Shopify also enables you to add a blog. Having a blog helps build a community and generate more traffic and sales.
Summary
Shopify, like other SaaS platforms, is a handy software to run your online store without much technical knowledge. We recommend it to all, especially the beginning entrepreneurs as the moment you buy a subscription, your online store is up, running and selling.
If you like our content, join our busy bees community on Facebook, Twitter, LinkedIn, Instagram, YouTube, Pinterest.
Author: Martin Sparks
E-commerce enthusiasts which constantly digs around the internet in order to make sure he hasn’t missed any important information on the topic of starting and scaling profitable online stores.

