This is part 8 of the JavaScript blog post series that will take you from beginner to advanced. If you haven’t read the previous blog post about JavaScript functions, you can check it here. By the end of this series you will know all the basics you need to know to start coding in JavaScript. Without further ado, let’s get started with the eighth tutorial.
JavaScript objects – table of contents:
JavaScript objects
JavaScript objects hold an important role. Although it is relatively a large topic it can also be relatively easy to develop an understanding of them. One of the most common ways to understand objects is to think of it as you are re-creating a car in code. We will have two main concepts when we are dealing with objects. They will have properties and methods. Properties are the things that javascript objects have and the methods are the things that objects can perform. Let’s see that with some examples.
// let's define multiple objects to have a better understanding
const plane = {
    numberOfWings: 2,
    canFly: true,
    takeOff: function(){return "Plane starts taking off..."},
    land: function(){return "Plane starts landing..."}
    }
const car = {
    brand: "Tesla",
    isElectric: true,
    numberOfDoors: 4,
    moveForward: function(){return "The car moves forward..."},
    smartSummon: function(){return "The car starts driving itself to you..."}
}
// we can access and console log the properties they have:
console.log("The properties for the plane:");
console.log("Can fly: " + plane.canFly);
console.log("Total number of wings: " + plane.numberOfWings);
// we can also make the plane perform actions
console.log(plane.takeOff());
console.log(plane.land());
// if you take a closer look, you can see that
// we do not directly console.log the actions inside the methods
// instead we return them from the functions
// and in this case we are console logging them
// this way if we want we can also give the user an alert
// that tells the plane is taking off
alert(plane.takeOff());
// we can also learn about the properties the car has
// and console log them as well for additional practice
console.log("Is it an electric car? " + car.isElectric);
console.log("What is the brand of the car: " + car.brand);
console.log("How many doors does it have? " + car.numberOfDoors);
console.log(car.smartSummon());
console.log(car.moveForward());
When we run the code above we should get the following output:
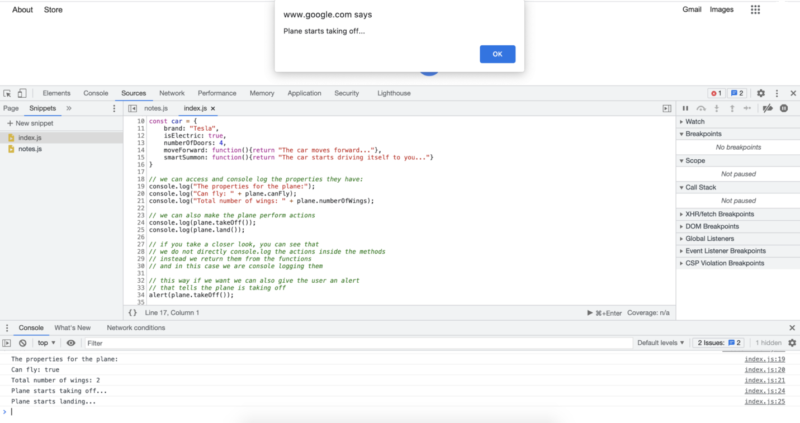
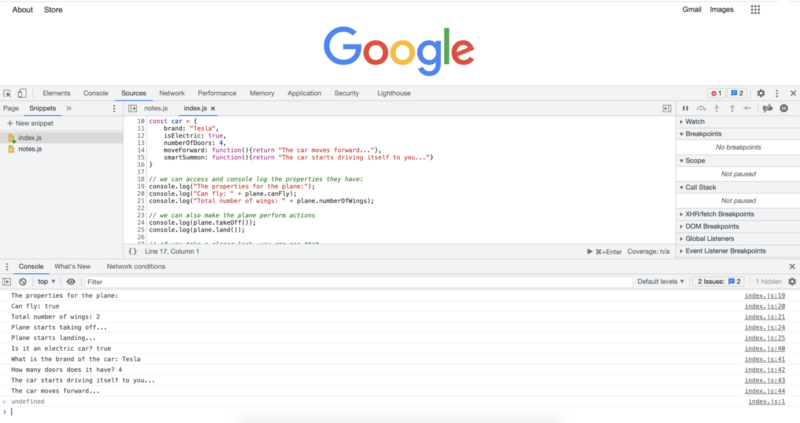
We have just seen two main examples of javascript objects: one with a plane and one with a car. Just like planes and cars have different properties and different things they can do, different objects we create can do different things and have different properties. If you take a closer look you can start seeing a pattern in the way we define objects, properties, and methods.
We start defining objects just like we are defining variables or constants, in this case, it is usually sufficient to use constants when defining javascript objects. But rather than simply assigning that constant to a value, just like we did with regular constants, now we open and close a set of curly braces and essentially provide the data in key-value pairs. Note that defining properties and methods are pretty similar. The main difference is that when defining properties, we assign the names to a value that we will retrieve later on. However, when we define a method, we have to provide a function that we will later on run. This difference is also reflected in how we call them later on. For example:
// when we retrieve a property we do not use brackets at the end
console.log("Can fly: " + plane.canFly);
// when we retrieve methods,
// we also run them by adding brackets after them
// methods here are essentially functions that
// belong to a specific object
console.log(plane.takeOff());
It is important that we add the parenthesis after the methods, just like we did with regular functions. Otherwise, we will just have the function itself rather than executing the function.
// in order to execute the object method we should
// add the parenthesis right after the method name
// otherwise we will get the method definition
// like in this example
alert(plane.takeOff);
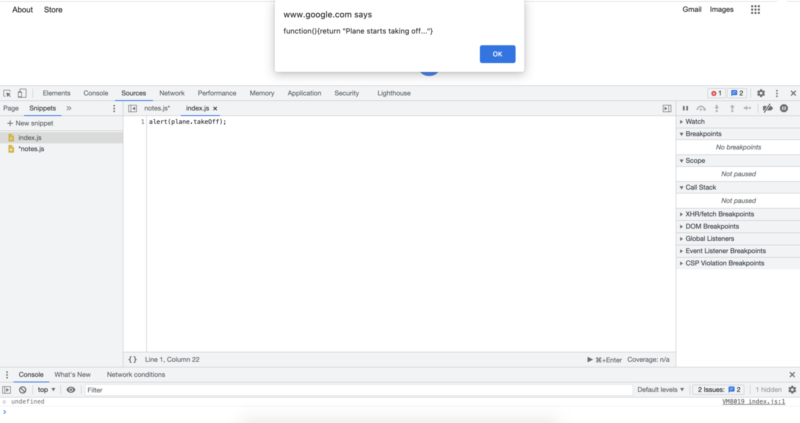
The displayed result is exactly what we defined while creating the method. You can also see that we are defining a function on the go. In this case we are defining the function without a name, which is possible in JavaScript. This is not always preferable, since giving the function a name makes it more clear when we see it being displayed. In this case however, we are not using the function anywhere else outside the object definition, we do not directly have to give the function a name. Instead, we can refer to the function from within the object with the method name we assign it.
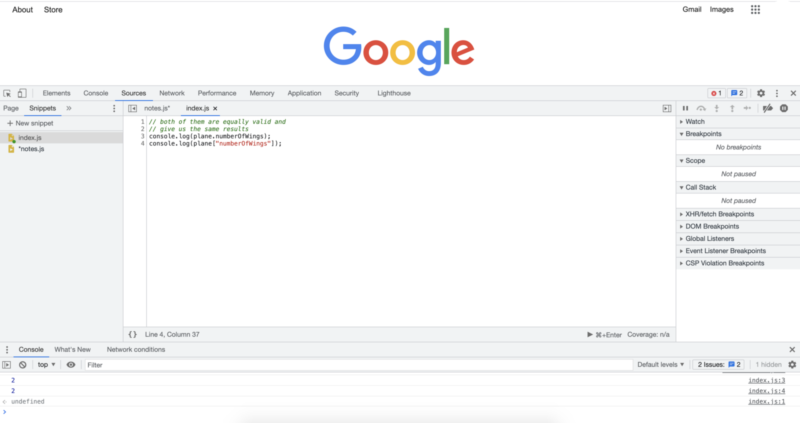
Another thing you should know about retrieving properties or methods from an object is that there is more than one way to achieve that. We used one of the most common practices in the examples above, which is to use dot notation. But there is also another commonly used way of achieving the same result that you should know about. This second notation uses square brackets and quotation marks.
// both of them are equally valid and
// give us the same results
console.log(plane.numberOfWings);
console.log(plane["numberOfWings"]);
// check out the JavaScript console for the results
It is great that we can store many detailed properties and actions we can perform using objects, but what if we needed to use objects, not just for 1 car, but let’s say for 20 cars, 100 cars, or even 1,000,000 cars each with a unique ID and varying property values. Would we have to type that whole code from scratch for each car? The answer is no. Instead, we can leverage something called the object constructor function.
Object constructor functions
Object constructors can massively speed up your coding process and can significantly make your code more DRY. With object constructor functions we essentially define a blueprint for the object. Once we have a blueprint for the object, we can create as many of that object instance in a much more clear way, with much less repetition. Let’s see that with some examples.
// this is how we define a blueprint for the objects
function Car(id, color, isElectric, numberOfDoors){
    this.id = id;
    this.color = color;
    this.isElectric = isElectric;
    this.numberOfDoors = numberOfDoors;
}
// this is how we can instanciate the
// javascript objects we want to create from
// the blueprint we defined above
// in this case we create 3 car objects
// with diffent values for the properties
const car1 = new Car(1, "white", true, 4);
const car2 = new Car(2, "black", true, 2);
const car3 = new Car(3, "red", false, 4);
// we can access object properties just like we did before
console.log("Color of first car is: " + car1.color);
console.log("Color of second car is: " + car2.color);
console.log("Color of third car is: " + car3.color);
Running the code above would give us the following code output:
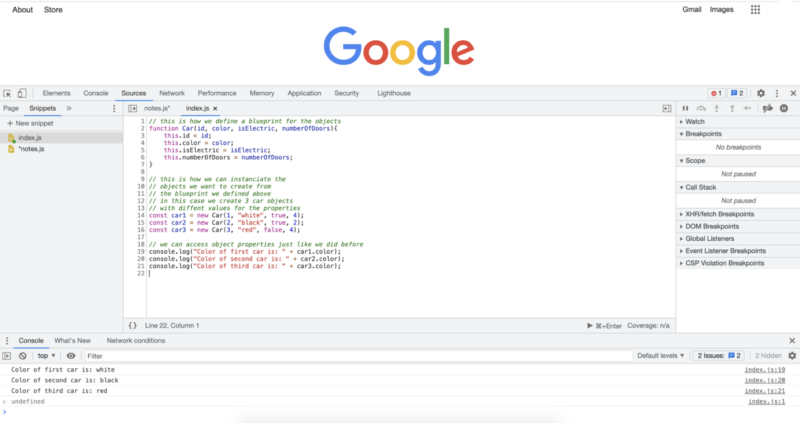
As you can see from the code above, once we have a blueprint, we can simply pass different values to create different javascript objects from the initial blueprint. One thing you probably noticed is that the naming convention for object constructor is to have the first letter capitalized. In this case, rather than defining it as “car”, we named it “Car”. If we were to create a plane class, we would name it “Plane”.
When we want to create objects from our defined blueprint, we use the keyword “new” and then write the name of the object constructor function we want to use. After the name, we open and close a set of parenthesis and pass in the arguments we want to create our object with. Note that we do not repeat the parameter names, we just pass the values in the same order as the parameters. You may also noticed that when creating the blueprint we are using a keyword called “this”. For now, what you should know is that the “this” keyword allows referring to the object itself, and it is part of the boilerplate code we should write when we are creating the blueprint for the object.
When you are learning to code you may hear the term “boilerplate code”, this is actually pretty common, especially in web development. It basically means that there are parts of code that we write to get certain setups in place. Even though there is not a unique solution we provide with code, we do have to write out those parts to have a functioning code. Depending on the boilerplate code, some IDEs provide even shortcuts for providing those boilerplate codes.
The javascript objects we just learned about are a large topic and have many details as we dive deeper. But at a fundamental level, you should know that we can mimic real-life objects with code using objects. Those javascript objects can have different properties and methods we can access and perform.
In the next tutorial we will discover more topics and concepts that are quite important and commonly used in JavaScript.
Author: Robert Whitney
JavaScript expert and instructor who coaches IT departments. His main goal is to up-level team productivity by teaching others how to effectively cooperate while coding.
